%20500x1200.png?width=200&height=83&name=ALK%20Tech%20Logo%20(TransparentTextured)%20500x1200.png "ALK Tech Logo (TransparentTextured) 500x1200")
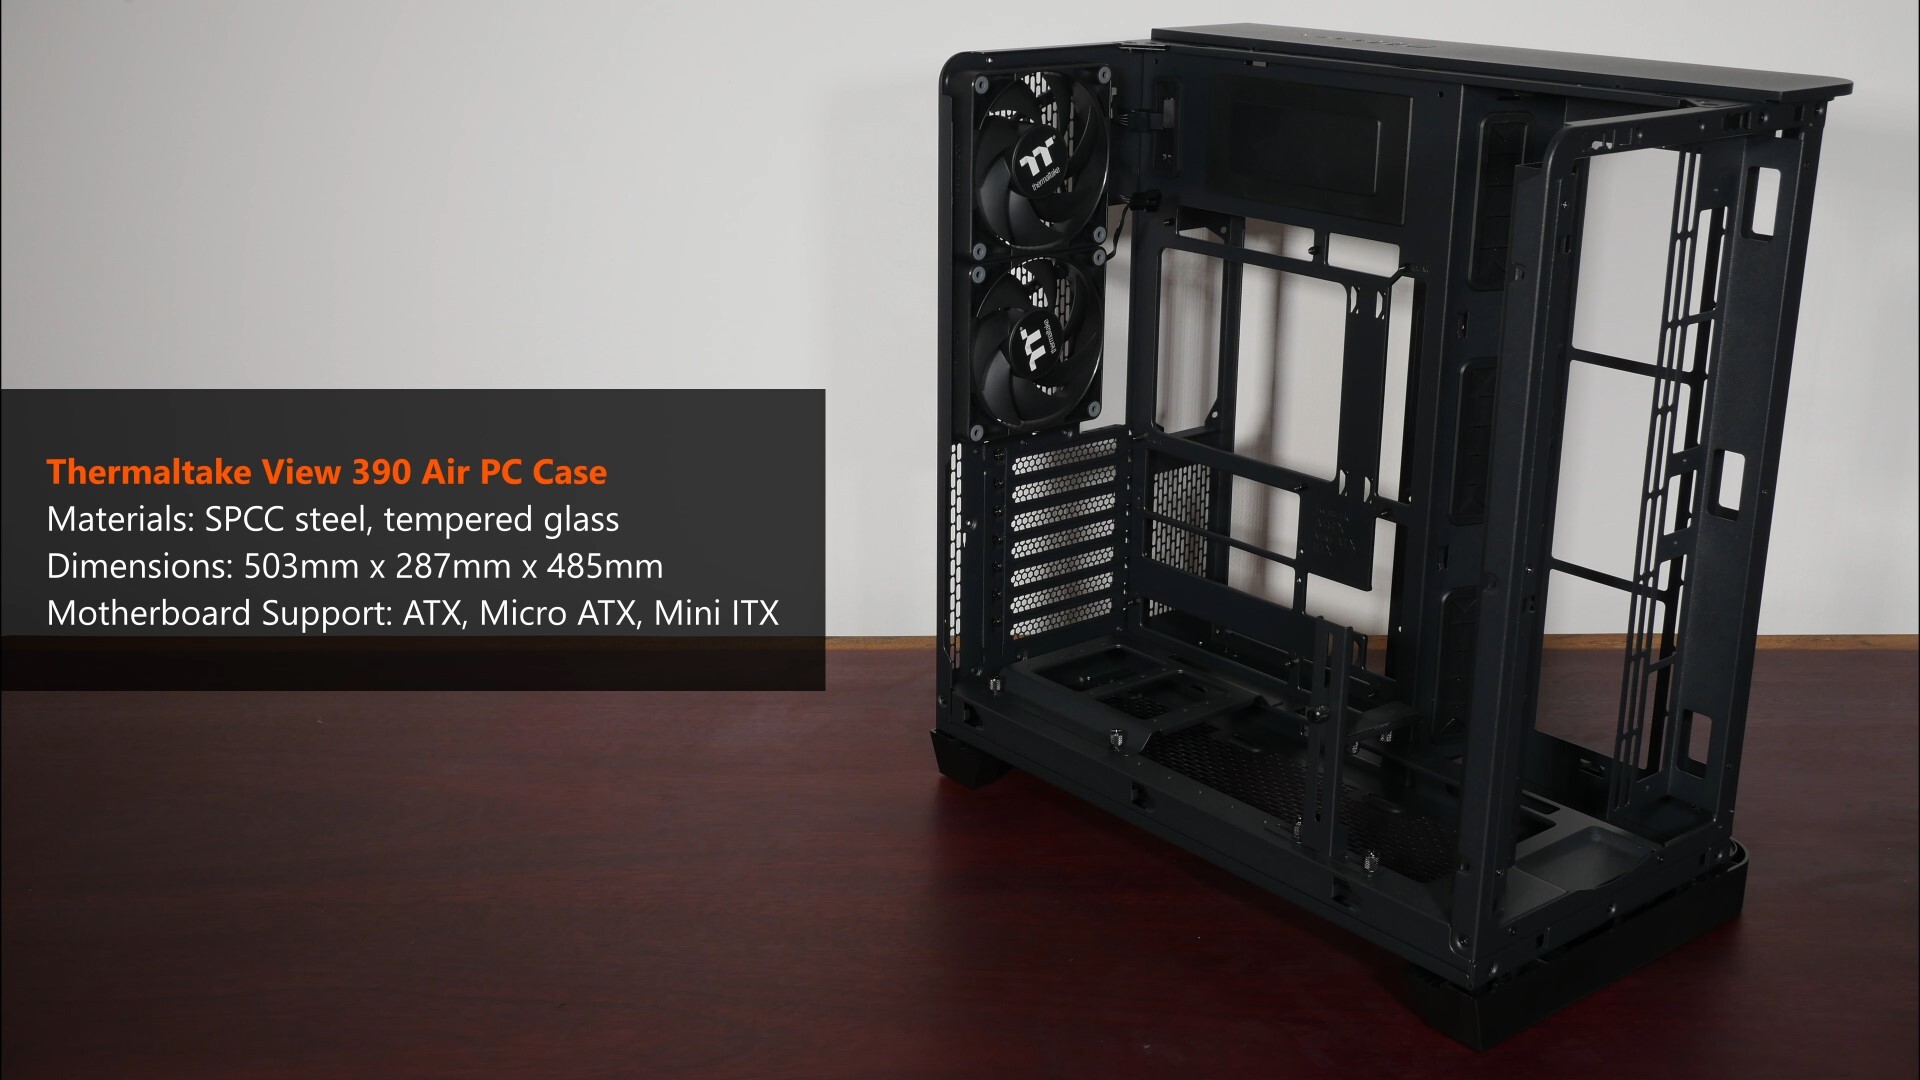
The Thermaltake View 390 Air is a mid-tower dual-chamber ATX PC case that stands out for its unique aesthetic, all thanks to a curved tempered glass panel that stretches from the top panel to the left side panel.
PC case launch season is truly upon us, as Thermaltake joins the fray with its new View 390 Air. First sighted at Computex 2025, the View 390 Air features a distinctive aesthetic all thanks to its one-piece tempered glass panel that stretches from the top panel to the left side panel.
Sporting a MSRP of $159.99 US dollars, the View 390 Air is a high-airflow mid tower ATX PC case with a dual chamber design, and is available in four distinctive Thermaltake colourways (Black, Snow, Future Dusk and Butter Caramel). Read on to learn more about the View 390 Air, as I take a look at the case and do a demo build using an EATX motherboard (Gigabyte X670E AORUS MASTER) and a chonker of a graphics card (Gigabyte AORUS GeForce RTX 4090 MASTER 24G), alongside three of Thermaltake's CT120 EX ARGB Sync case fans!
Summary of Specifications (CA-11F-00M1WN-00)
- Colour: Black (also available in Snow, Future Dusk, Butter Caramel)
- Materials: SPCC steel, tempered glass
- Dimensions: 503mm x 287mm x 485mm
- Motherboard Support: ATX, Micro ATX, Mini ITX
- Expansion Slots: 7
- Drive Support: up to 3x 2.5" SSDs, or 2x 3.5" HDDs and 1x 2.5" SSD on rear of motherboard tray
- Front I/O: 1x 3.5mm microphone in jack, 1x 3.5mm headphone out jack, 2x USB 3.0 Type-A. 1x USB 3.2 Gen 2 Type-C
- Included Fans: 2x Thermaltake CT120 120mm rear mounted case fans
- Top Panel Cooling Support: N/A
- Front Panel Cooling Support: up to 2x 200mm/2x 140mm/3x 120mm fans, or 1x 360mm/280mm/240mm AIO radiator
- Side Panel Cooling Support: up to 3x 120mm fans, or 1x 360mm/240mm AIO radiator
- Bottom Panel Cooling Support: up to 3x 120mm fans
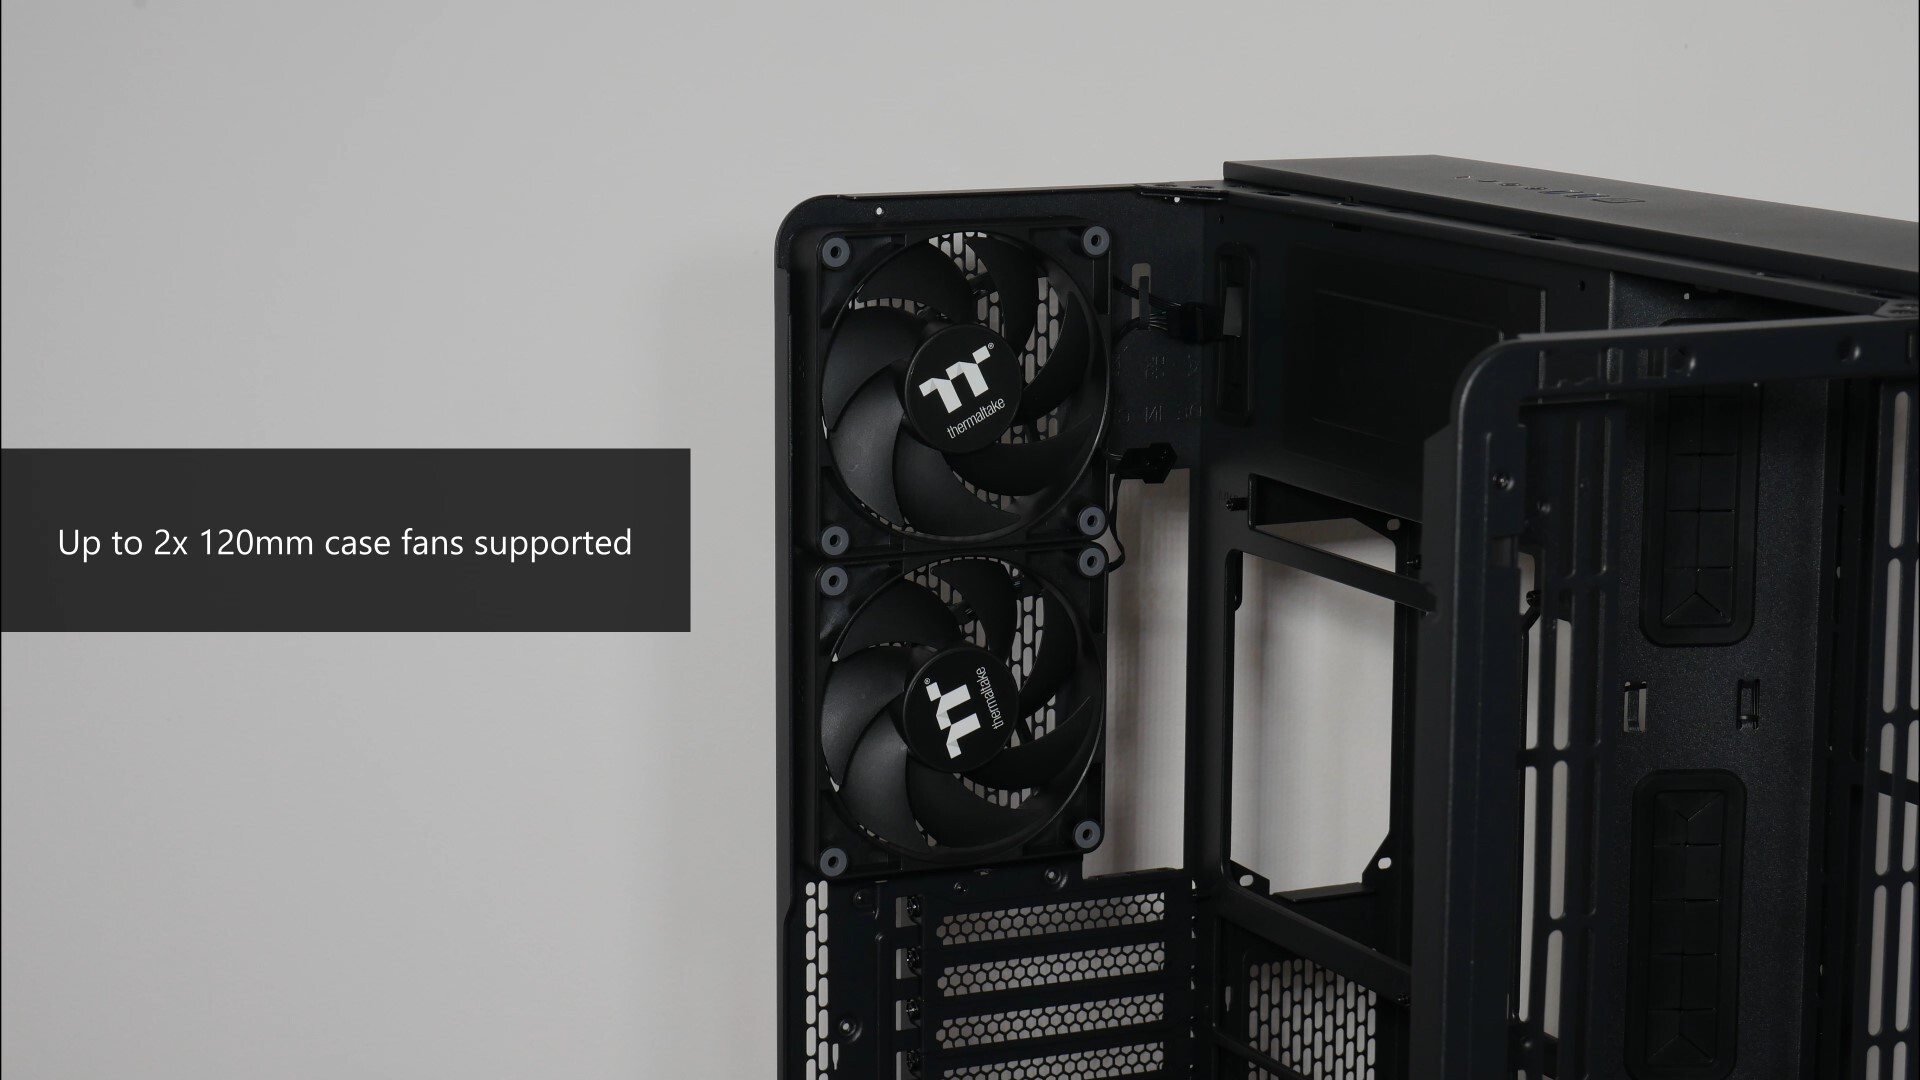
- Rear Panel Cooling Support; up to 2x 120mm fans
- Official Product Page: https://www.thermaltake.com/view-390-air-mid-tower-chassis.html
Packaging & Accessories
.jpg)
.jpg)
The View 390 Air comes shipped in a brown cardboard box with your usual product illustrations and descriptions on all sides.
.jpg)
Opening up the box, we see that the case is pretty well secured inside of the box with the usual foam protectors.
.jpg)
.jpg)
The View 390 Air doesn’t come with a fancy box for its accessories – instead, we get a clear plastic bag that's secured to the motherboard tray with a cable tie. Inside of the said bag, we see that Thermaltake’s provided a whole bunch of screws, motherboard standoffs, a tool that is to be used to install and remove motherboard standoffs from the motherboard tray, spare friction clips for the steel panels of the case, a motherboard speaker (which is kind of cool to have in this day and age), a 1 meter-long roll of Velcro tape as well as a bunch of cable ties. We do also get a user's manual.
Exterior Walkthrough
.jpg)
.jpg)
.jpg)
For this review, the folks over at Corbell Technologies, the official distributor for Thermaltake in Singapore, have kindly sent over the black version of the View 390 Air - if you're looking to build a white-coloured PC, the View 390 Air also comes in a white colourway that Thermaltake christens "Snow".
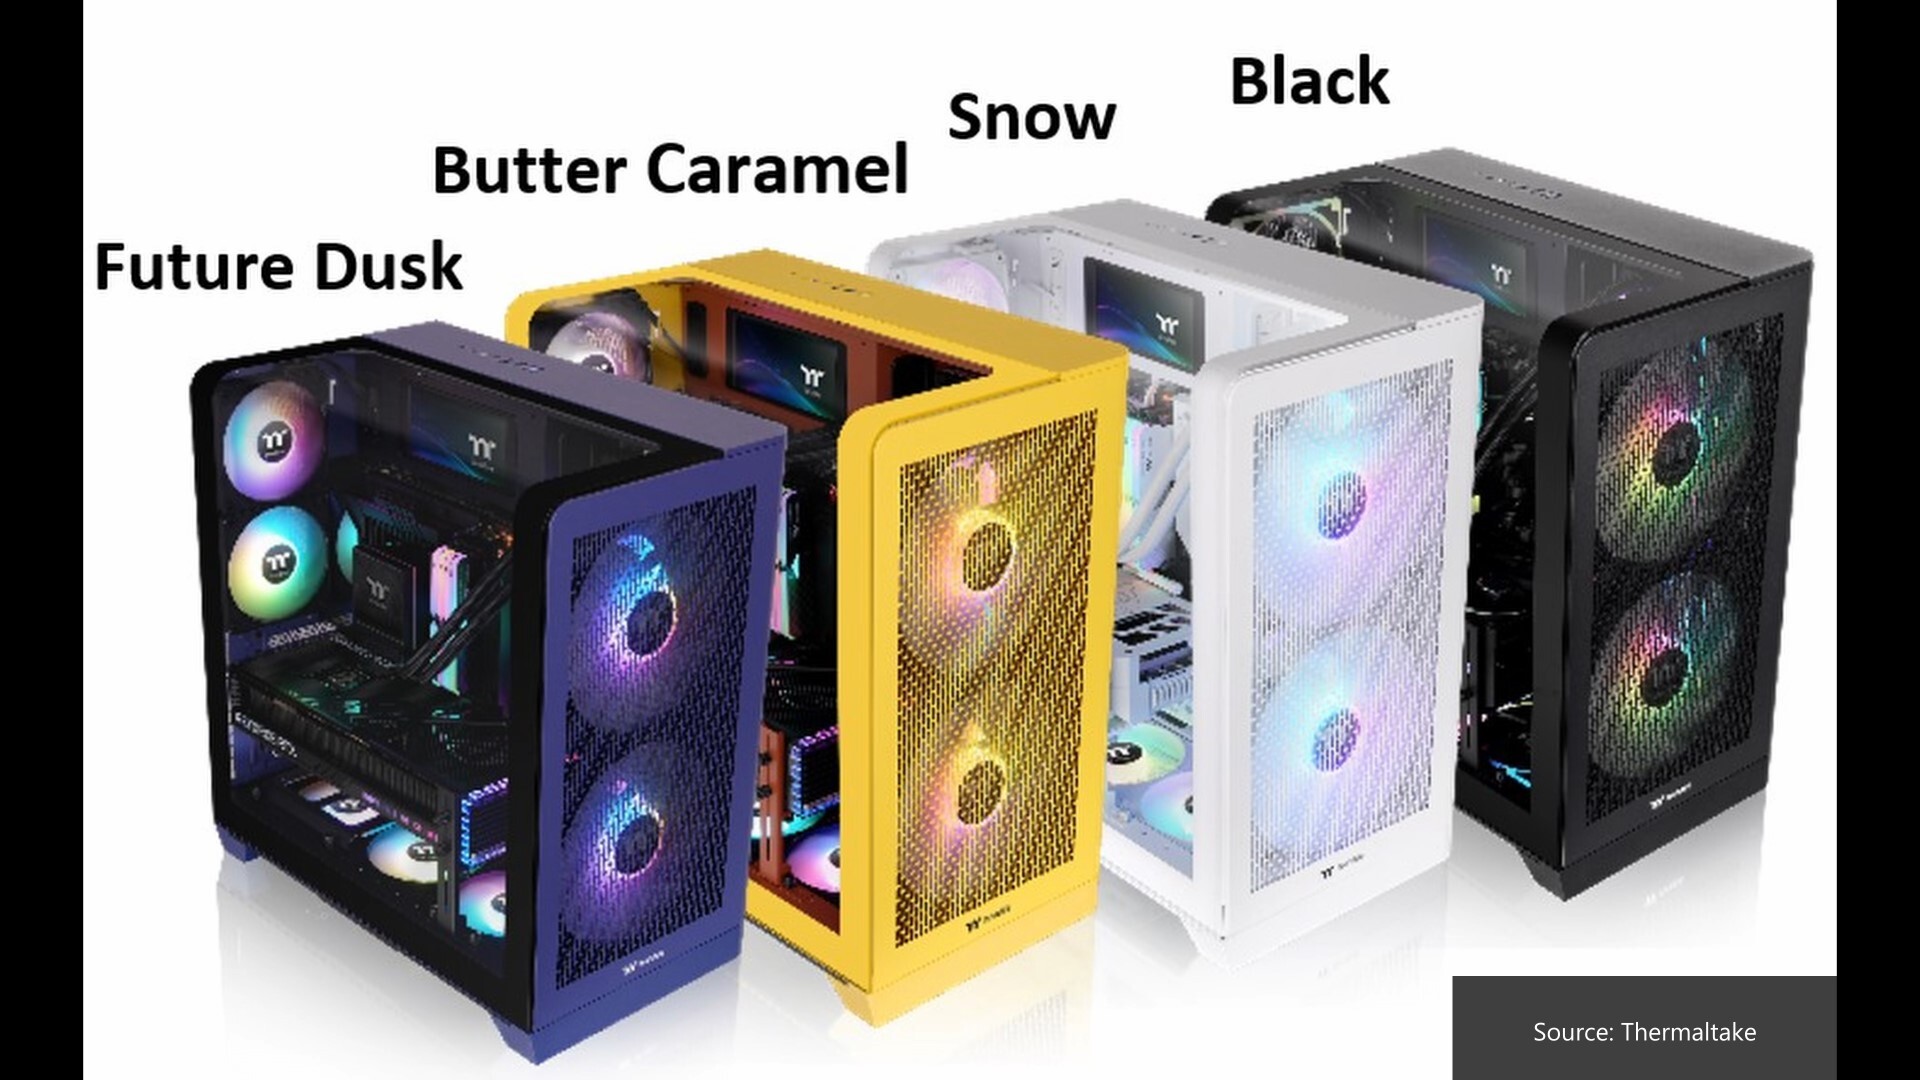
If you're feeling more adventurous about your colour choices, the View 390 Air also comes in a purple and black colourway called Future Dusk, as well as an eye-catching yellow and brown colour combo called “Butter Caramel”.
.jpg)
The View 390 Air has a unique aesthetic, all thanks to its one-piece curved tempered glass panel that runs from the top panel of the case to the left side panel of the case.
.jpg)
.jpg)
The front and right panels of the case are made of steel and have perforations for airflow purposes; for the side panel, the ventilation openings are right above where the side mounted case fans and your power supply unit’s cooling fan would be.
.jpg)
The front panel buttons and connectors of the case are located on the top panel, where we get a power button that is illuminated in white when the PC is powered on. We do also get two USB 3.0 Type-A ports, a headphone out port, a mic in port, a reset button as well as a USB 3.2 Gen 2 Type-C port.
.jpg)
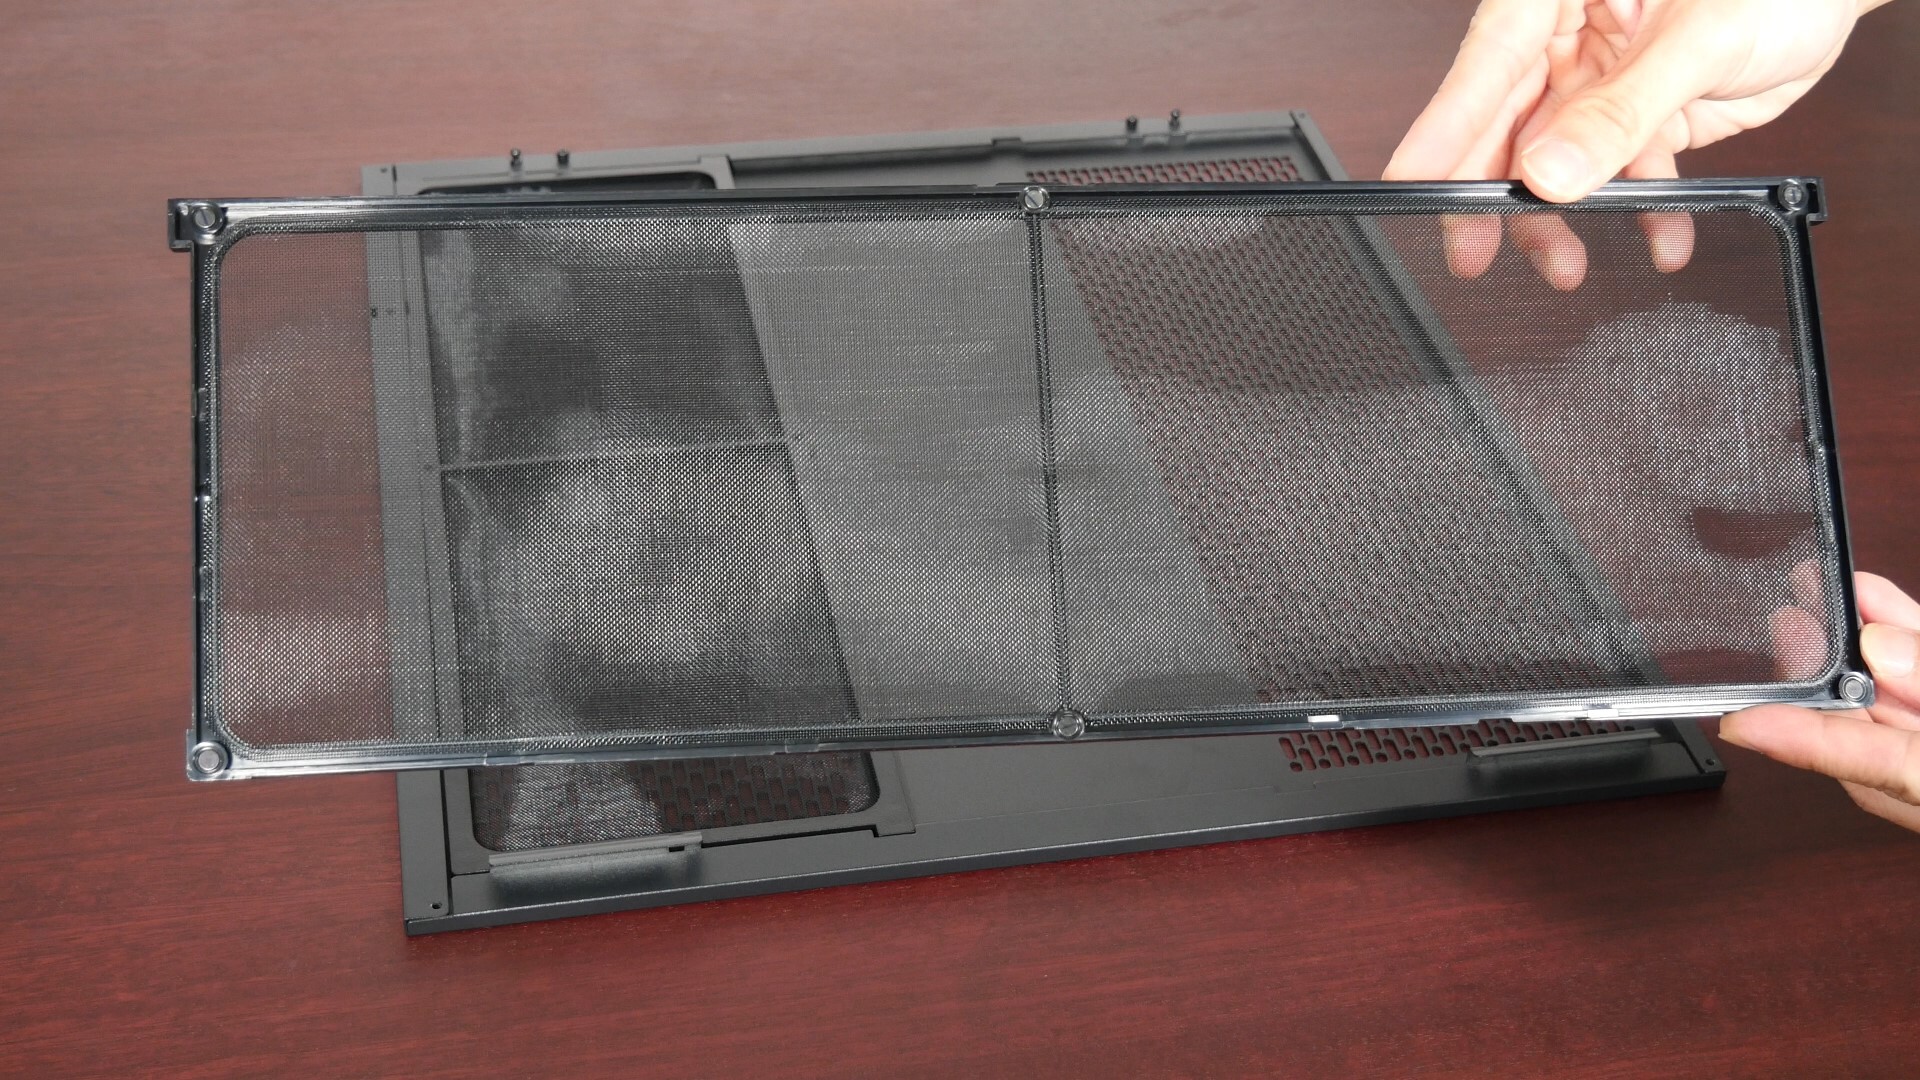
Over on the bottom panel, we get a removable dust filter that covers the View 390 Air’s triple 120mm fan openings. As can be seen, the case comes with four rubber pads that serve as feet for the case.
.jpg)
The rear of the case is pretty straightforward – for expansion slot openings, we get reusable slot covers that are to be expected of a more premium PC case offering – this case does support vertical GPU mounting and thus has a repositionable expansion slot bracket, more on this feature later on in this review.
.jpg)
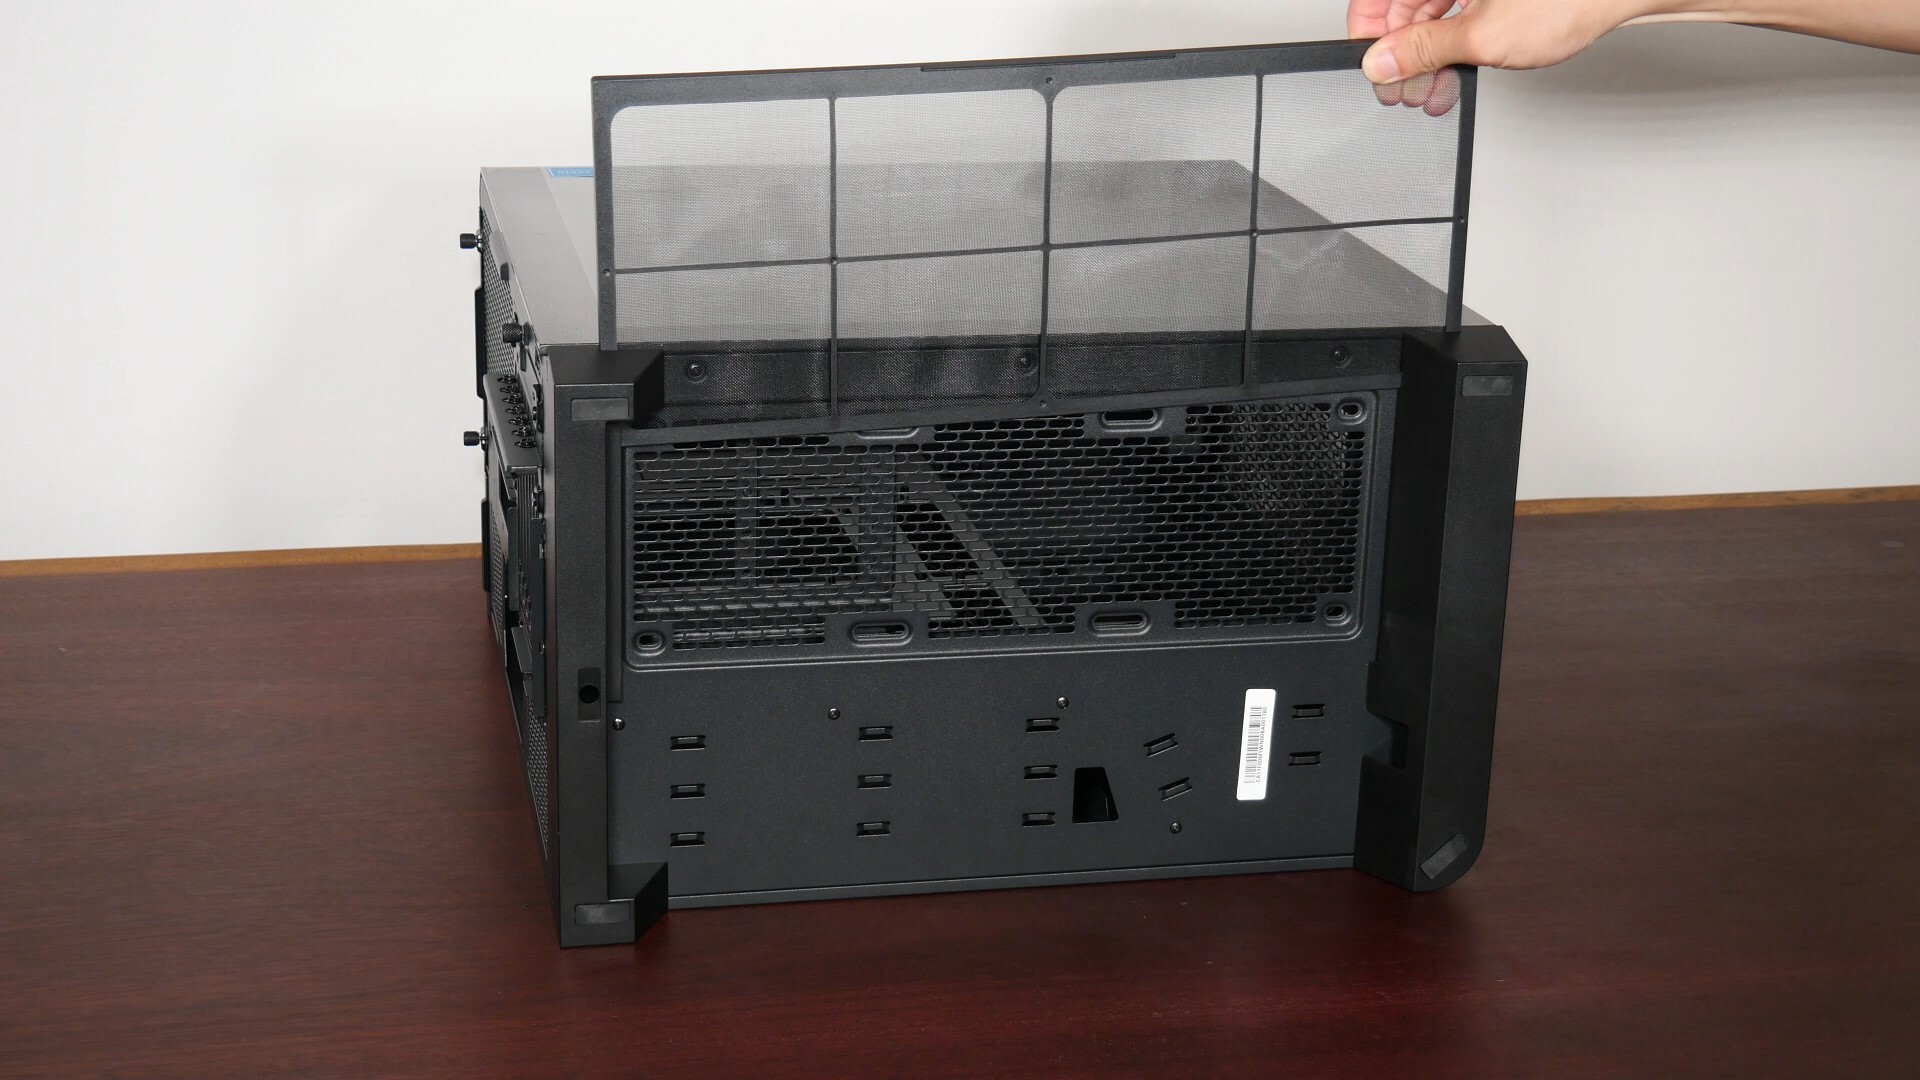
Removing the panels of the View 390 Air is an uncomplicated process. First, you’ve got to remove the one piece curved tempered glass panel that is held in place by three thumbscrews, which slides out easily once the said thumbscrews have been undone.
.jpg)
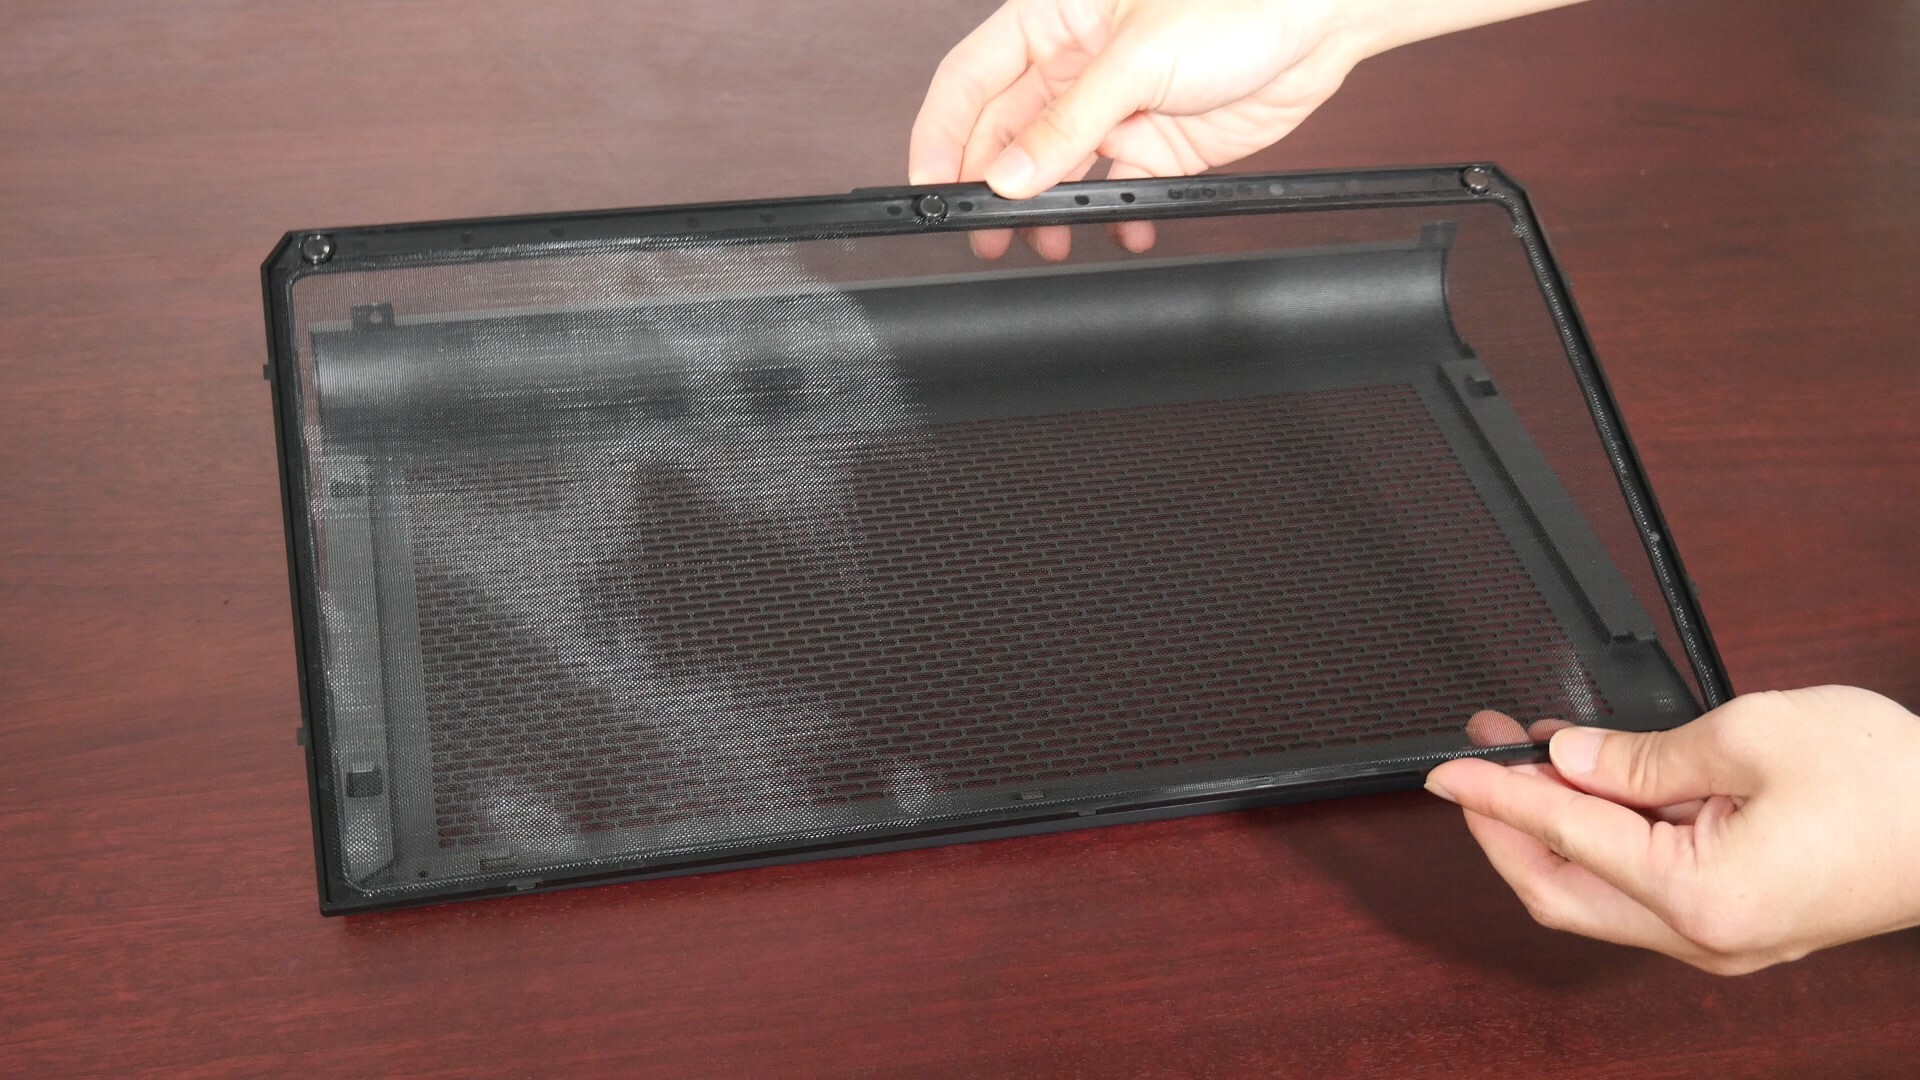
The side steel panel is held in place by friction posts and can be pried off with ease – it’s good to see that we get two preinstalled dust filters for the side panel intake openings, where the said filters are held in place by magnets.
The front panel is made of steel, and is held in place by two screws located on the right side of the case. On the rear of the front panel, Thermaltake’s included a removable dust filter that’s also held in place magnetically.
Finally, the dust filter on the bottom panel can be removed easily by just sliding it out – it’s further secured in place by magnets too.
Cooling Hardware Support
.jpg)
.jpg)
The View 390 Air comes with two pre-installed CT120 exhaust fans on the rear panel. These are non-RGB fans, and you get the black version of the fans with the Black, Future Dusk and Butter Caramel variants of the View 390 Air, while naturally, the Snow, that is, the white variant of the CT120, comes included with the white version of the View 390 Air.
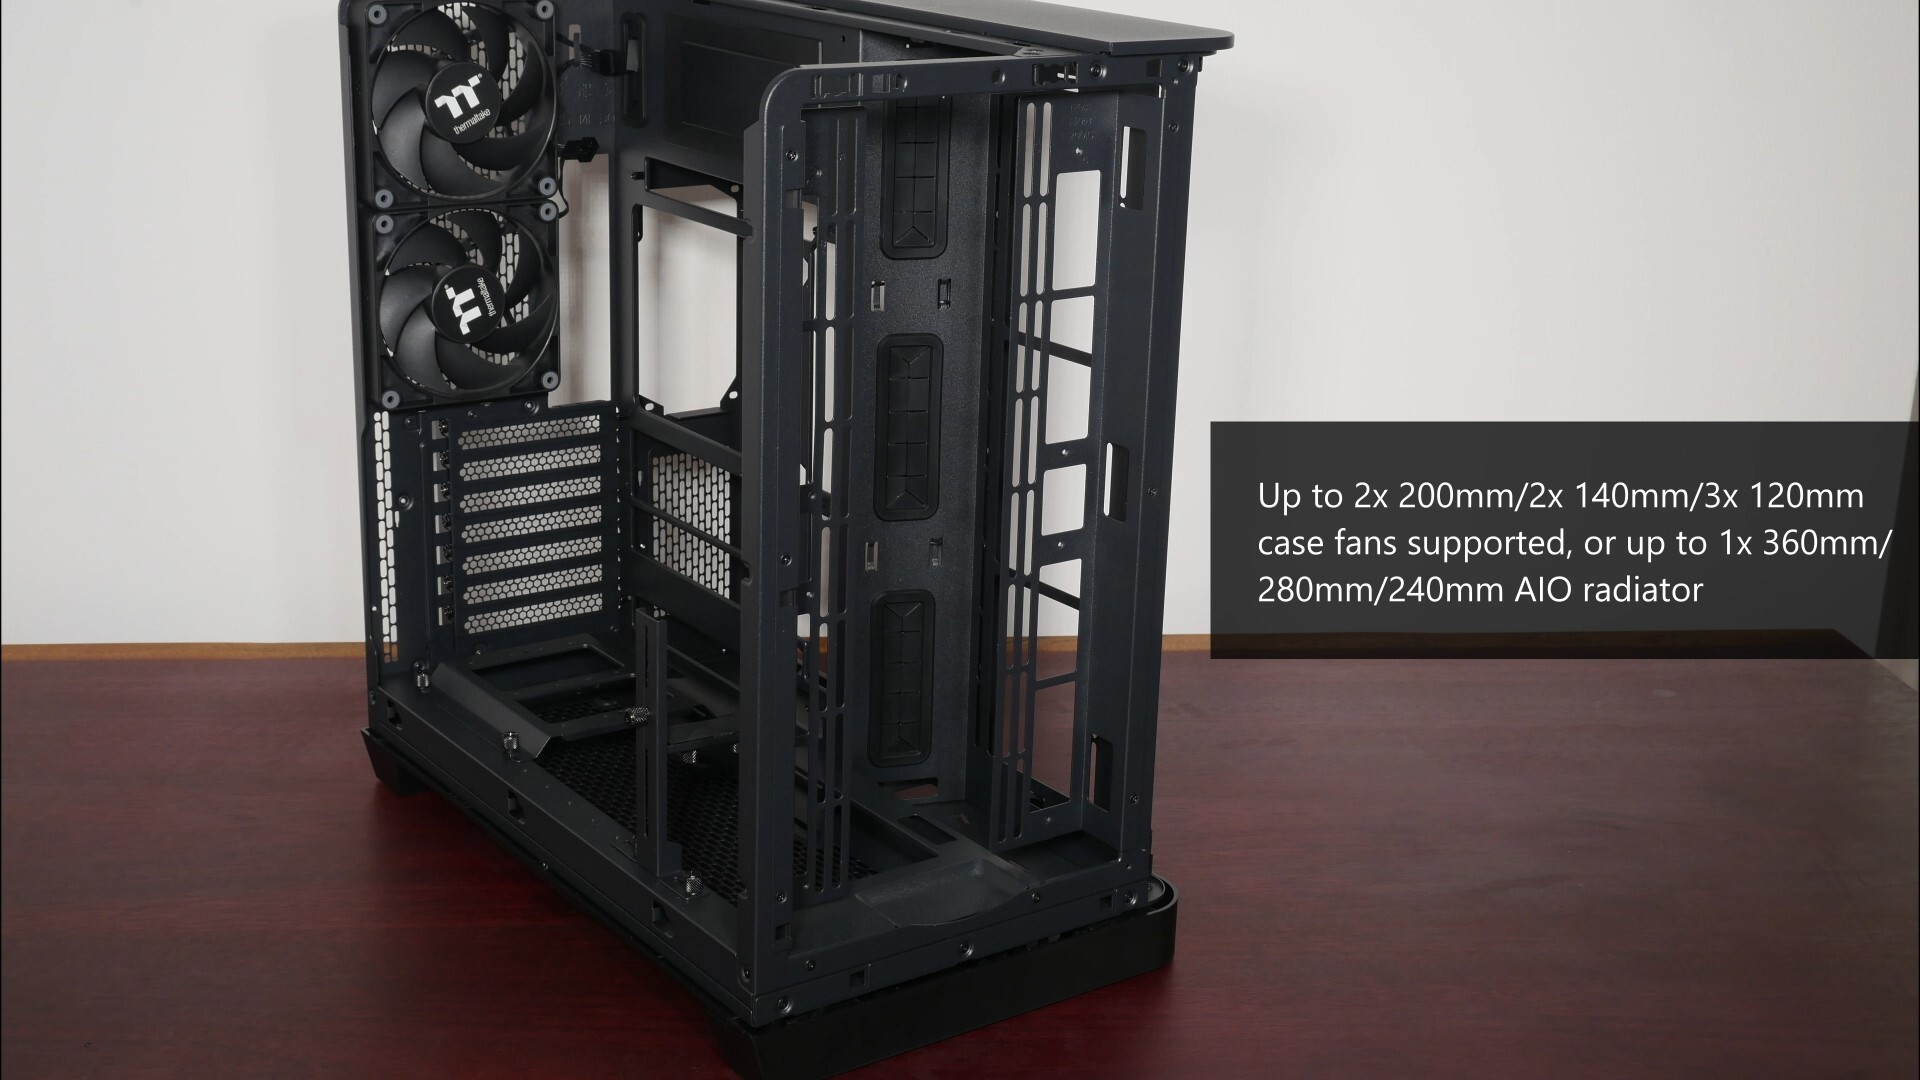
And with that, let’s talk about cooling hardware support, starting first with the front panel, where we get lots of support for different sizes of case fans – you can install either 1) 2x 200mm front intake fans 2) 2x 140mm front intake fans or 3) 3x 120mm front intake fans. Otherwise, the front panel also supports a 360mm, 280mm or 240mm AIO radiator.
Over on the side panel, we get support for up to three 120mm intake fans, or up to a 360mm side mounted radiator for an AIO cooler – do note that 280mm radiators will not fit on the side panel.

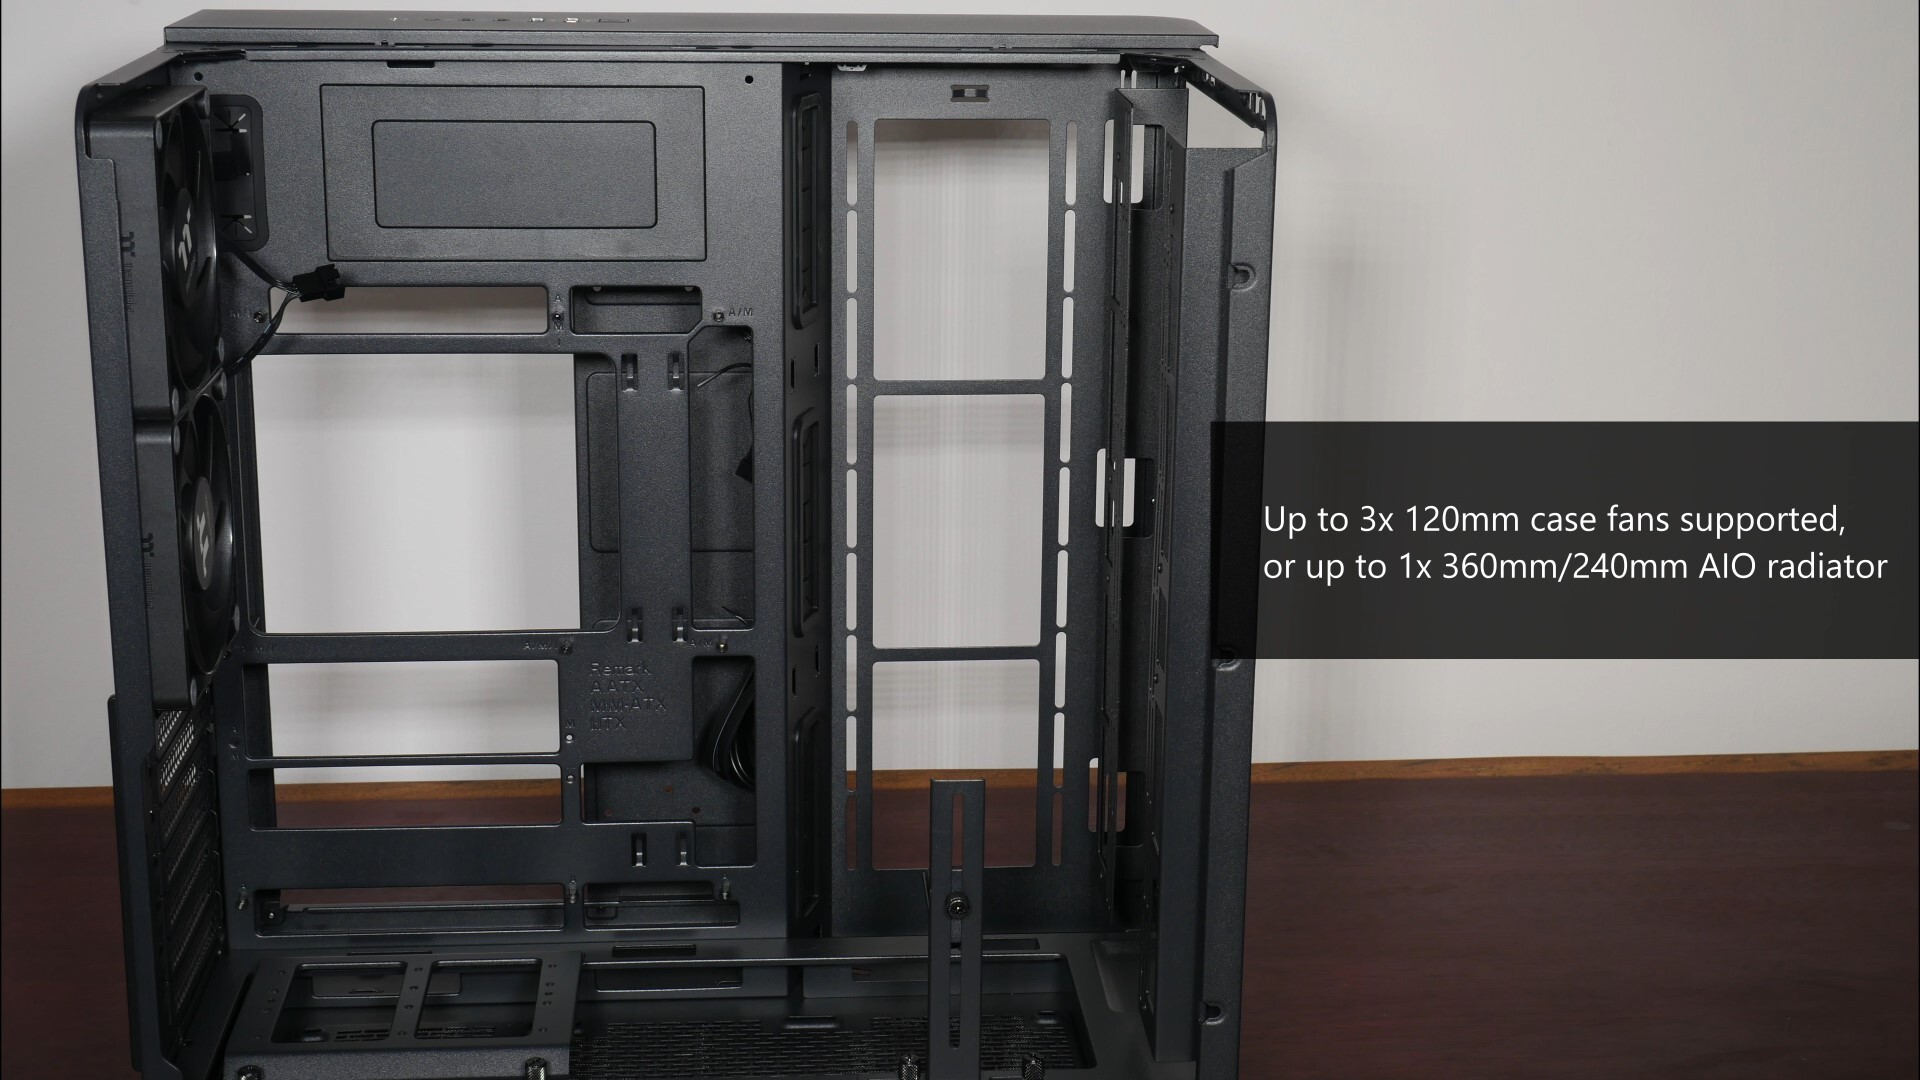
Moving to the bottom panel, we get openings that support up to three 120mm case fans.
As mentioned earlier, the View 390 Air comes with two preinstalled 120mm case fans - you have the option of replacing them with other brands/models of 120mm case fans should you so wish.
Physical Dimensions & Clearances
In terms of physical dimensions, the View 390 Air is a mid-tower dual-chamber ATX PC case that measures in at 503mm x 287mm x 485mm. Although Thermaltake makes no mention of EATX motherboard support with this case, I did actually manage to fit a consumer EATX board into this case for a demo build - I’ll talk more about the installation experience with this said board later on in this review.
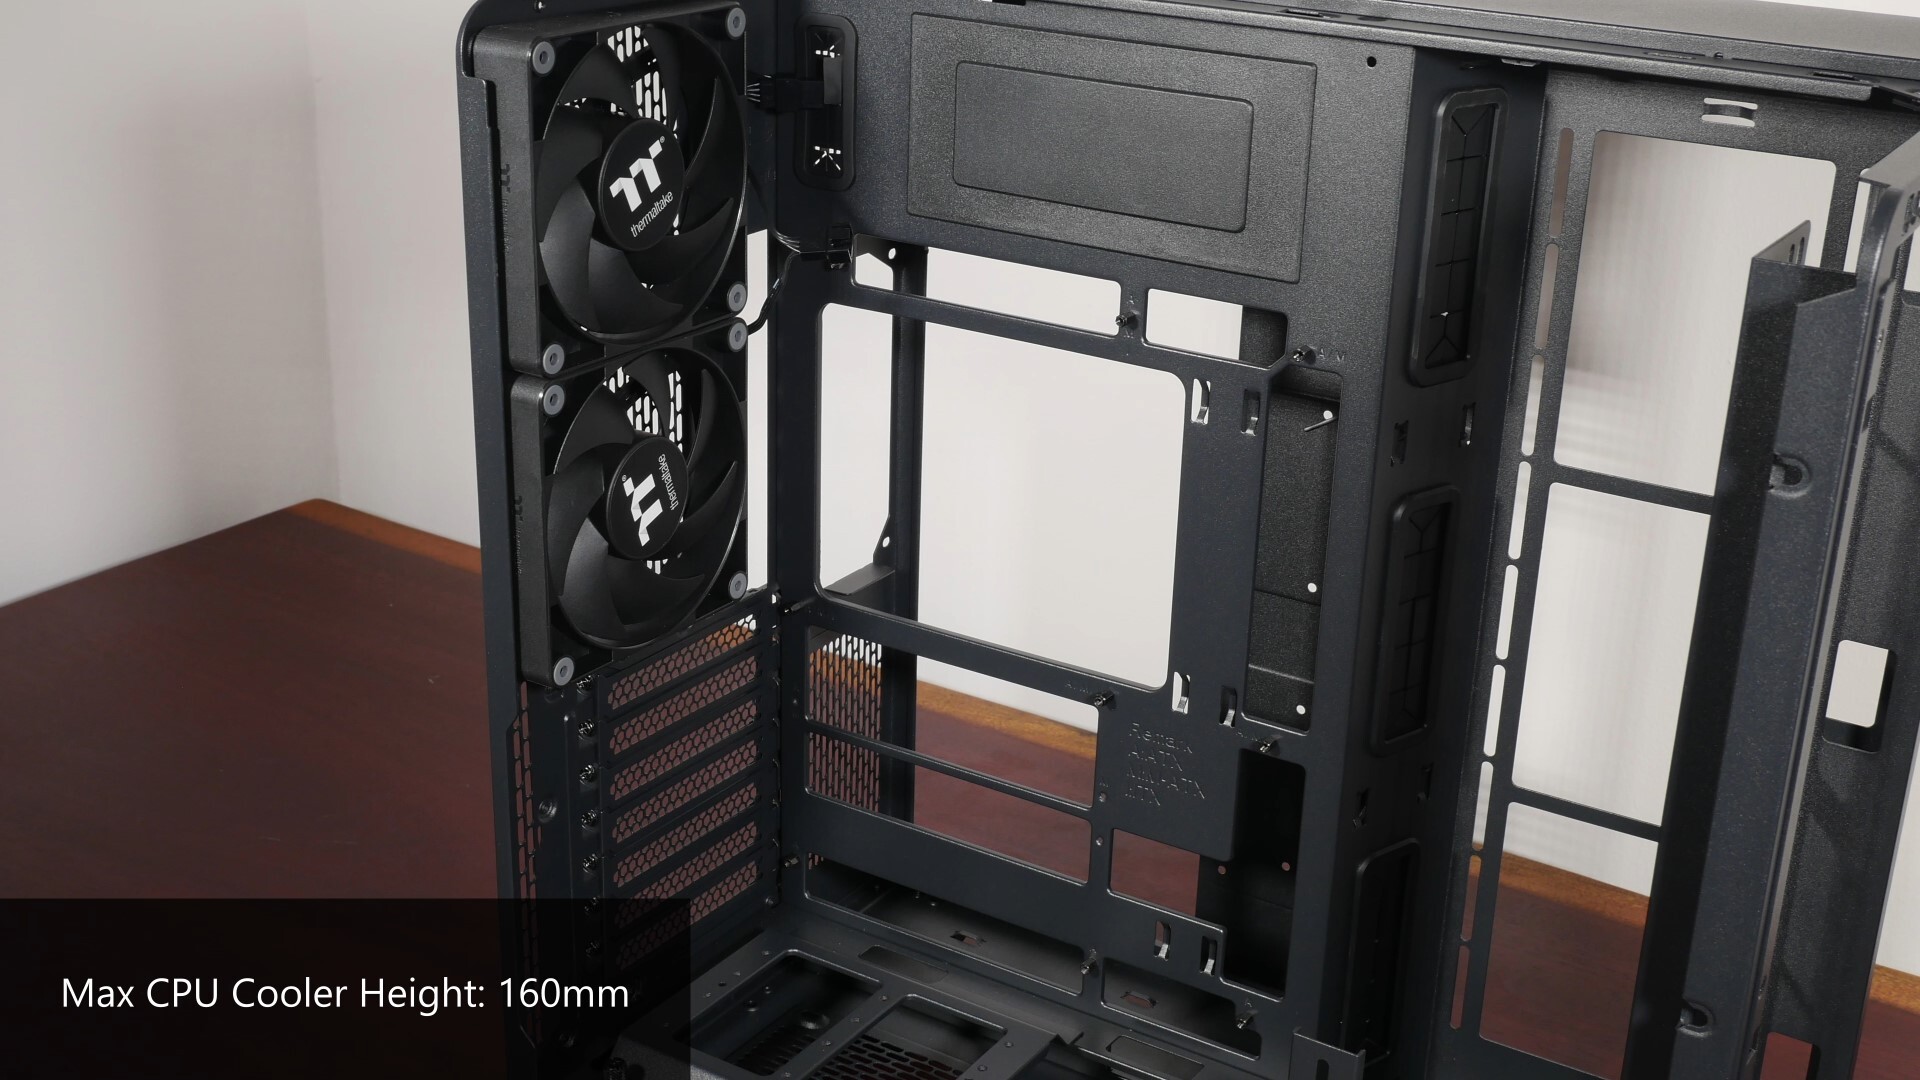
For you folks intending to use an air cooler for your processor, Thermaltake states that the case supports CPU coolers of heights no more than 160mm.
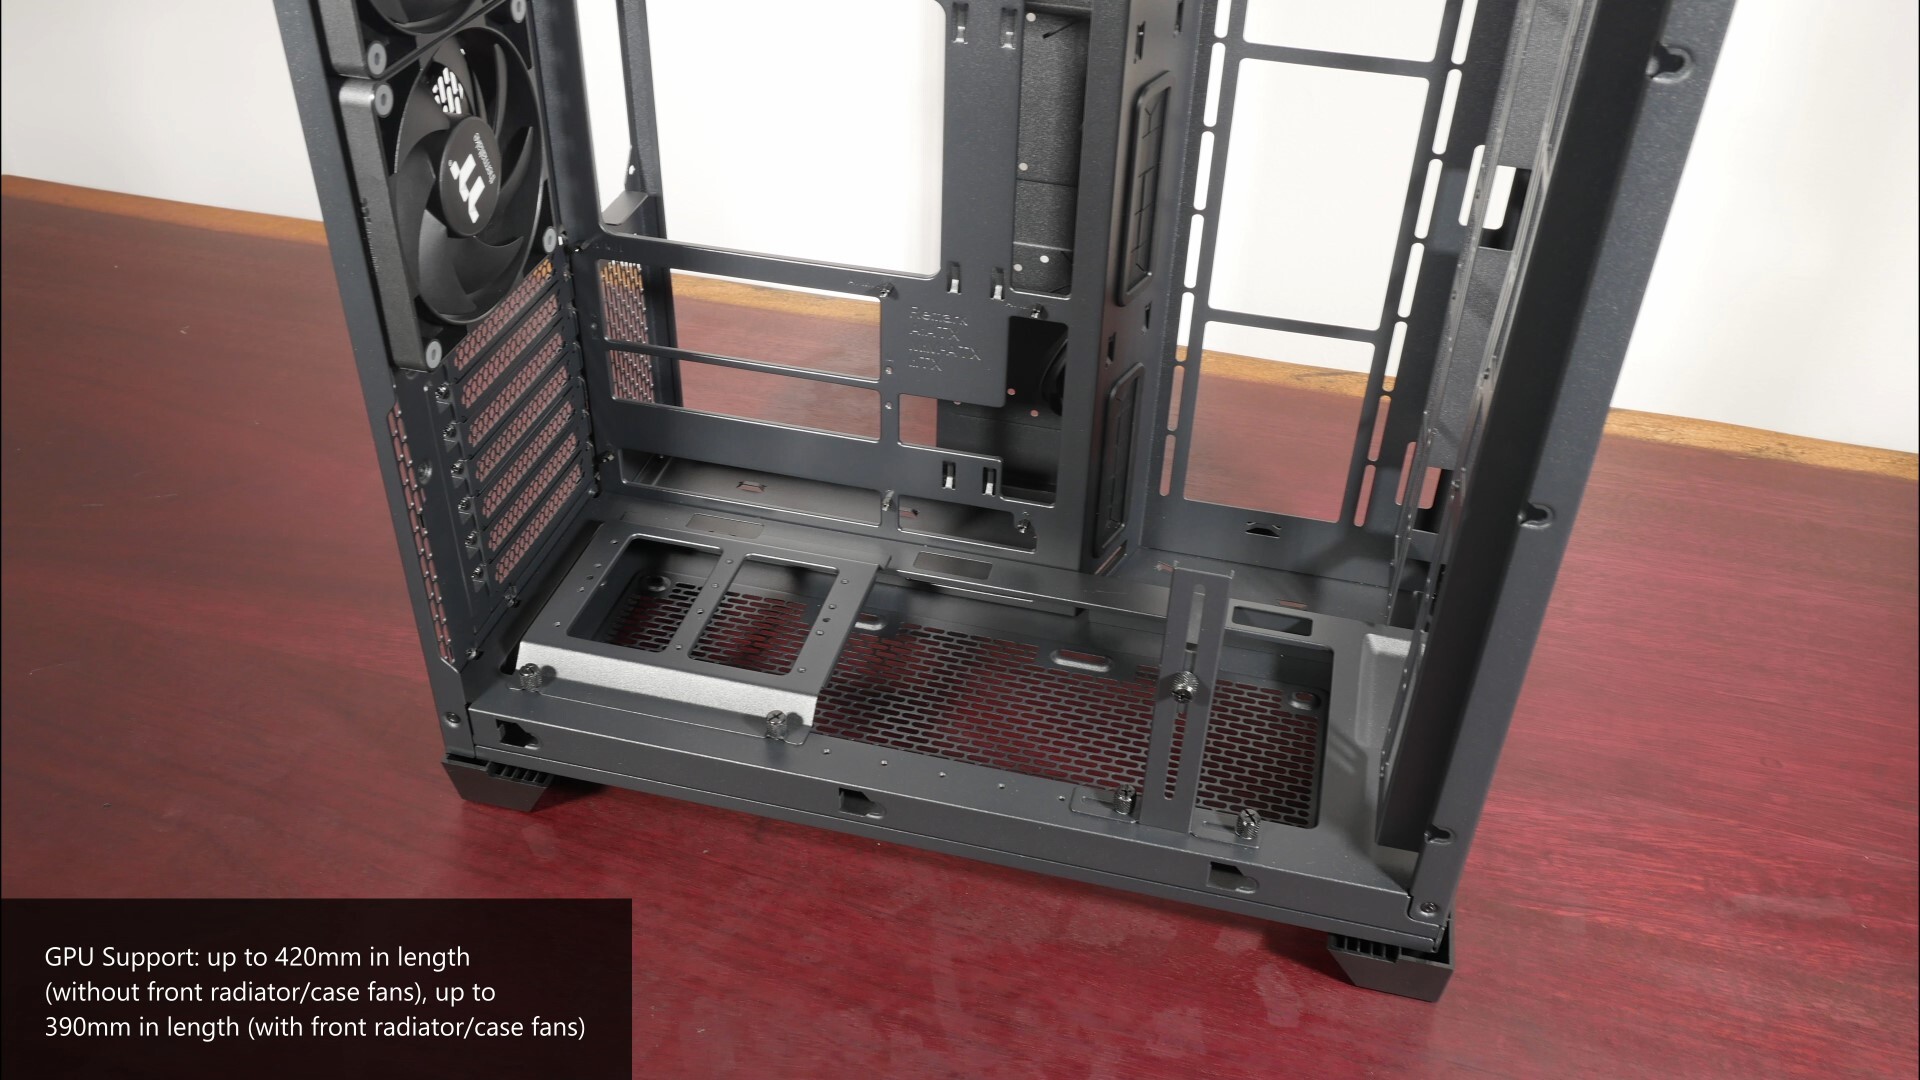
For your graphics card, the View 390 Air comes with support for cards with lengths of up to 420mm without a front AIO radiator or front fans installed, if you’ve got a radiator or front case fans installed, the clearance drops down to 390mm instead.
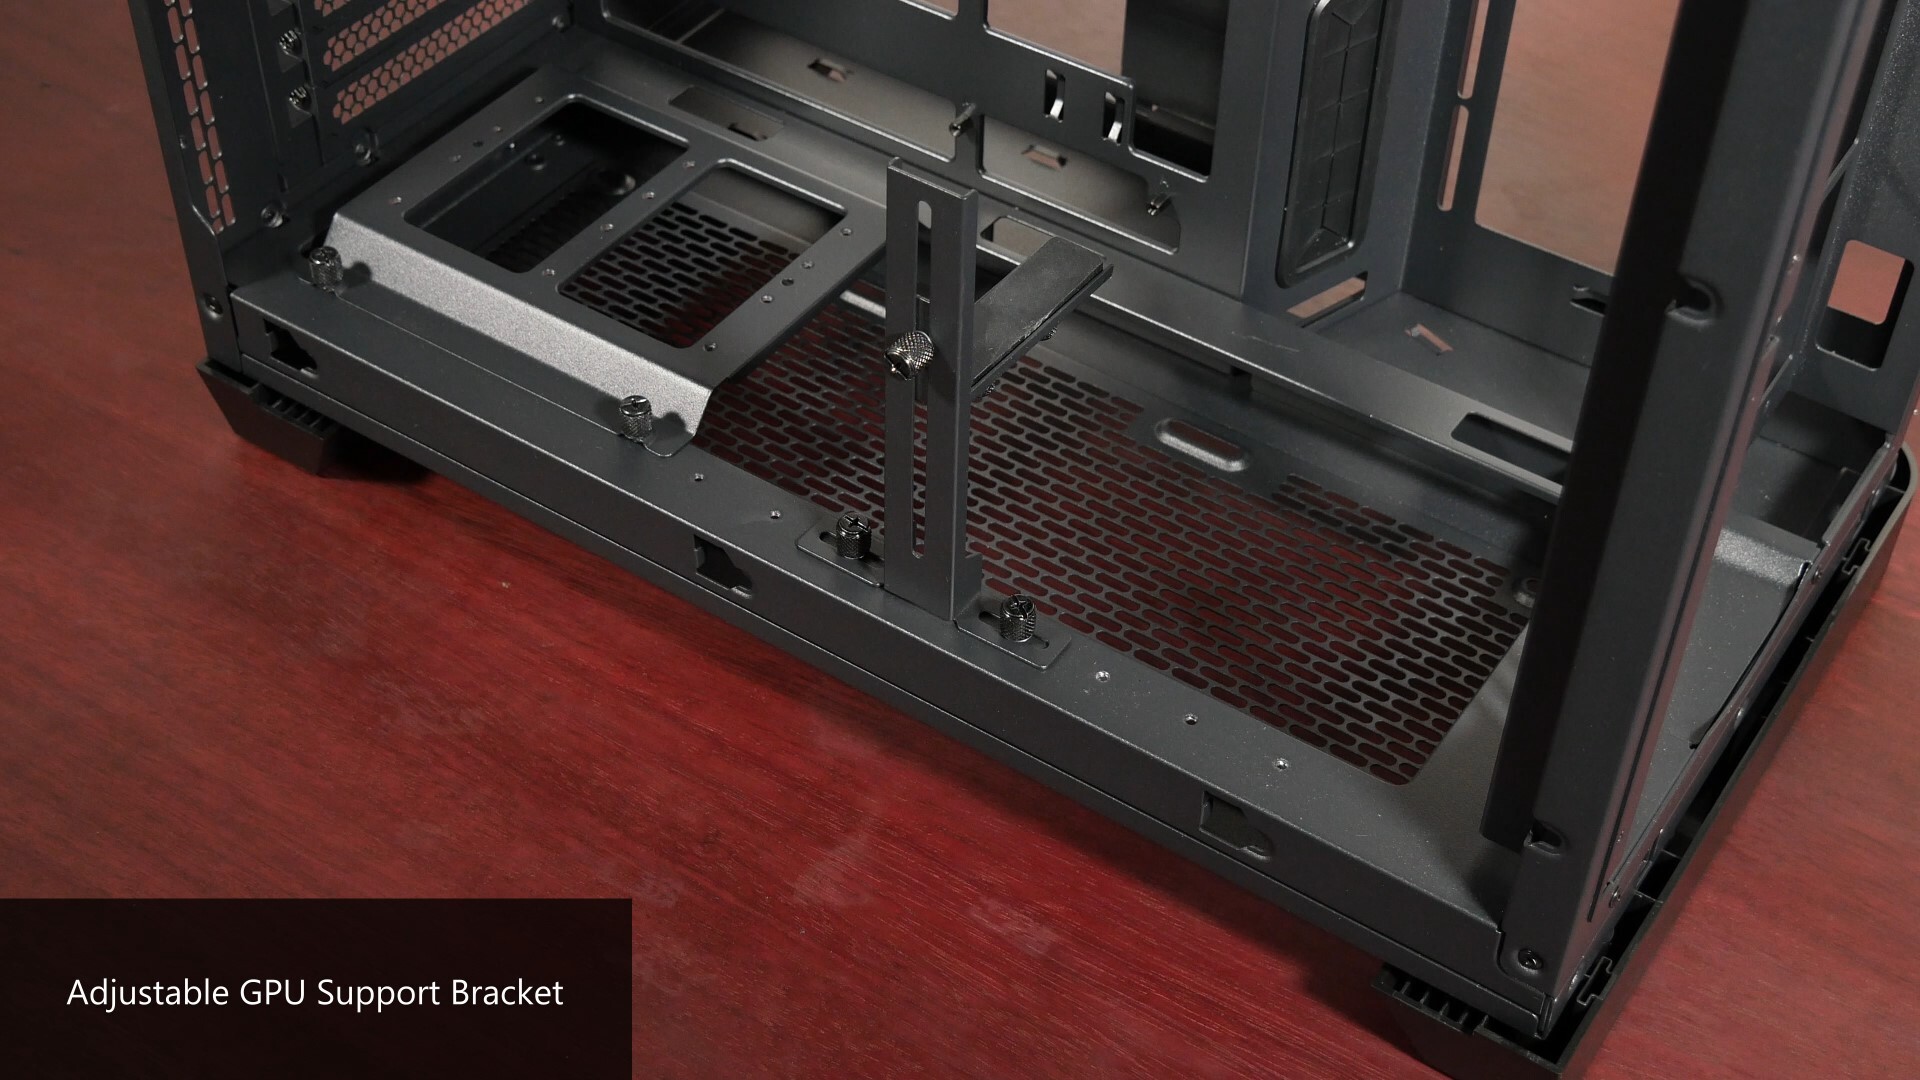
It’s great to see that Thermaltake’s also included a built-in GPU support bracket that's adjustable for height. The said bracket can also be repositioned along the row of screw holes pictured above, so as to accommodate different lengths of graphics cards.
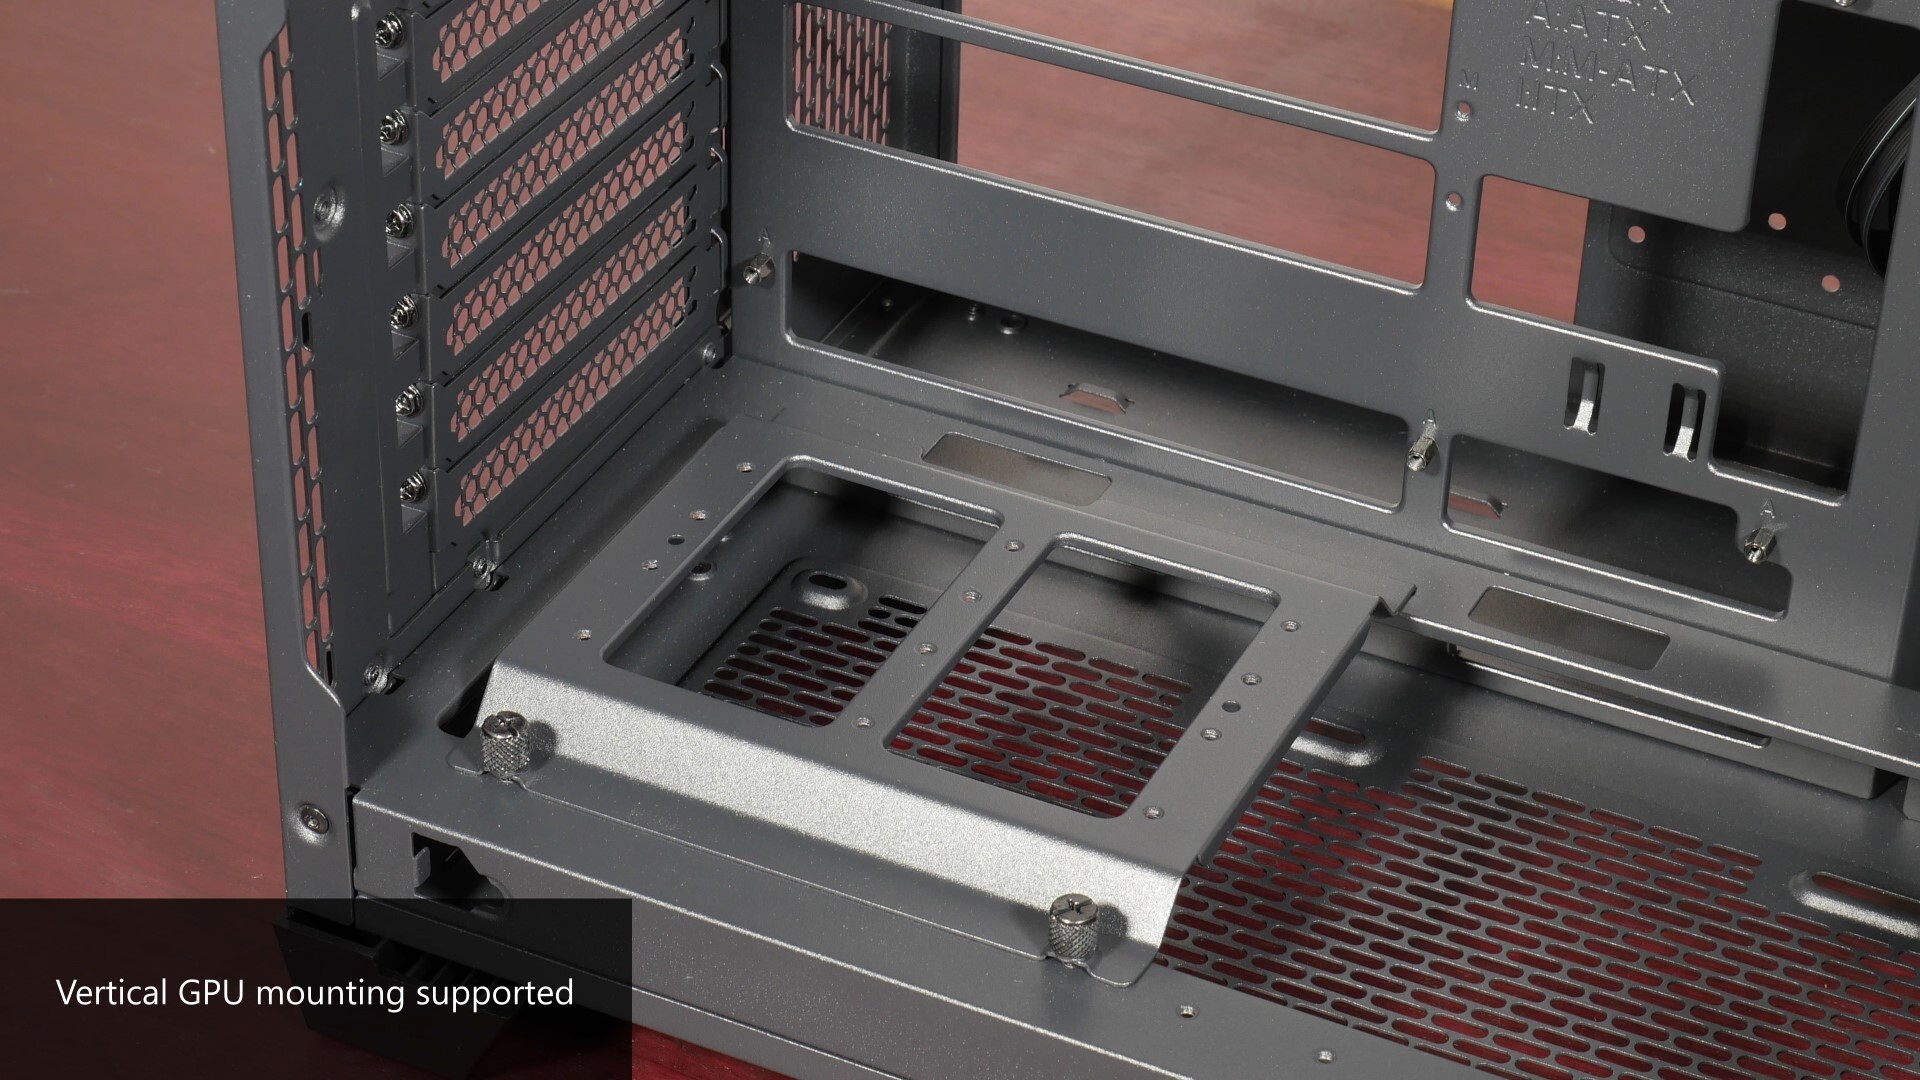
The case supports vertically mounted GPUs, though you will have to get a riser cable that is sold separately, and mount it on the removable bracket as pictured above.
.jpg)
.jpg)
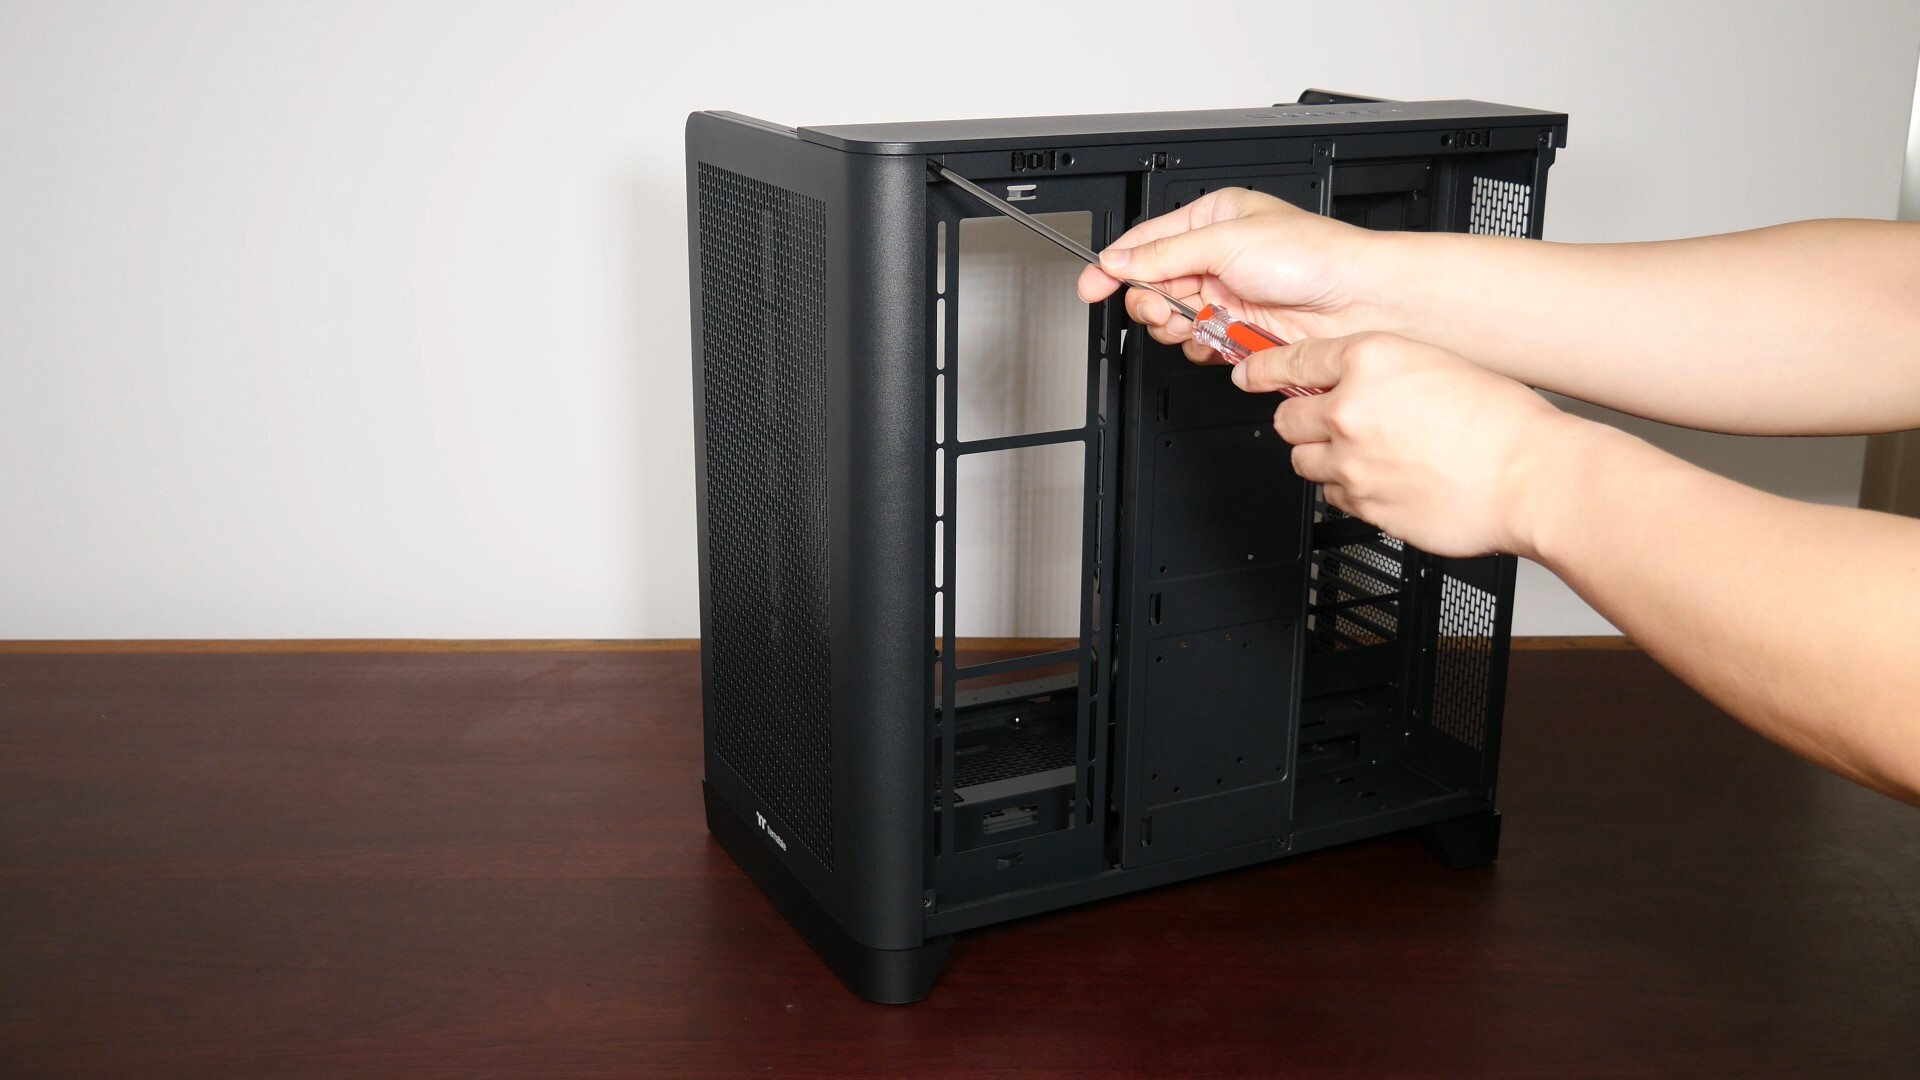
Changing the orientation of the expansion slot openings to suit a vertically mounted GPU is pretty straightforward, all you’ve got to do is to undo six screws on the rear so as to remove the expansion slot bracket, and thereafter, install it in the correct orientation for vertical GPU mounting.
.jpg)
As can be seen, the case is able to accommodate one of the largest graphics cards available on the market, a Gigabyte AORUS GeForce RTX 4090 MASTER 24G that measures in at a sizeable 358.5mm x 162.8mm x 75.1mm, in the vertical GPU mount position.
.jpg)
Do note that to install this chonker of a card in the vertical mount position, I’ve had to remove the bottommost rear exhaust fan in order to make room for the cooler shroud of the graphics card – this is a really tall GPU after all!
.jpg)
You’ll also have to use the included GPU support bracket to make sure that the graphics card won’t sag after installation.

A common feature of modern PC cases is support for back-connect motherboards, and the View 390 Air is no exception. This means motherboards from say, ASUS’s BTF line-up, Gigabyte’s Stealth series or MSI’s Project Zero line-up should be compatible with this case.
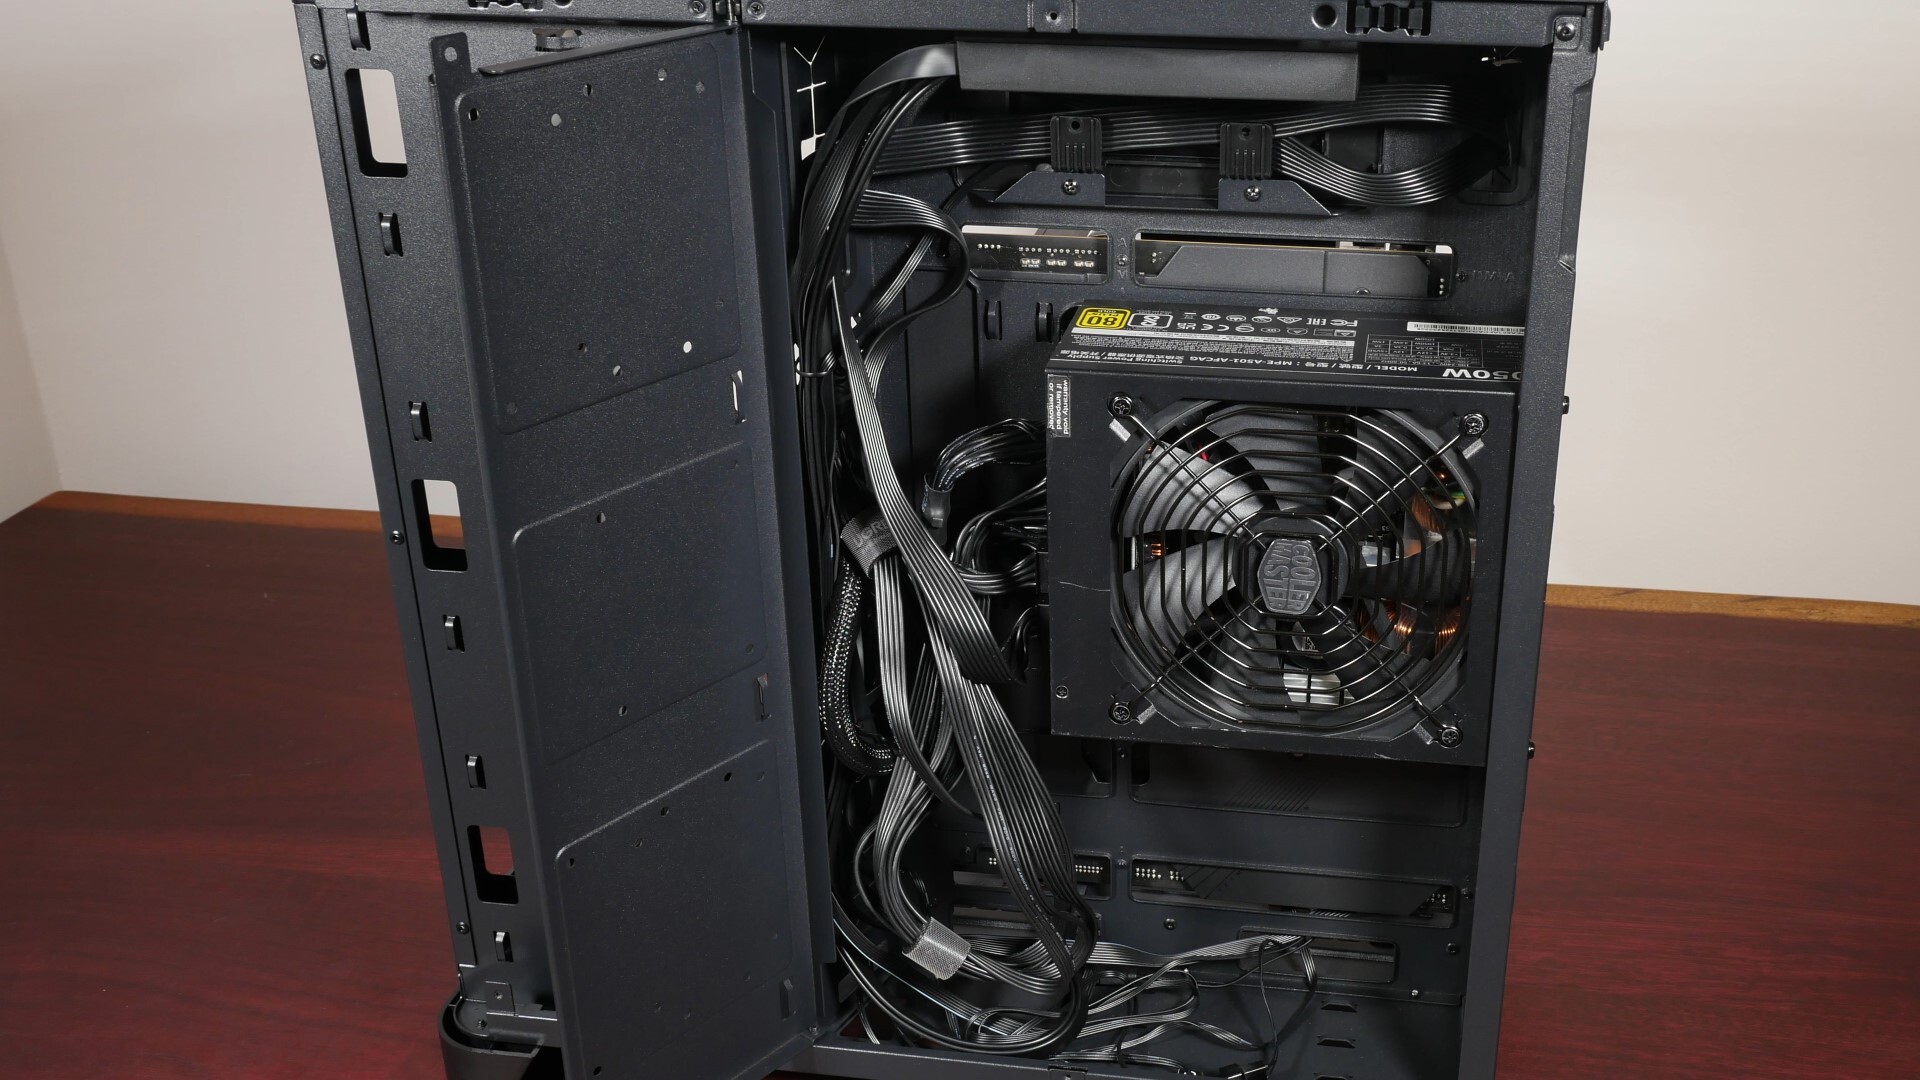
Finally, in terms of power supply dimensions, we get support for full-sized ATX power supplies of up to 260mm in length, which is mounted in the secondary chamber of the PC case – do note that this 260mm figure is when you do not have a certain combination of drives installed on the mounting bracket behind the motherboard tray. If you do have such drives installed, depending on how you position the said drives, the PSU length clearance will drop down to 200mm instead.
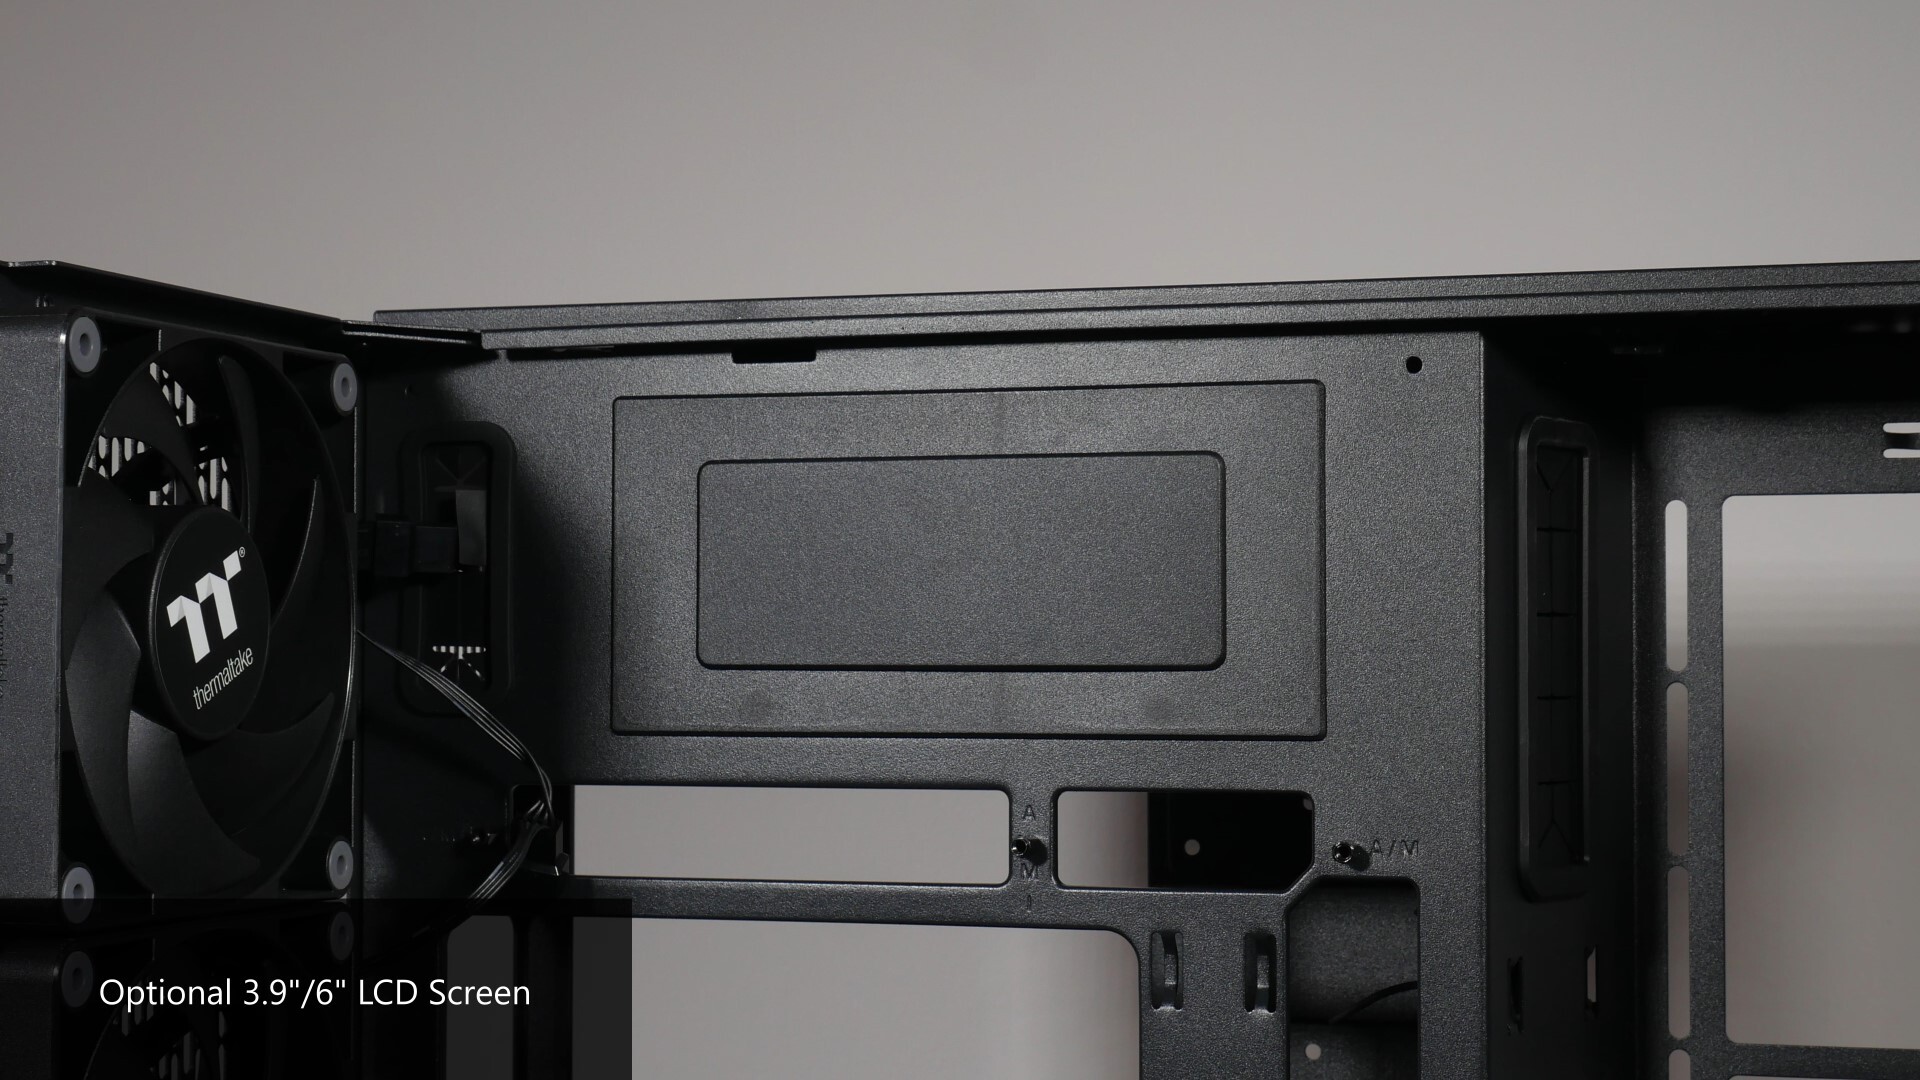
One feature worth highlighting about the View 390 Air is this rectangular faceplate right above the motherboard, where you can remove it to install an optional 3.9” or 6” LCD screen kit that is sold separately by Thermaltake.
Storage Drive Support
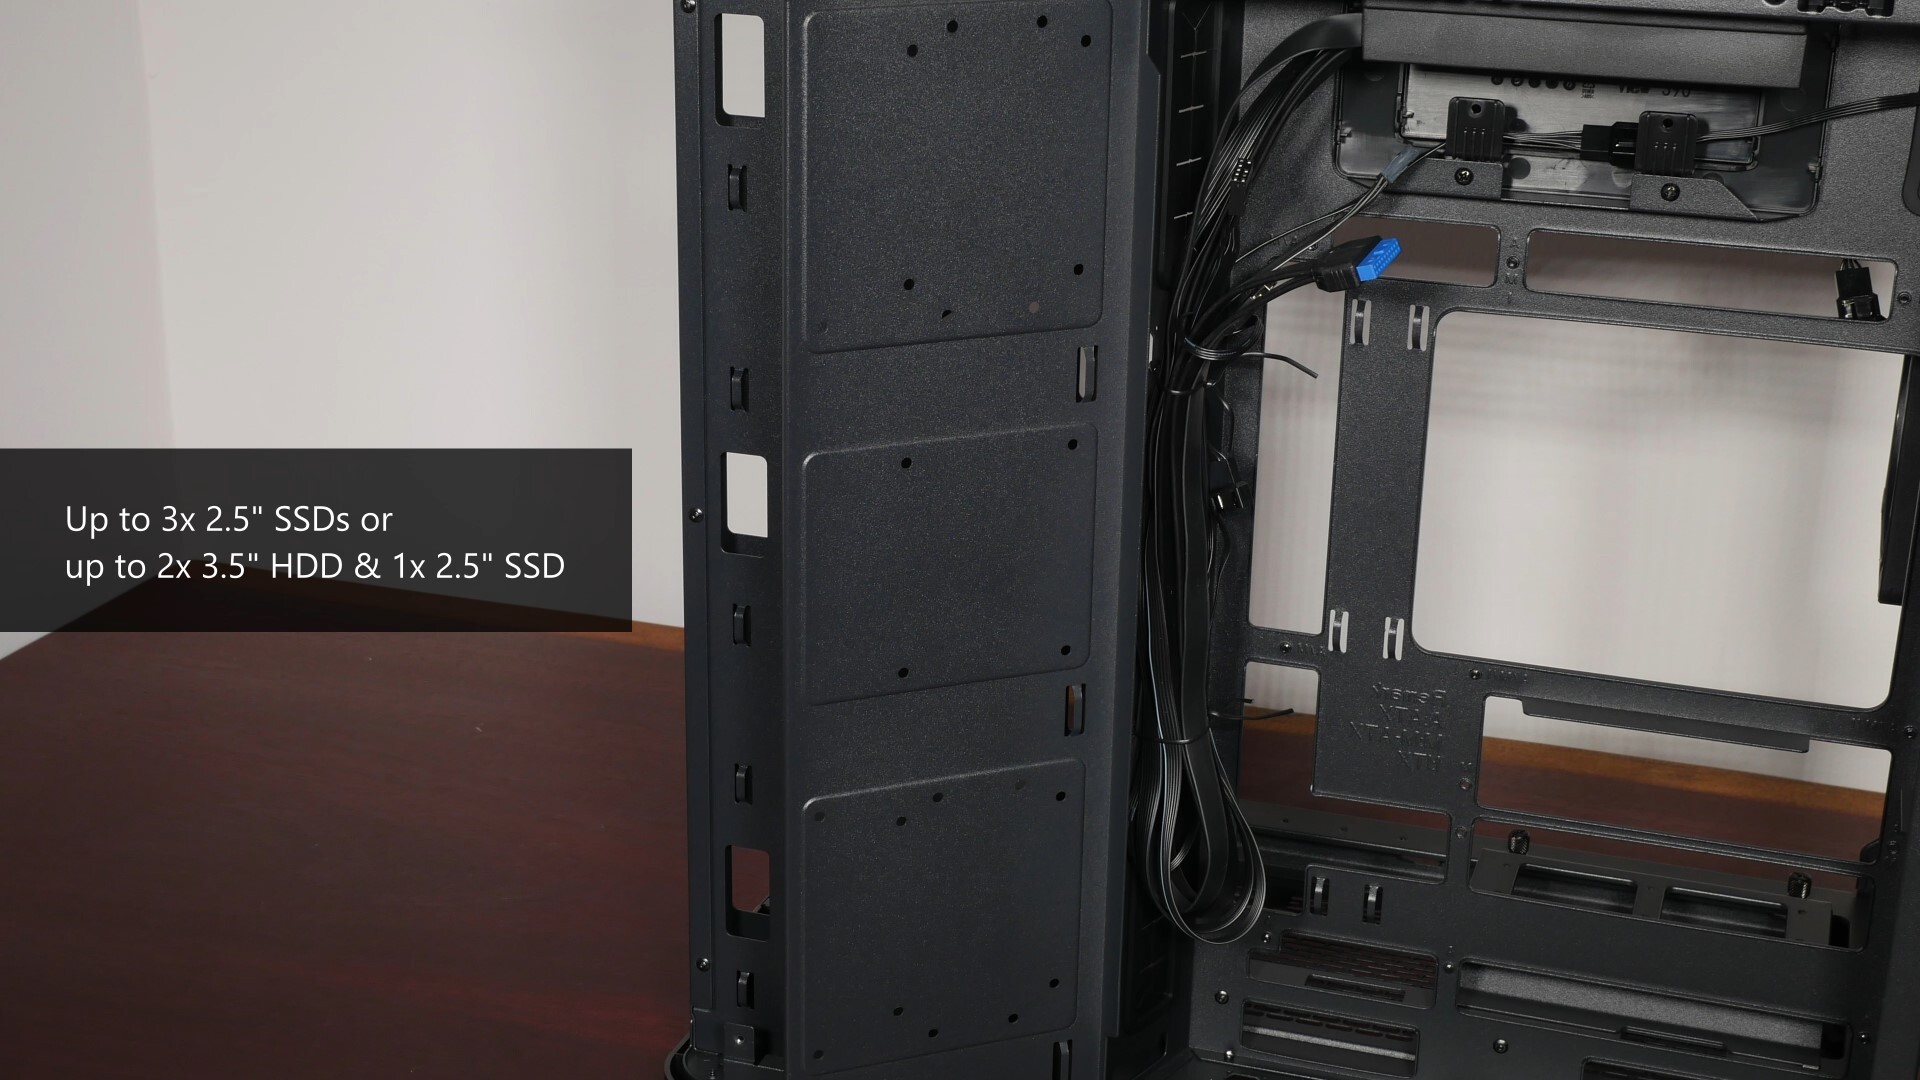
For those of you intending to install 2.5” and 3.5” drives for your PC build with the View 390 Air, Thermaltake’s included a mounting bracket behind the motherboard tray that supports up to three 2.5” SSDs, or two 3.5” hard disks and one 2.5” SSD.
Building a PC with the Thermaltake View 390 Air
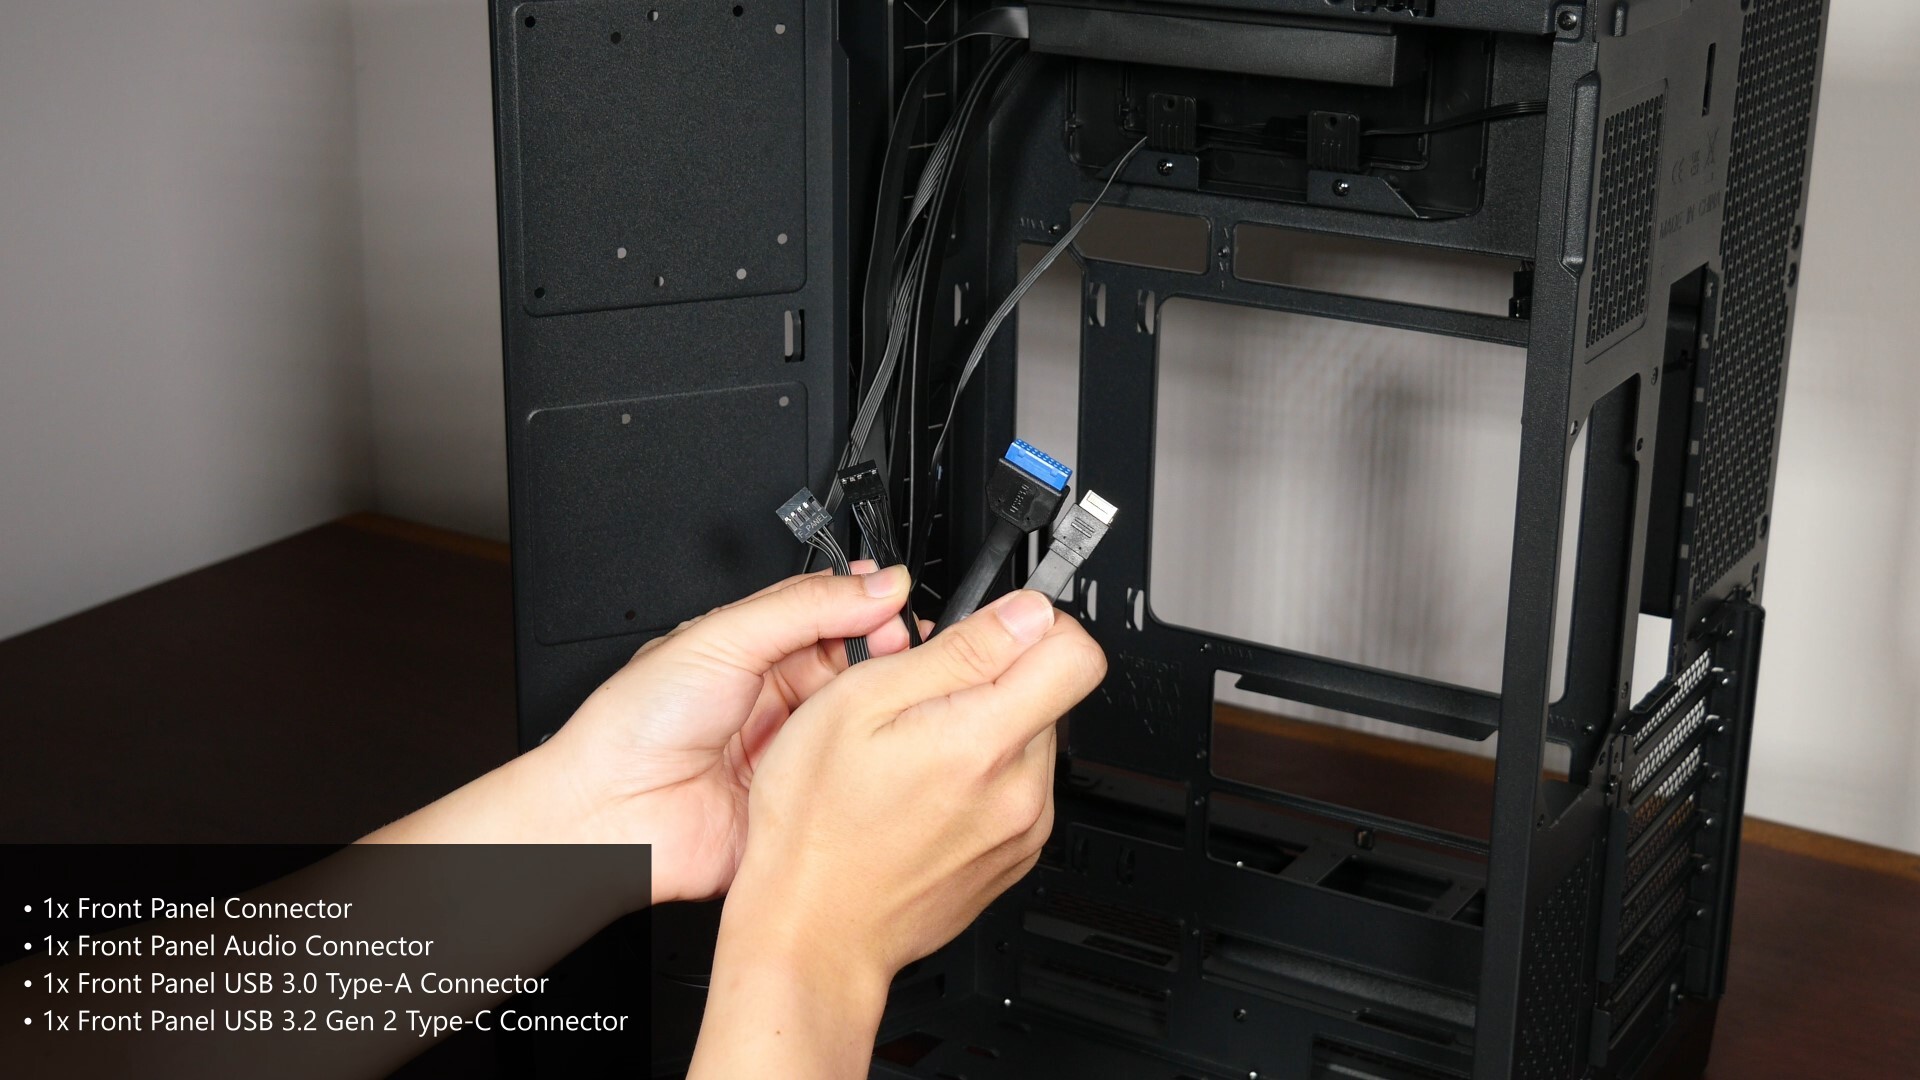
The front panel connectors of the case are of your bog standard variant, where we get a nine-pin integrated front panel connector, a front panel audio connector, a front panel USB 3.0 Type-A connector as well as a front panel USB 3.2 Gen 2 Type-C connector.
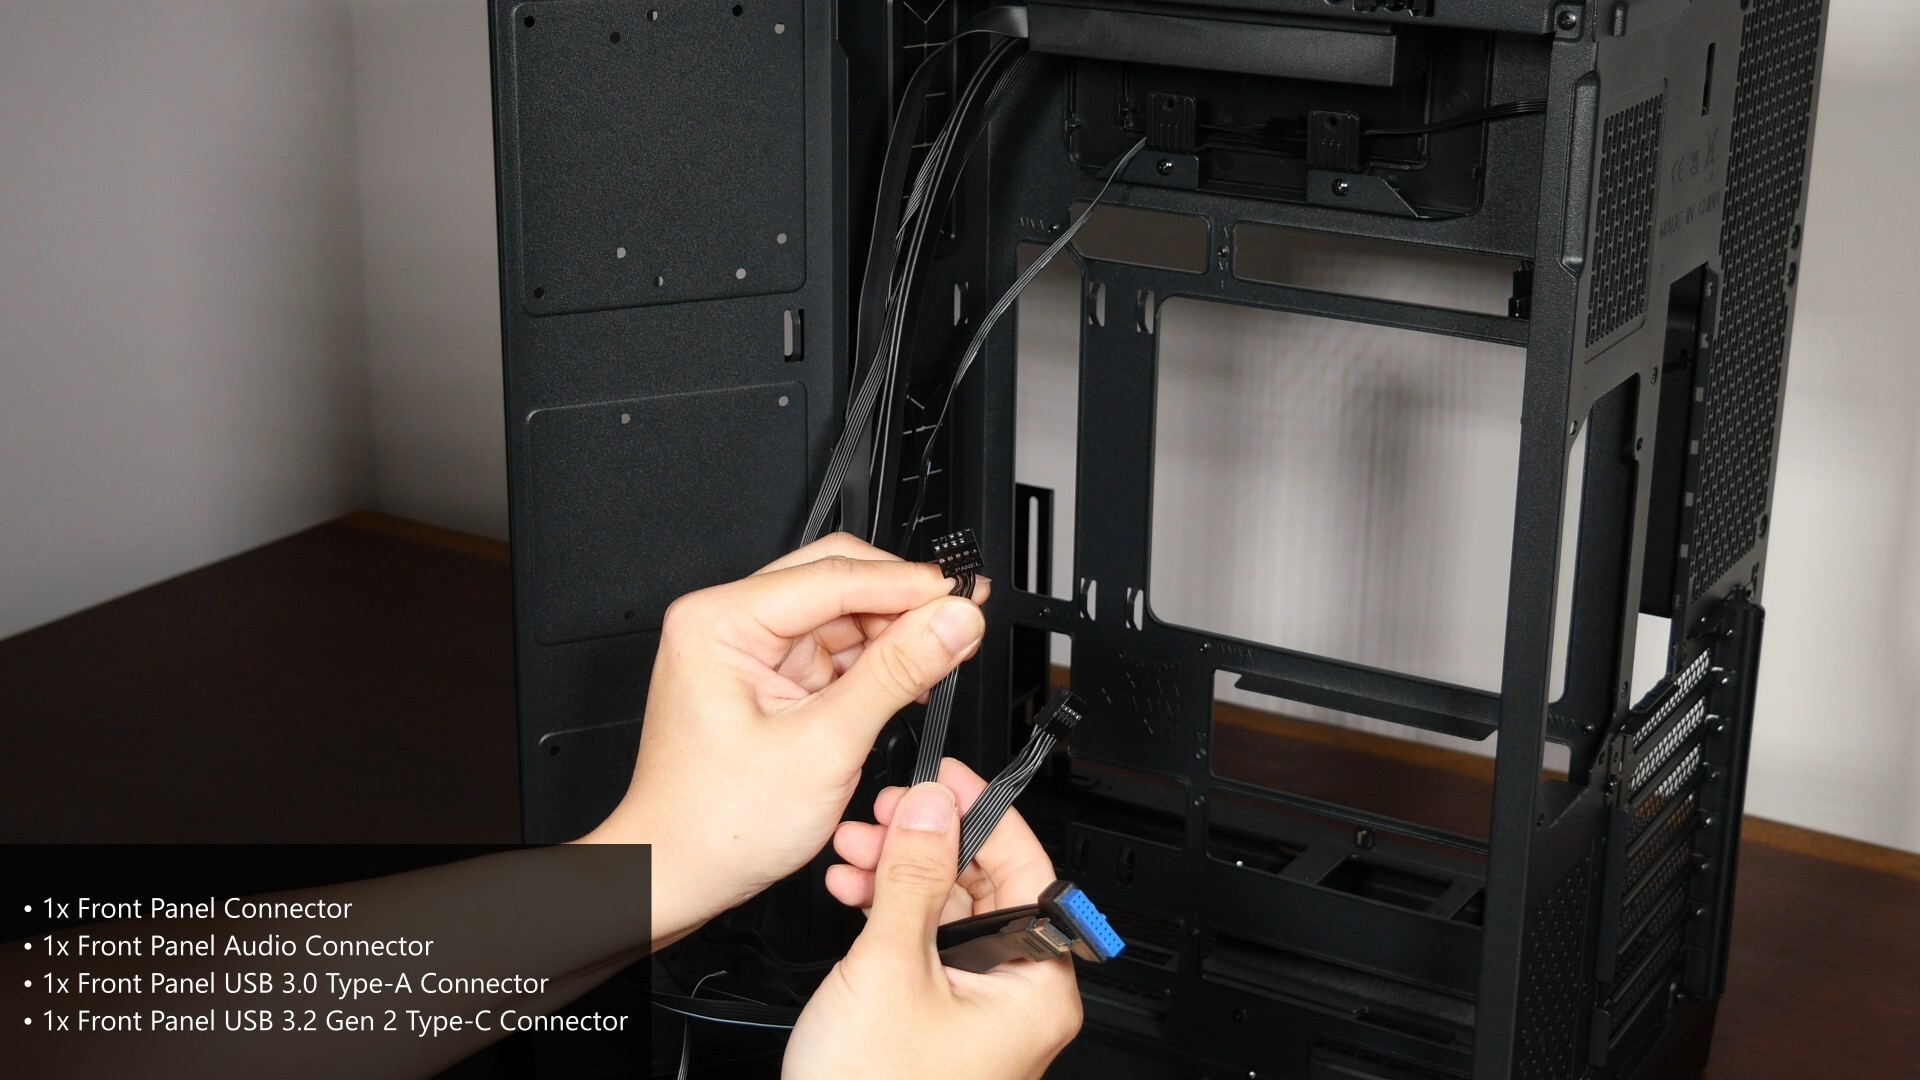
It’s great to note that Thermaltake has gone with a nine-pin front panel header that integrates your power button, power LED and reset leads into one integrated connector. This really helps with the build process, and saves you the hassle of fiddling about with multiple connectors and trying to get them hooked up to the correct pins on your motherboard.

To secure the motherboard on the motherboard tray, I had to remove the bottommost rear-mounted case fan first, place the motherboard on the tray before reattaching the fan – this is because the cables of the preinstalled rear case fans run right above where your motherboard's I/O shield shroud would be.
.jpg)
.jpg)
The View 390 Air's motherboard standoffs come preinstalled for an ATX form factor motherboard - as mentioned earlier, although Thermaltake doesn’t make any mention of EATX motherboard support, I still managed to fit a Gigabyte X670E AORUS MASTER, an EATX form-factored motherboard, into the case and it fits perfectly. You might even get away with a slightly wider EATX board as there seems to be enough width clearance - your mileage may vary!
.jpg)
.jpg)
.jpg)
The case fan installation process was straightforward, where the folks over at Corbell Technology's kindly sent over a three-pack of Thermaltake’s CT120 EX ARGB Sync fans, which I’ve installed on the front panel as intake fans. For the purposes of this demo build, I’ll won’t be installing side intake or bottom intake fans, as I didn’t have any extra case fans on hand.
Installing the power supply unit was easy too – the PSU that I’m using measures in at a length of 180mm, so it fits easily and you’ll still have room for your 2.5” or 3.5” drives that are to be mounted behind the motherboard tray.
.jpg)
.jpg)
For the demo build, I’ll be installing the Gigabyte AORUS GeForce RTX 4090 MASTER 24G that I mentioned earlier in this article. To recap, this graphics card measures in at a sizeable 358.5mm x 162.8mm x 75.1mm, and the View 390 Air was able to accommodate this beast of a card, though as can be seen in the photo above, it was a really tight fit with barely any clearance left between the GPU cooler shroud's short edge and the frame of the case.
.jpg)
.jpg)
Also, given how tall the card is, I wasn’t able to use the included GPU support bracket as the thumbscrew would get in the way of the tempered glass panel, so I had to make do with a spare GPU support stand that I had lying around to prop up the RTX 4090 MASTER 24G.
.jpg)
.jpg)
With the demo build pretty much done, it’s a good time to talk about all things cable management with the View 390 Air. It’s great to see that Thermaltake's included numerous cable anchor points behind the motherboard tray that are accessible from the secondary chamber of the case, and we also get three rubber grommets along the motherboard tray with which to route your cables to the main chamber of the case.
.jpg)
All in all, the demo build is shaping up pretty nicely, in spite of the fact that I did not put in a deliberate amount of effort to cable manage!
Completed Demo Build Aesthetics
.jpg)
.jpg)
.jpg)
.jpg)
.jpg)
Thermal Performance
To benchmark the thermal performance of the Thermaltake View 390 Air PC case, I put together a demo build with the following specifications:
- CPU: AMD Ryzen 7 7800X3D (stock settings, PBO & Curve Optimiser disabled)
- CPU Cooler: Thermalright Phantom Spirit 120 SE ARGB
- CPU Thermal Paste: Arctic MX-4
- Motherboard: Gigabyte X670E AORUS MASTER
- Memory: 32GB (2x16GB) KingBank DDR5 Dark Heatsink UDIMM 6000MHz (DDR5 6000 CL28-35-35-76 1.45V)
- Storage: Lexar NM790 1TB NVMe SSD
- Graphics Card: Gigabyte AORUS GeForce RTX 4090 MASTER 24G
- PSU: Cooler Master MWE Gold 1050 V2 ATX 3.0
- Case: Thermaltake View 390 Air
- Case Fans: 3x Thermaltake CT120 EX ARGB Sync, 2x Thermaltake CT120
- OS: Microsoft Windows 11 Pro
- Fan Curve: Stock standard profiles
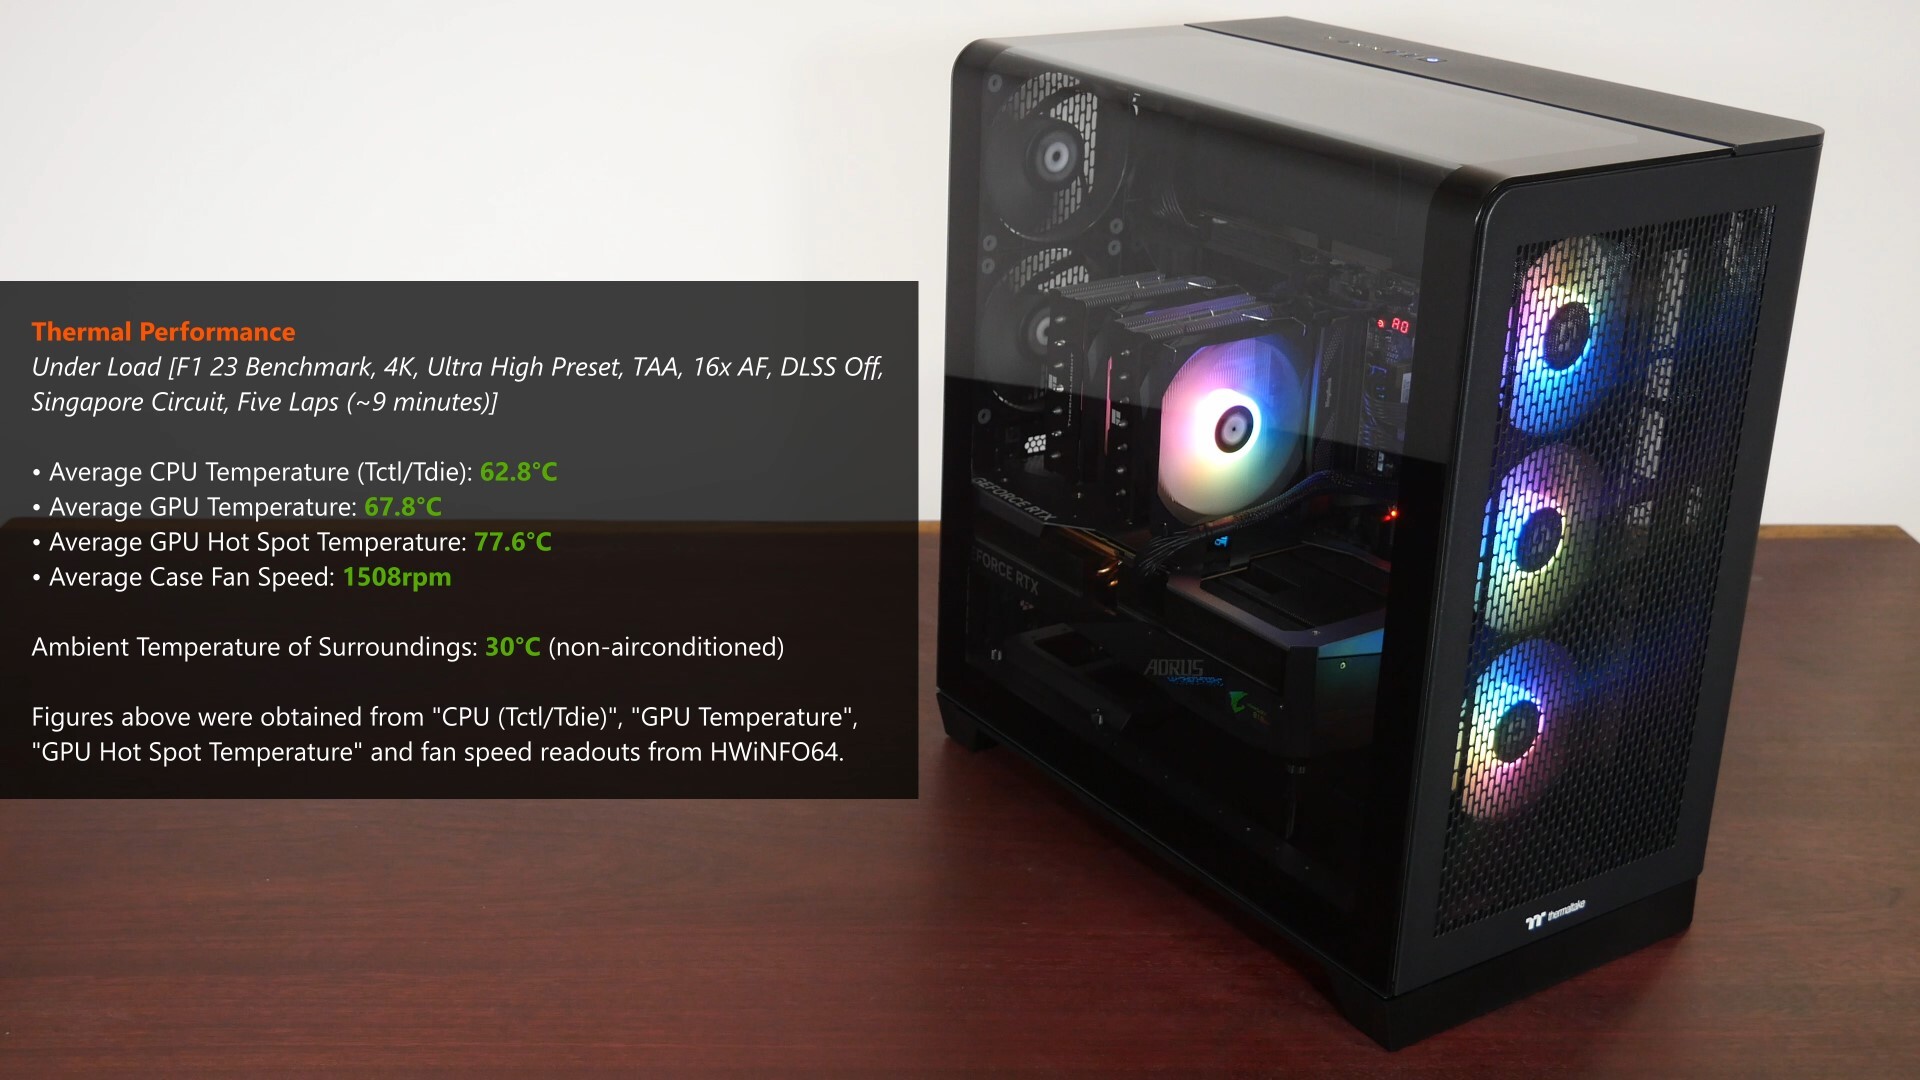
With F1 23’s in-game benchmark, where I ran a five-lap test for around 9 minutes in total, the Ryzen 7 7800X3D processor in the demo build achieved an average CPU temperature of around 62.8°C, while the GeForce RTX 4090 MASTER 24G by Gigabyte achieved an average GPU temperature of 67.8°C and an average hotspot temperature of 77.6°C. These results were achieved in a non-airconditioned room with a temperature of 30°C. For the purposes of benchmarking, the fan curves were left on their stock settings without any further tweaks, where the case fans ran at an average speed of 1508RPM for the benchmark duration.
Conclusion & Pricing
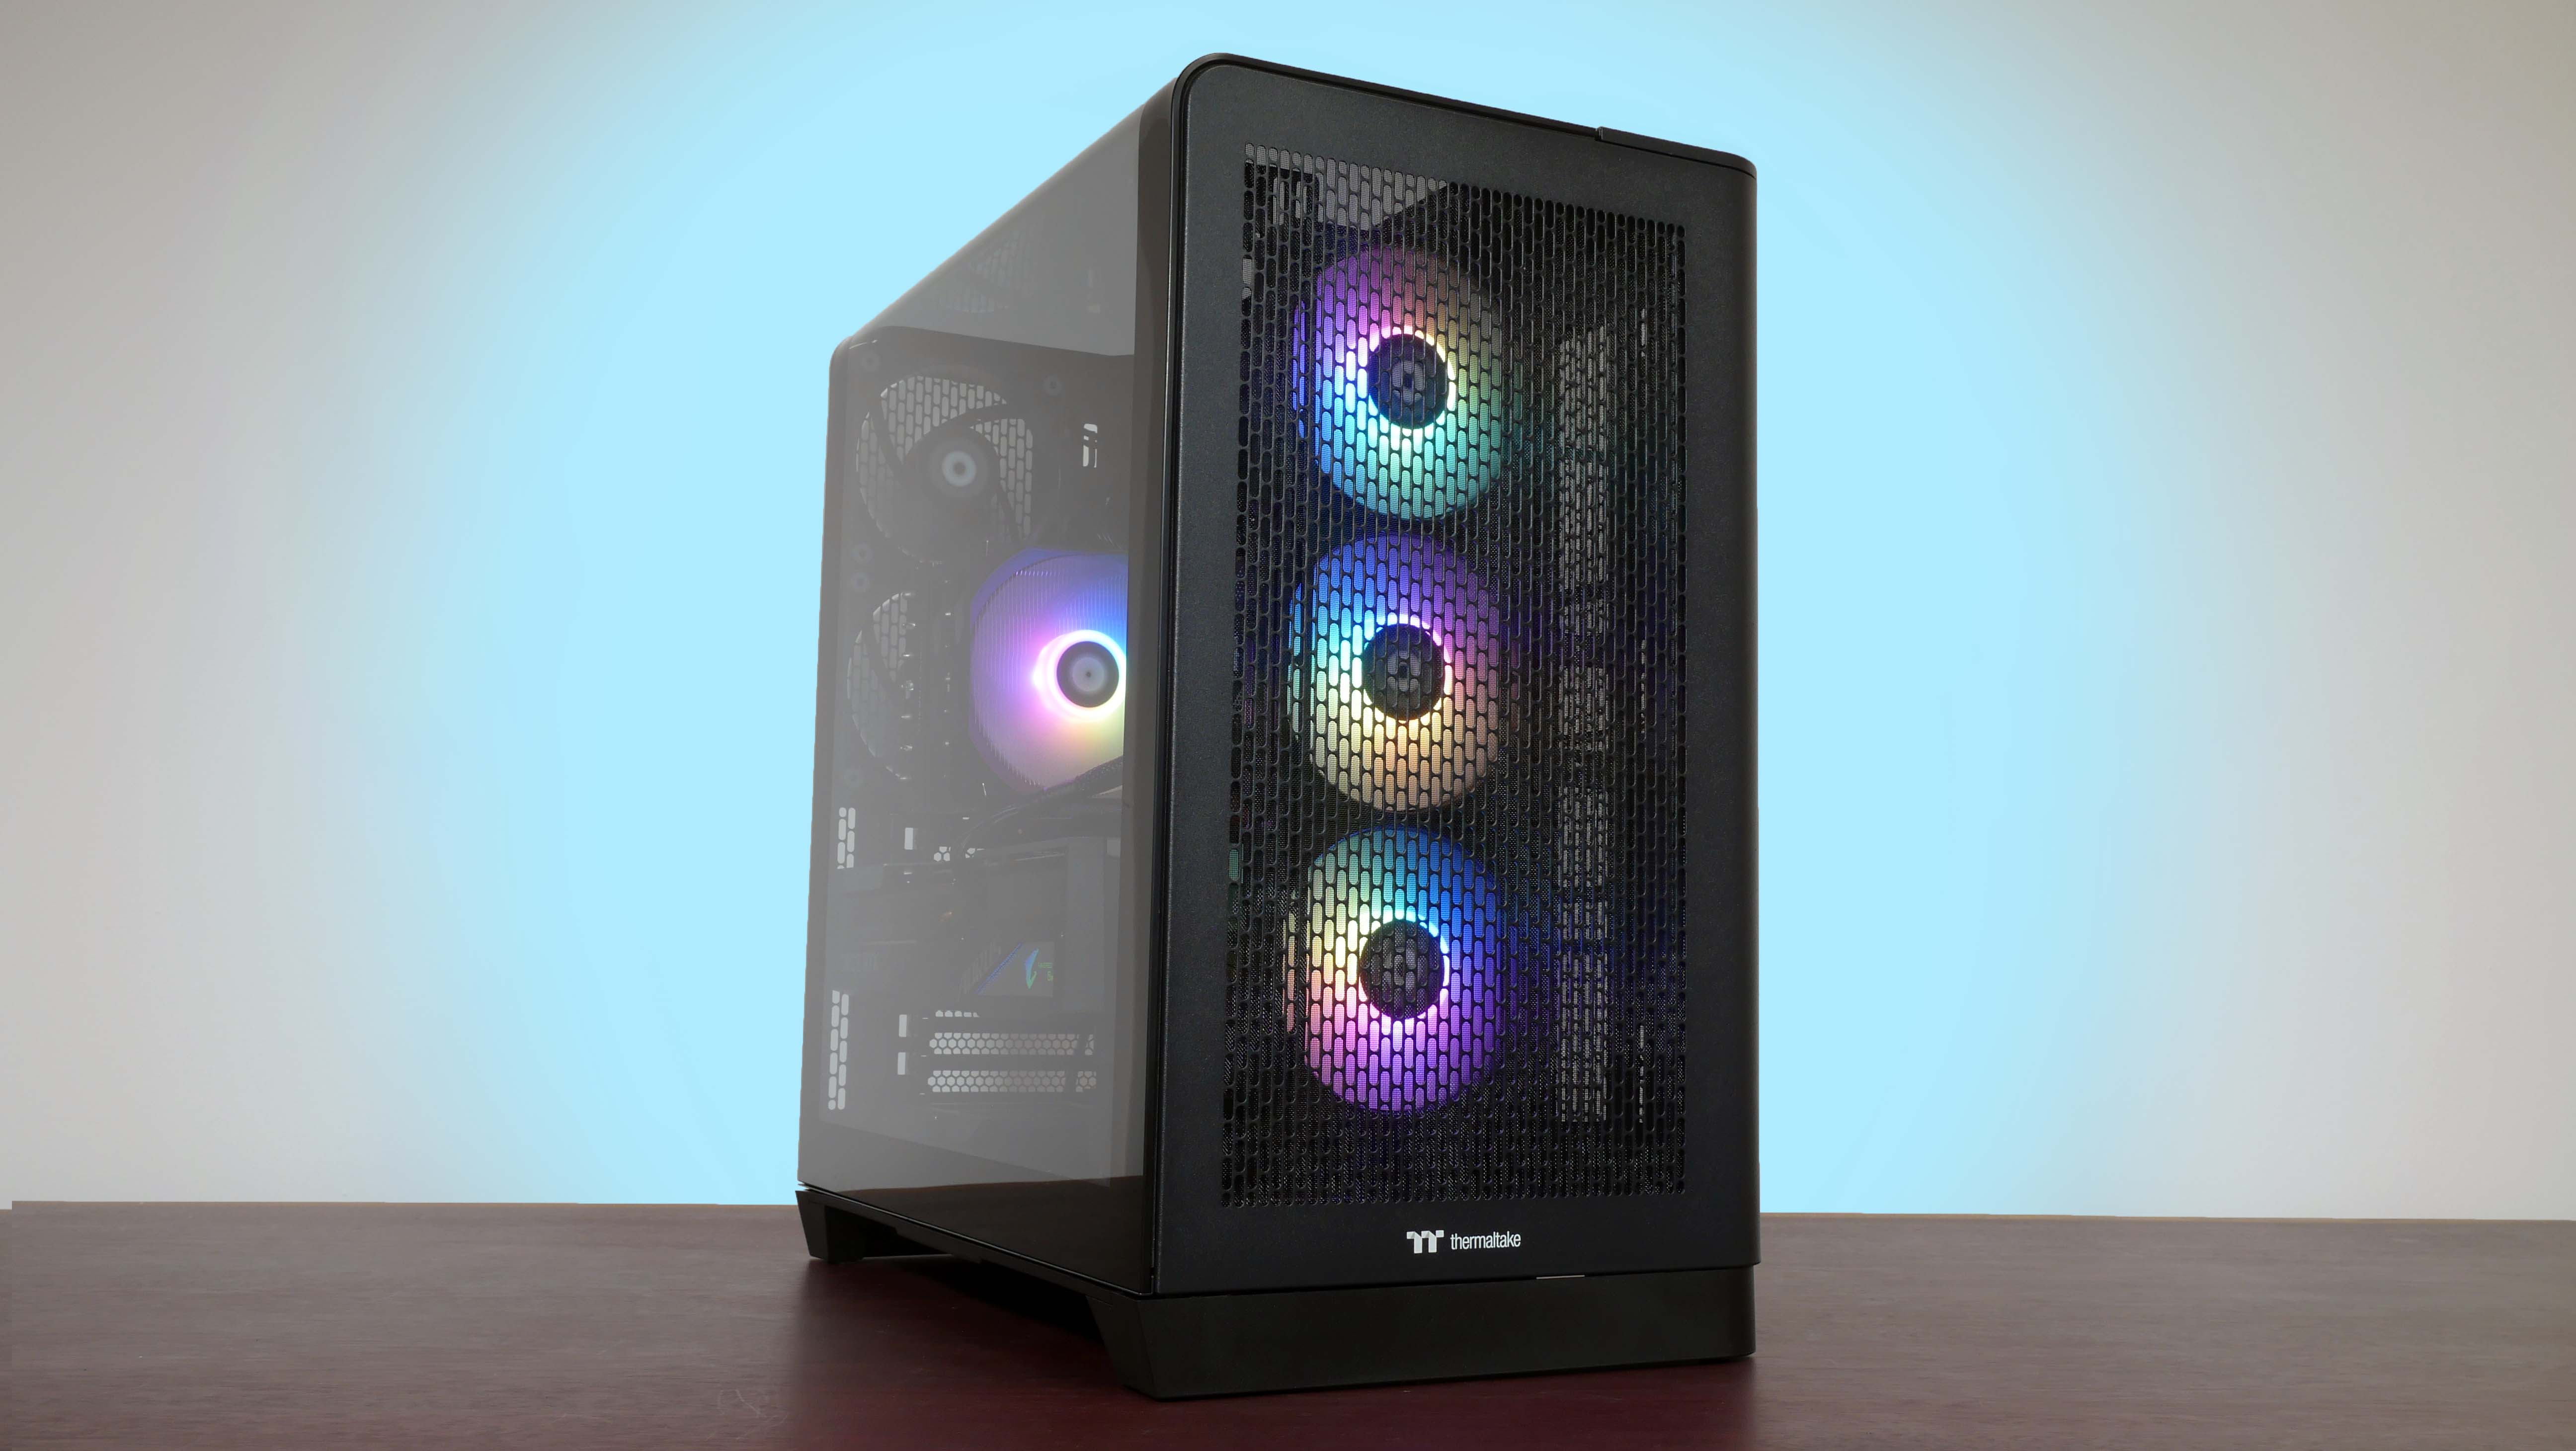
To sum up, I think that the Thermaltake View 390 Air is, a breath of fresh air, pun intended, all thanks to its one-sheet curved tempered glass panel that stretches from the top panel to the left side panel, making for a unique aesthetic that allows it to stand out from the competition. The case is pretty easy to build in and cable manage with all thanks to its spacious interior, where we get lots of support for various permutations of case fans and AIO radiators, and fit and finish is pretty good as well.
Thermal performance is decent, despite the fact that I used only three 120mm intake fans on the front panel and the two preinstalled 120mm exhaust fans on the rear panel for the demo build – I’m sure the case will perform even better from a thermal perspective when you’ve got bottom and side intake fans installed.
In terms of pricing, Thermaltake has a MSRP of $159.99 US dollars for the View 390 Air, placing it in the premium category of PC cases with its price tag. As of the time of writing this article, the case is available to purchase from international PC hardware retailers such as Newegg; readers based in Singapore can purchase the View 390 Air from local PC hardware retailers for a price of around $169 Singapore dollars.
Get this PC case from Amazon: https://amzn.to/456eLcy (affiliate link)
ALKtech may earn commissions from qualifying purchases made using affiliate links, at no extra cost to you as a customer. These commissions go a long way in supporting the platform!
The PC case and CT120 EX ARGB Sync case fans featured in this video were sponsored by Corbell Technologies, the official distributor for Thermaltake in Singapore.