%20500x1200.png?width=200&height=83&name=ALK%20Tech%20Logo%20(TransparentTextured)%20500x1200.png "ALK Tech Logo (TransparentTextured) 500x1200")
The Lian Li B4-mATX is the anointed successor to the popular DAN A3-mATX PC case, where it serves up support for lots of cooling options, decently-sized graphics cards, ATX PSUs, and can even be used in either a horizontal or vertical orientation to save on desk space.
Review Video Timestamps
0:00 Introduction
0:32 Packaging & Accessories
1:06 Exterior Walkthrough
1:52 Panel Removal
2:22 Cooling Features & Layout
4:17 Vertical Orientation Features
6:19 Dimensions & Clearances
6:48 Adjustable GPU Support Bracket
6:55 Dimensions & Clearances Continued
7:46 2.5" & 3.5" Drive Bays
8:26 PC Building Experience
12:12 Cable Management
12:41 Demo Build Finishing Touches
13:12 Test Setup & Thermal Performance
14:17 Conclusion & Pricing
Introduction
If you're a fan of small form factor (SFF) PC builds, you'd probably agree that the DAN A3-mATX is arguably one of the best compact microATX PC cases available on the market. No wonder then, that Lian Li's pulled out the stops to try and make its successor, the B4-mATX, as worthy a successor as possible.
Sporting a 21.3L chassis design, the B4-mATX features a high airflow design with support for lots of permutations of cooling hardware, decently-sized graphics cards of up to 358mm in length and not forgetting, ATX and SFX PSUs. A new feature that this case has over its predecessor is its support for either a horizontal or vertical orientation to suit different desk layouts, and an optional "Vertical Aerodeck" airflow accessory to further improve airflow for end-users intending to use the B4-mATX in the vertical orientation. Read on to learn more about this PC case, and to see it in action as part of a demo PC build!
Summary of Specifications
- Colour: Black or white, also available with wood front panel
- Materials: Steel, plastic, wood (for variant with wood front panel)
- Dimensions: 420mm x 191mm x 288mm
- Motherboard Support: Micro ATX, Mini ITX (back-connect motherboards not supported)
- Expansion Slots: 4
- Drive Support: up to 1x 2.5" storage drive behind front panel, up to 1x 2.5" or 3.5" storage drive on bottom panel
- Front I/O: 1x USB 3.2 Gen 2x2 Type-C, 2x USB 3.0 Type-A. 1x 3.5mm microphone/headphone combo jack
- Included Fans: 2x slim 120mm fans on top panel
- Top Panel Cooling Support: up to 2x slim 120mm fans
- Front Panel Cooling Support: up to 1x slim 120mm fan
- Side Panel Cooling Support: up to 3x 120mm or 2x 140mm fans (depending on hardware used)
- Bottom Panel Cooling Support: up to 3x 120mm fans or 2x 140mm fans (depending on hardware used)
- Rear Panel Cooling Support: up to 1x 120mm fan
- PSU support: ATX (up to 140mm in depth), SFX
- Official Product Page: https://lian-li.com/product/b4-matx/
Packaging & Accessories
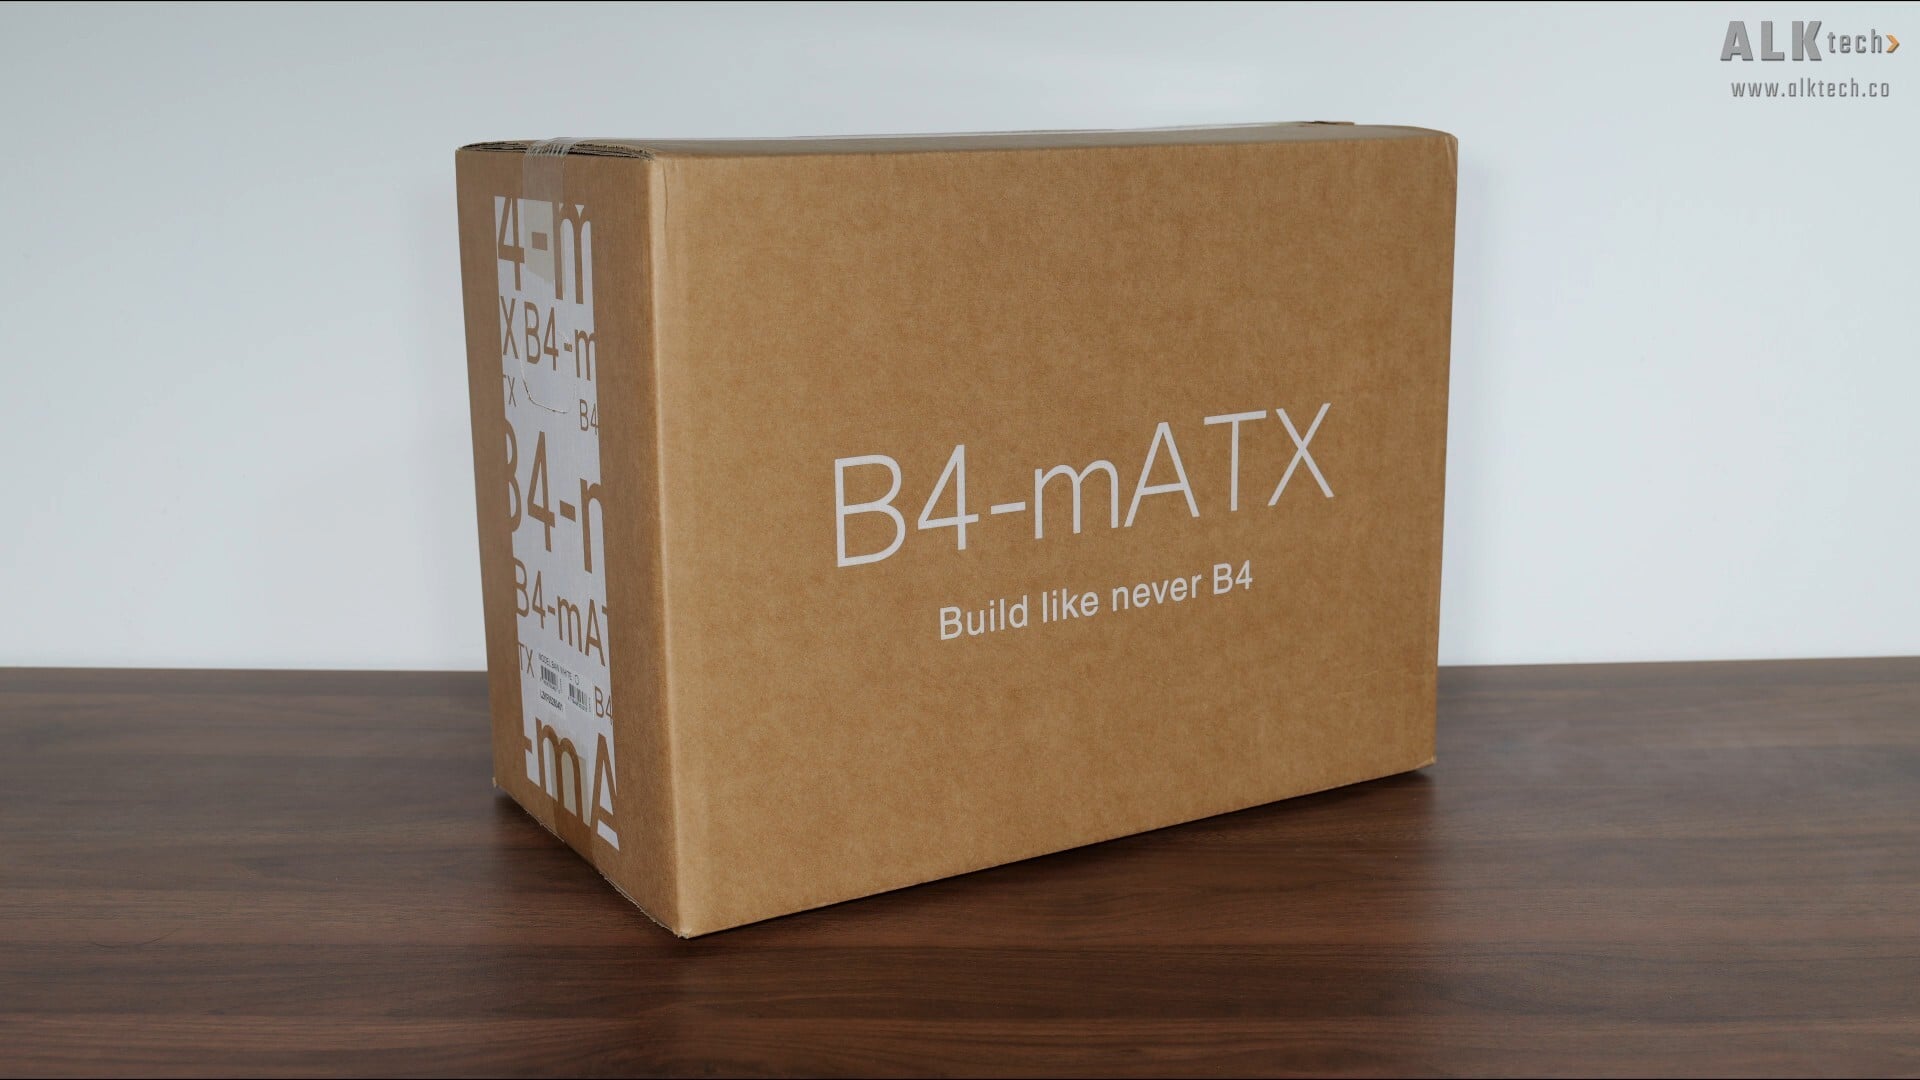
In terms of packaging, the B4-mATX ships in a plain brown cardboard box, nothing out of the ordinary here.
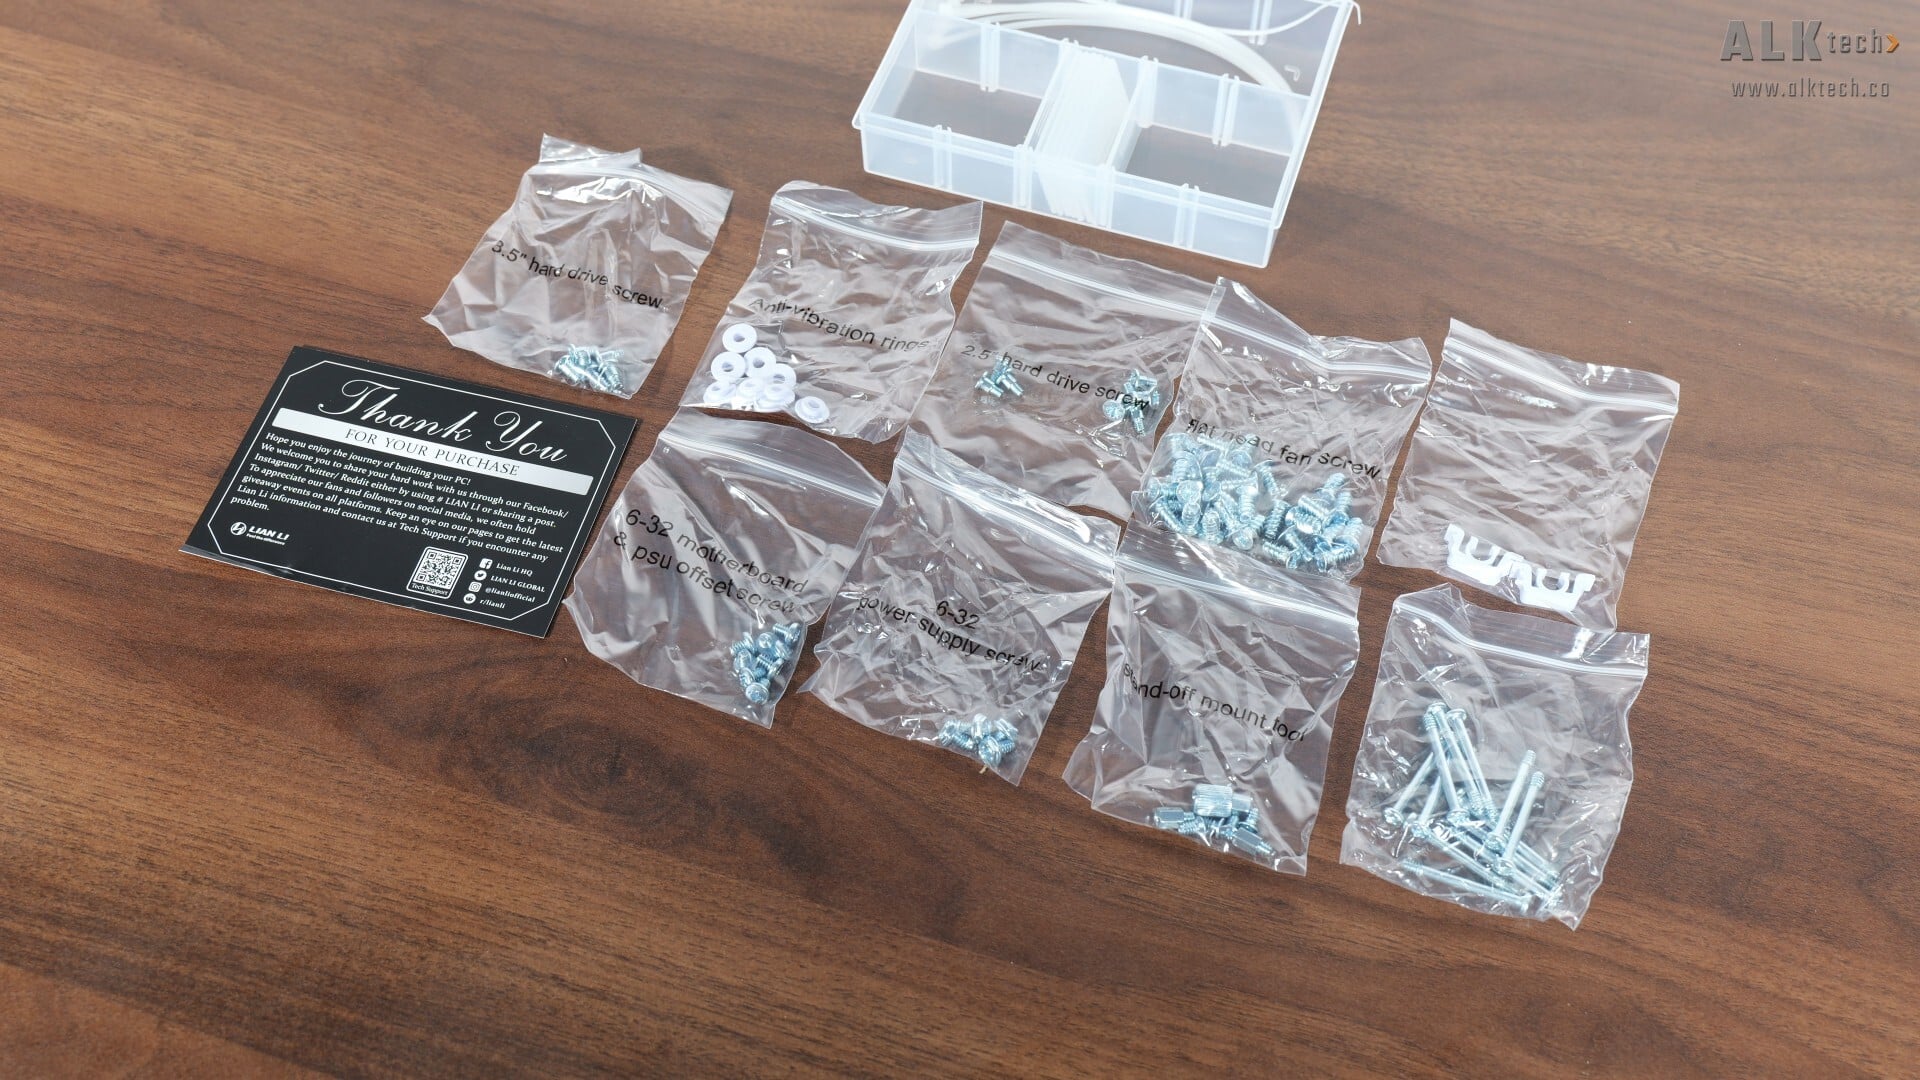
Accompanying the B4-mATX is an instruction manual, as well as a single box of accessories. Within the box of accessories, we get a thank you note, a whole bunch of screws, cable ties, rubber grommets for storage drive mounting purposes, as well as spare friction clips for the top panel of the case.
Exterior Walkthrough
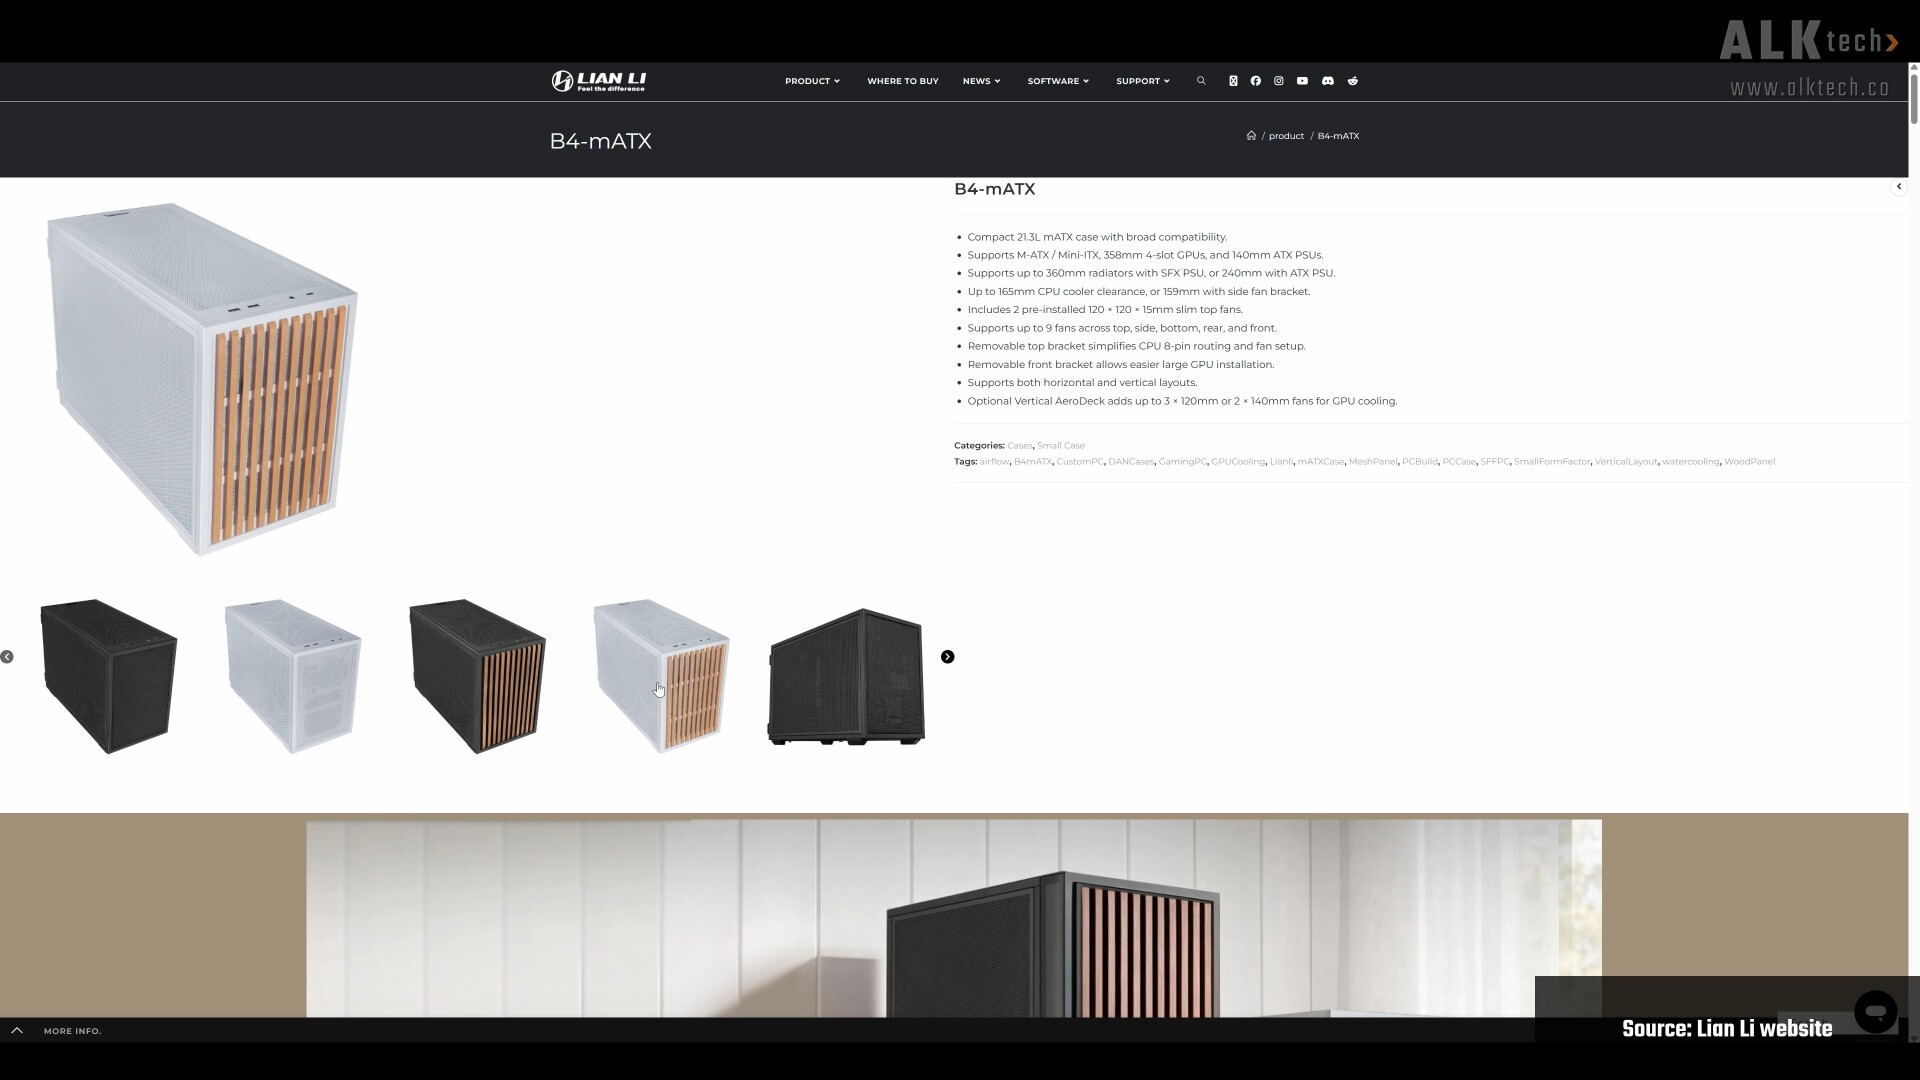
This case has a compact footprint of just 21.3 litres, where it’s available in either black or white colourways, and you get to choose between two front panel styles: a perforated mesh panel for a more airflow-focused look, or a real wood panel for a more refined aesthetic – you get a choice of two wood types too, either beech or walnut. The unit that Lian Li’s sent over for this review is the white variant with the mesh front panel.
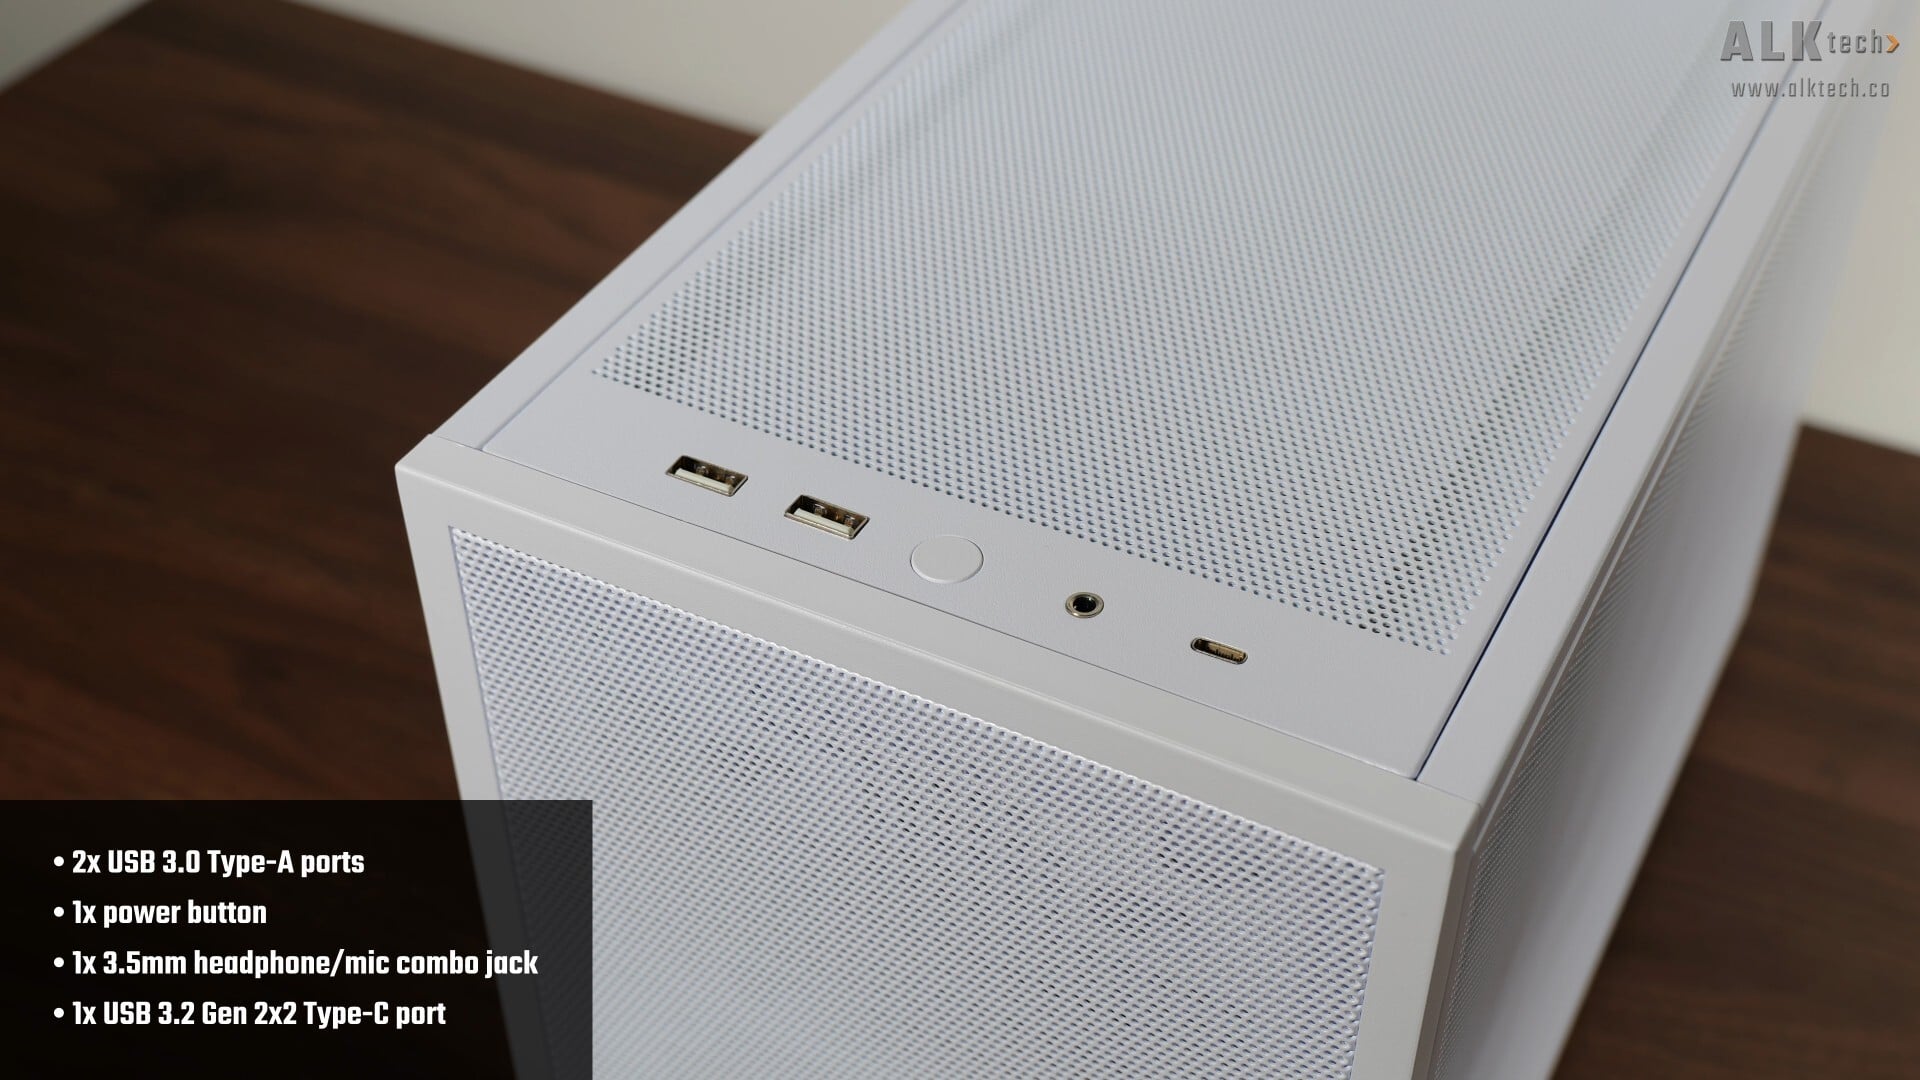
Front panel connectivity wise, we get two USB 3.0 Type-A ports, a power button, a 3.5mm audio combo jack, as well as a USB 3.2 Type-C port that supports 20Gbps transfer speeds.
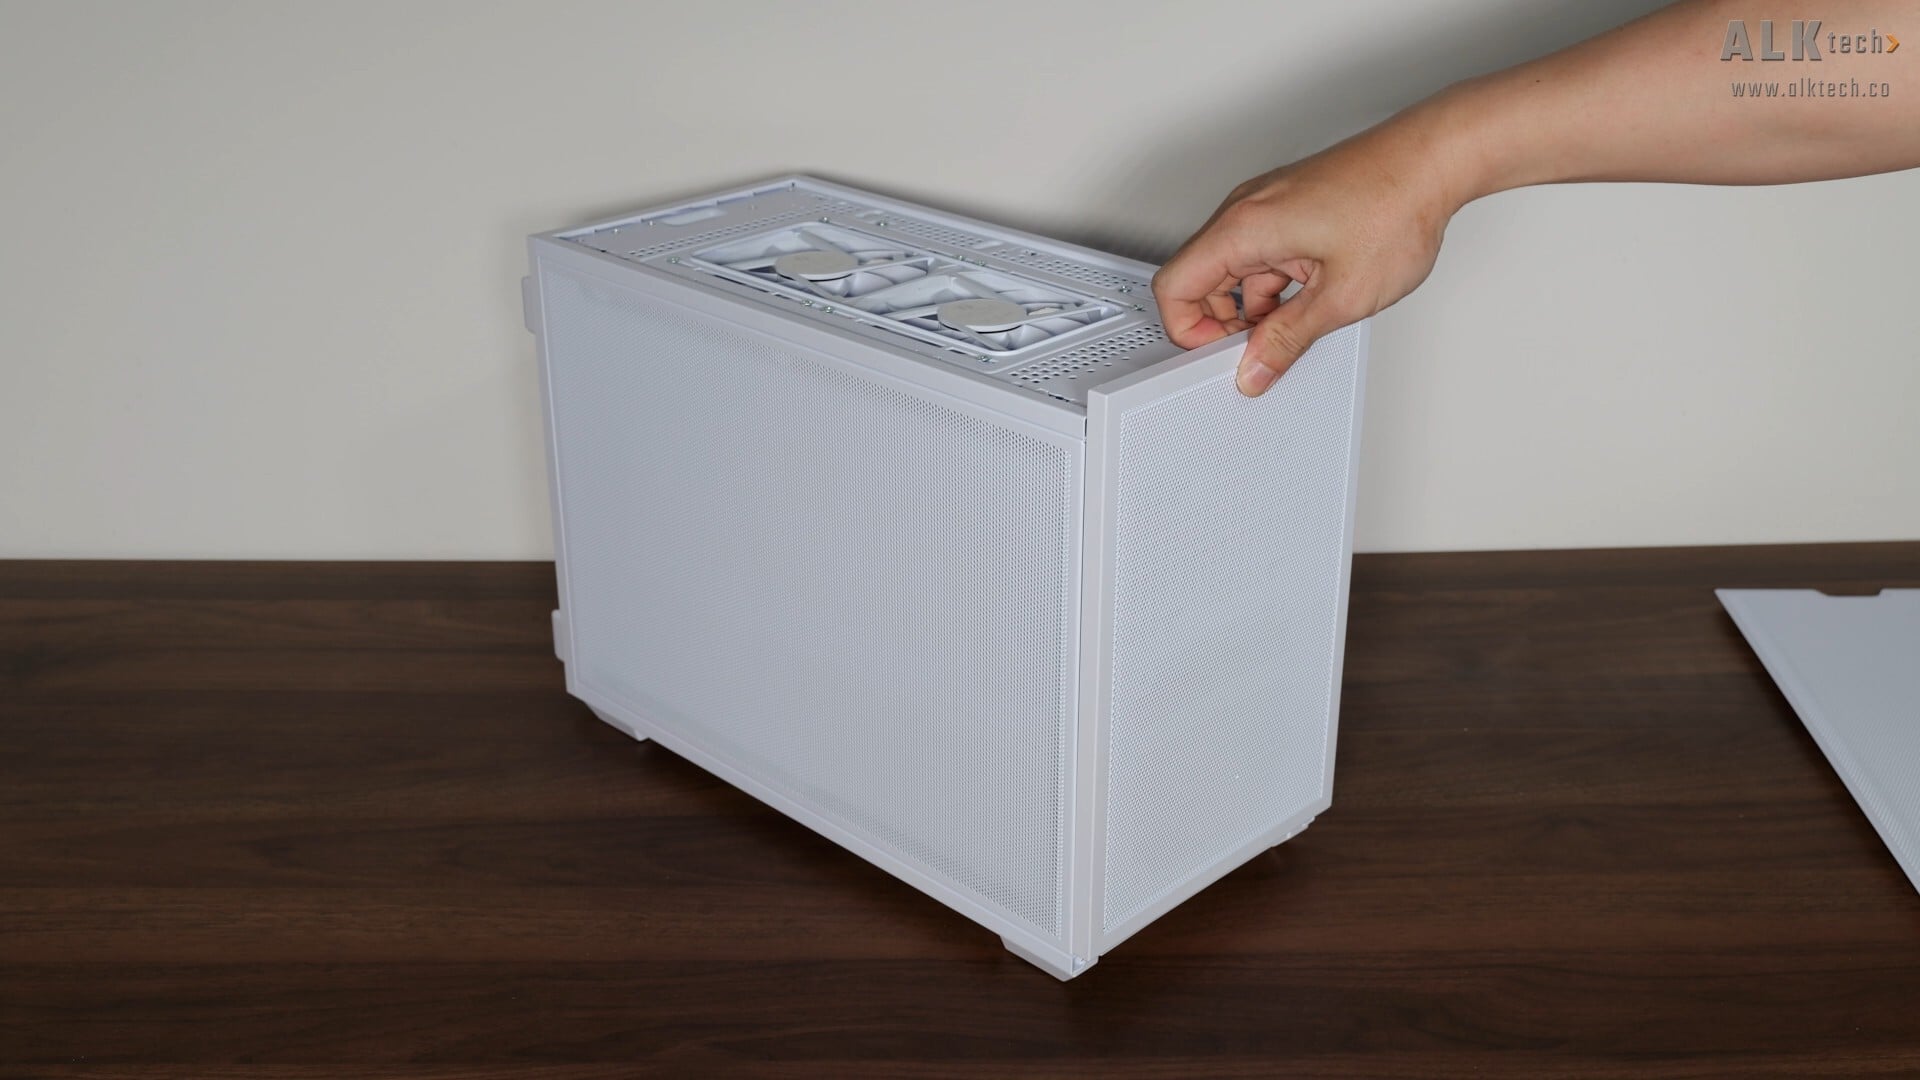
All of the panels on the B4-mATX are tool-less, where the top panel is secured via push-pins and can be pried off easily. Once done, you can then slide the front mesh panel off, and do the same for the two side panels as well.
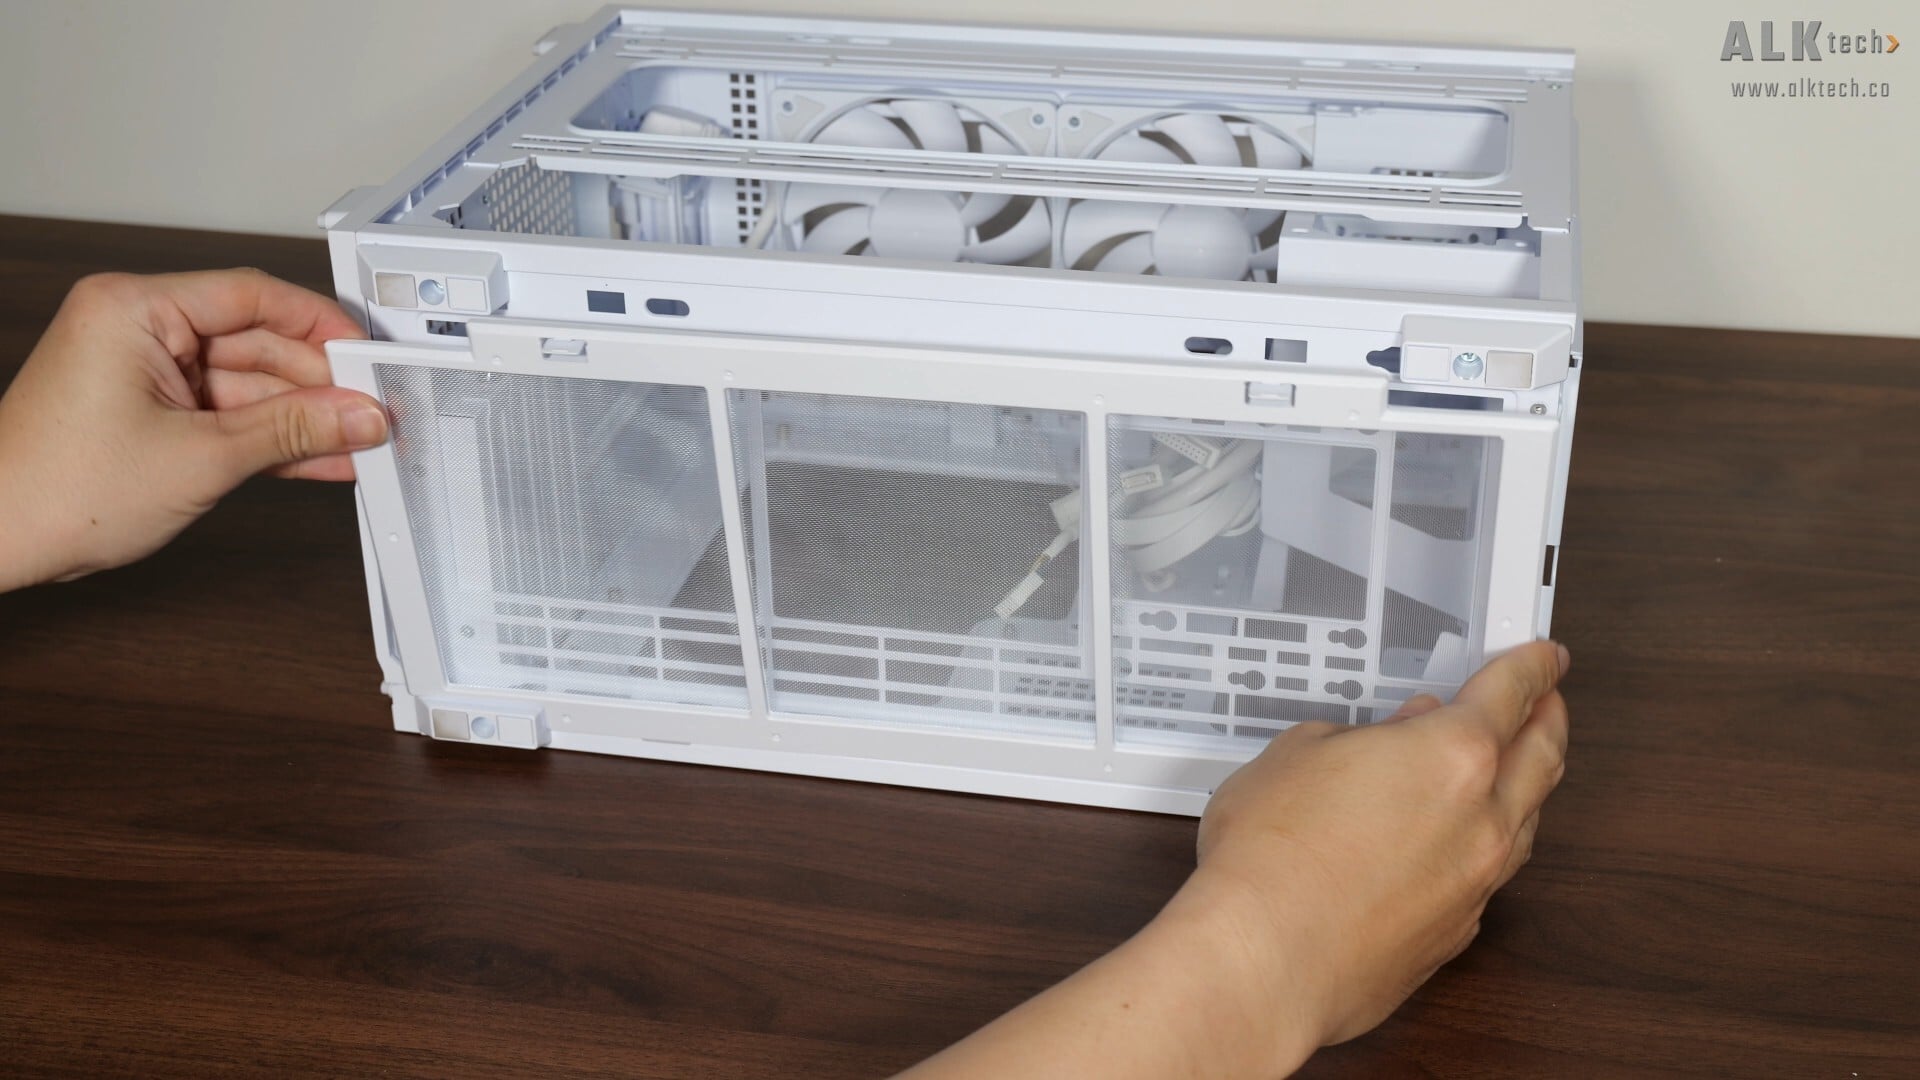
Over on the bottom panel, we get a dust filter for the bottom intakes that’s held in place by two friction clips.
Cooling Hardware Support
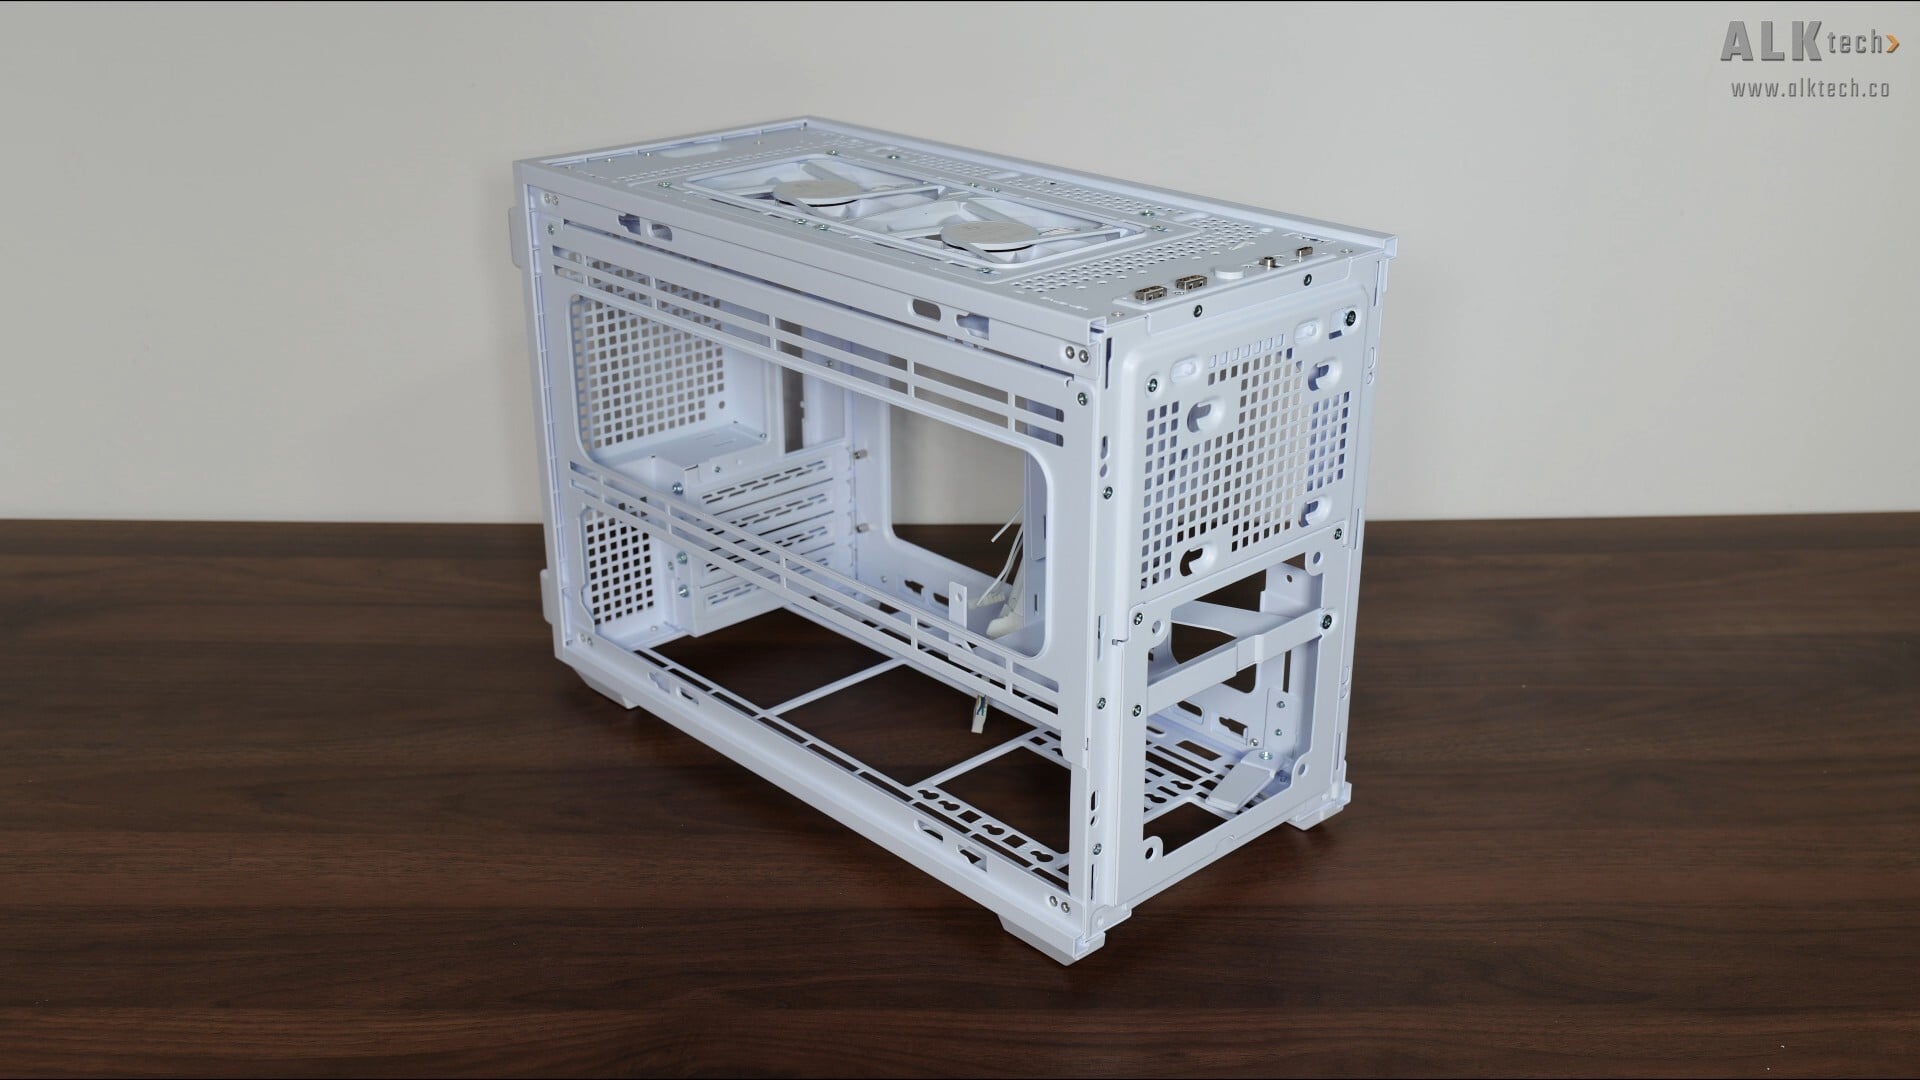
Cooling wise, the B4-mATX supports up to nine fans in total across the top, sides, bottom, rear and front of the case.
.jpg)
.jpg)
On the top, we get two pre-installed 120mm slim fans in the exhaust orientation on a removable fan bracket - this removable bracket makes cable management to the motherboard easier, and also makes it easier for one to reconfigure the airflow of the top exhaust fans if you're going down the air cooling route, where Lian Li recommends to change the orientation of the rightmost fan such that it serves as an intake fan instead for a CPU air cooler.
.jpg)
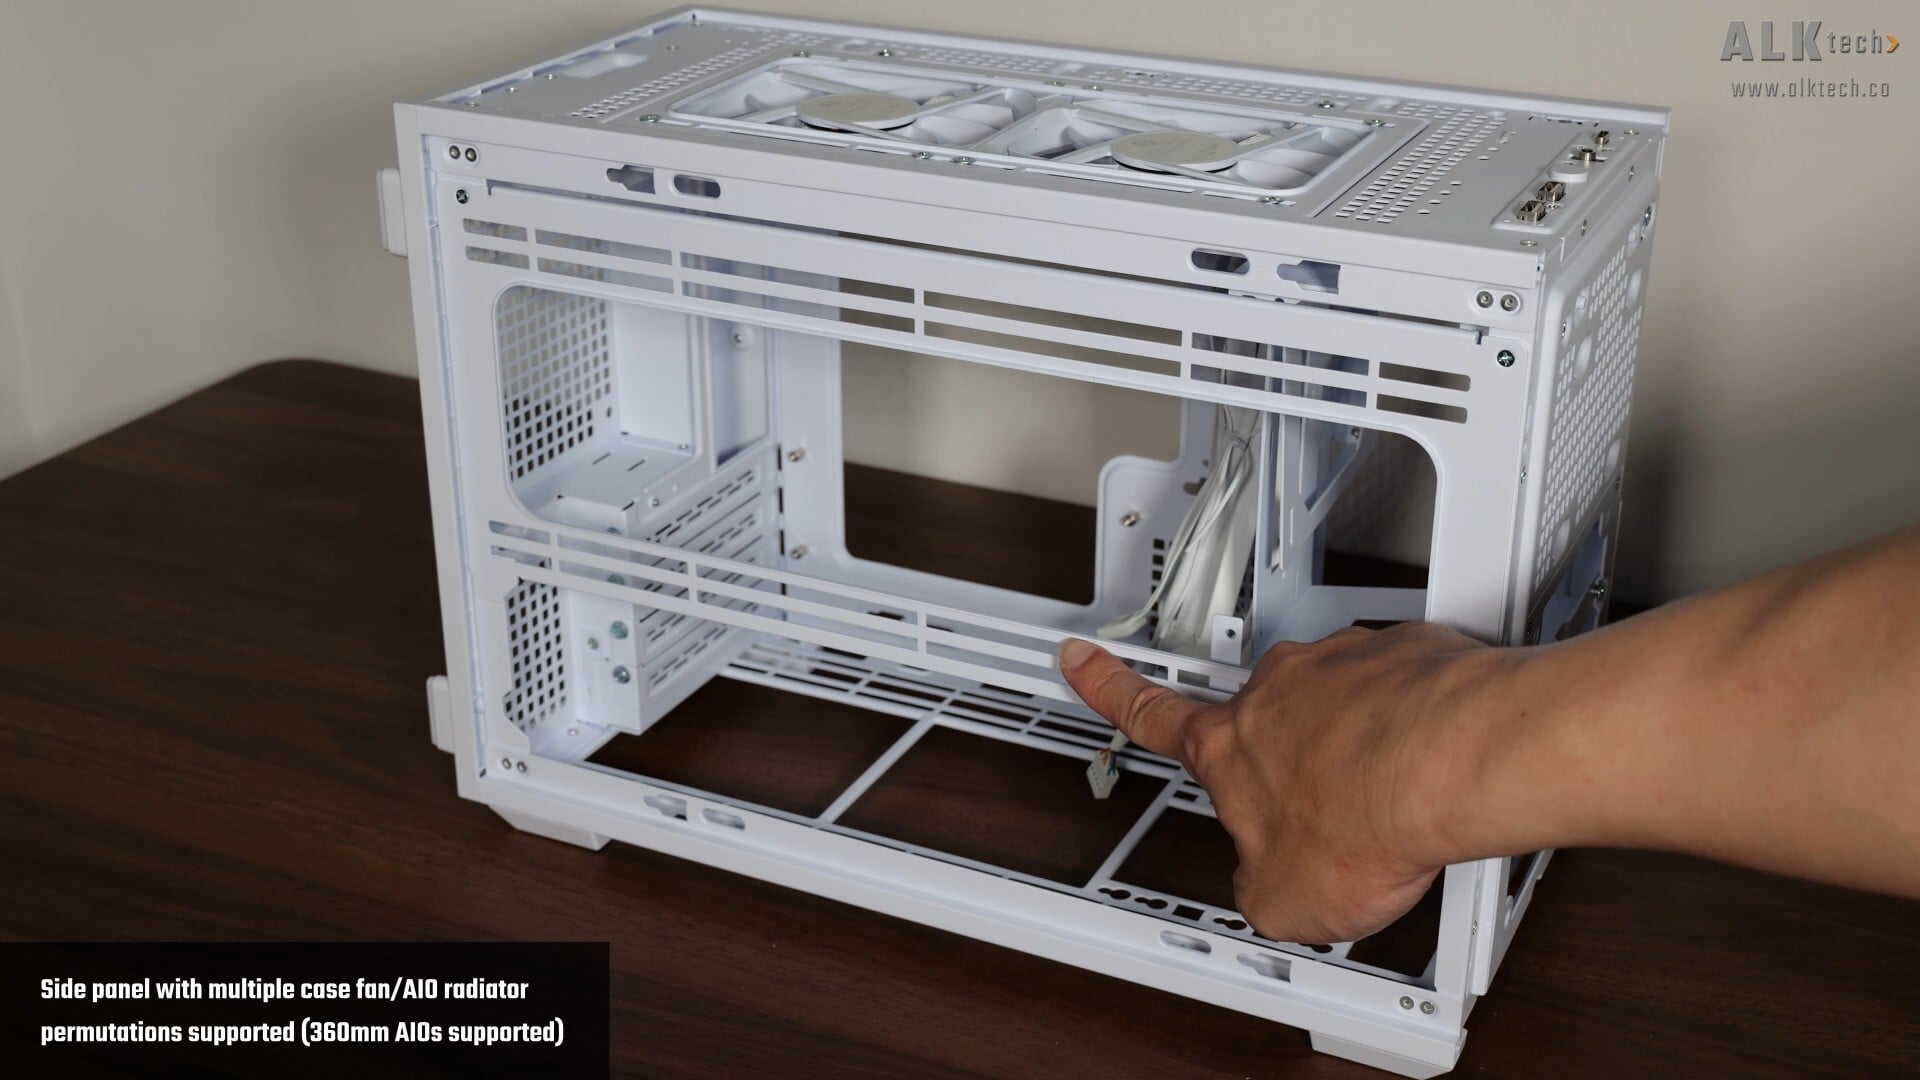
Over on the side, the frame higlighted above is where you’d install your side-mounted fans or a side-mounted AIO radiator, of which we get a fair number of permutations, all depending on whether you’re running an ATX or SFX PSU for your build - shown above is a table on the possible hardware configurations that I've lifted from Lian Li's product page.
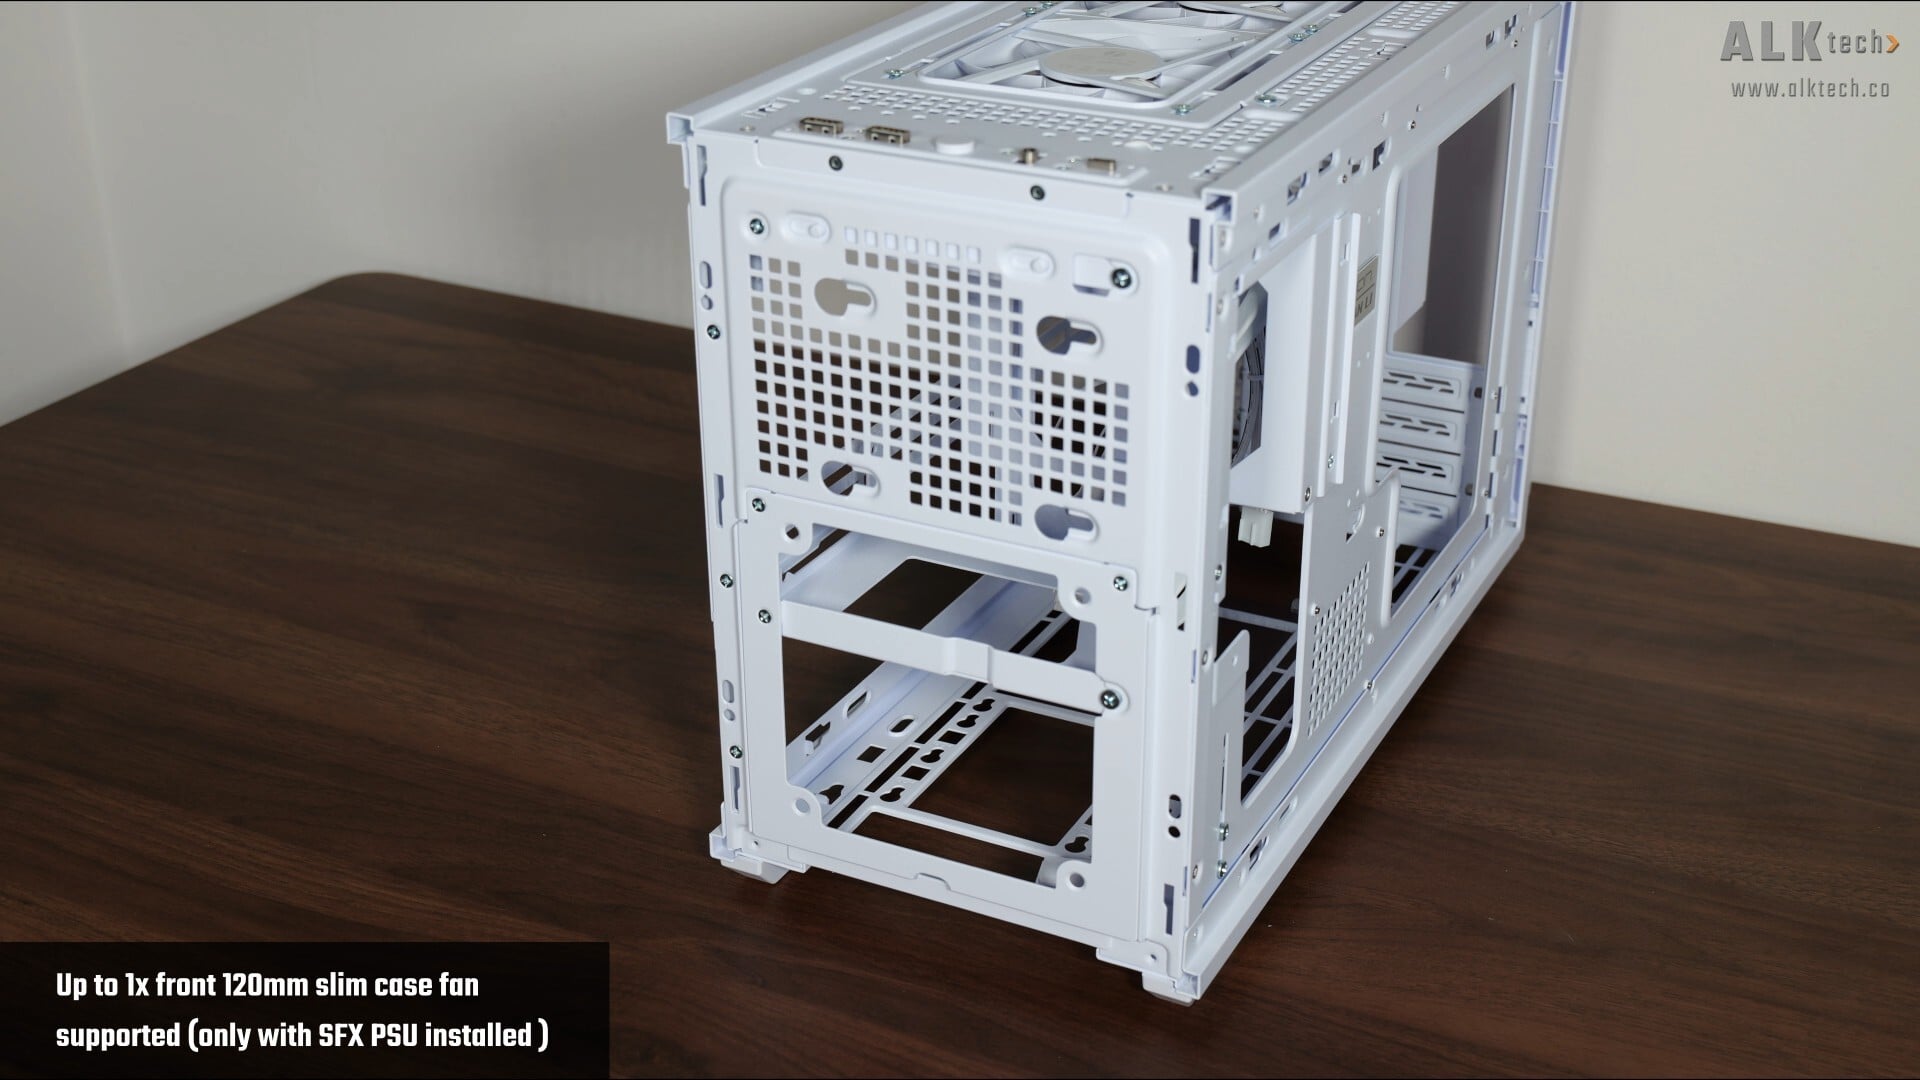
If you're running an SFX PSU for your PC build, the case also supports a single 120mm slim fan up behind the front panel.
.jpg)
.jpg)
One neat feature that the B4-mATX has is a reversible rear fan bracket, where it comes preinstalled in this manner for when you have an AIO CPU cooler installed. The bracket can be flipped the other way around to bring the rear exhaust fan closer to your CPU air cooler’s fan, where Lian Li claims that this can improve CPU temperatures by up to 1°C. Do note that this rear bracket only supports 120mm fans.
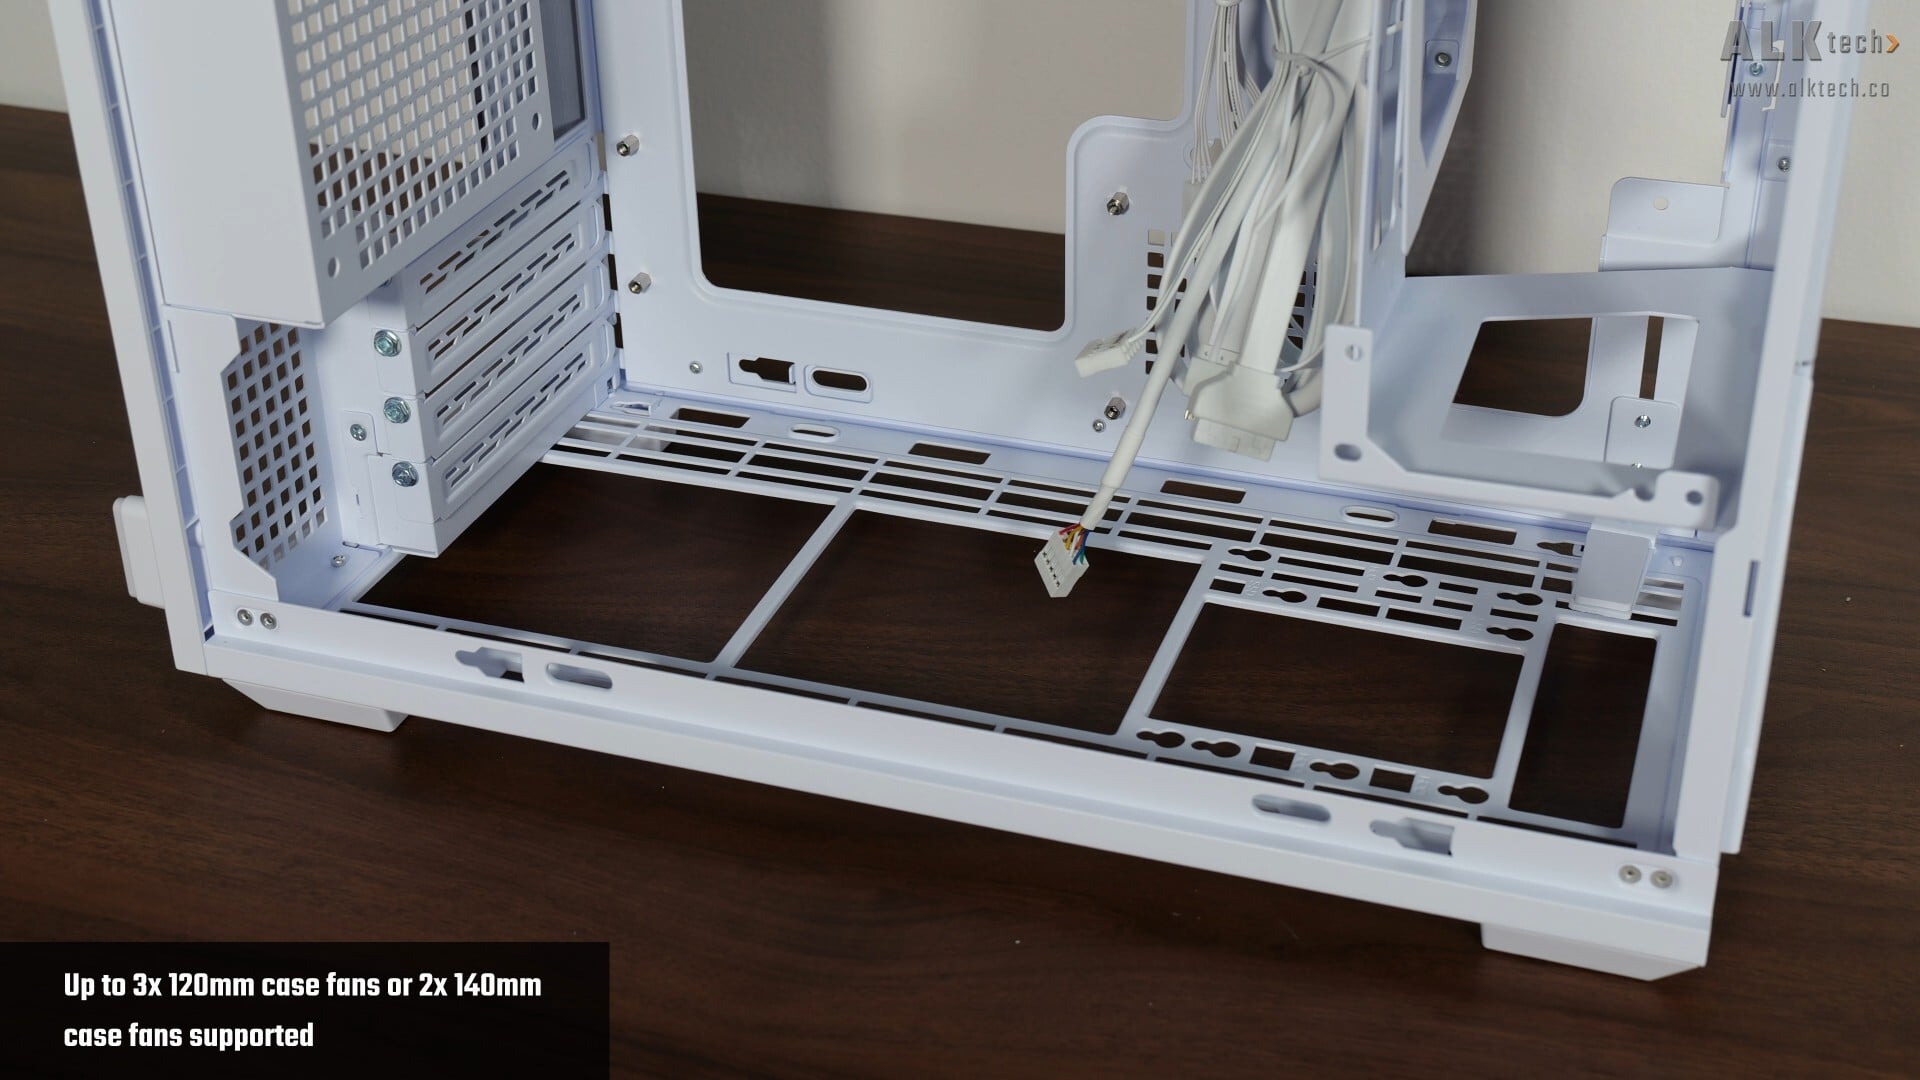
Finally, over on the bottom panel, we get support for up to three 120mm case fans or two 140mm case fans. The number of case fans supported will depend on whether you’ve got a storage drive installed on the bottom panel, which I’ll talk about later in this article.
Horizontal & Vertical Case Orientations
.jpg)
.jpg)
One of the headline features of the B4-mATX is its ability to easily switch between a horizontal and vertical case placement orientation. Switching between the two orientations is fuss-free, where the case ships with integrated feet for the vertical orientation, so there's no need for any additional hardware to make the switch.
.jpg)
The I/O panel, which sits on the top of the case in horizontal mode, ends up at the front once you've rotated the case into vertical mode.
.jpg)
.jpg)
On that note, we also get a rotatable AC power connector, which you can face outward for easy cable access in horizontal mode, or rotate inward in vertical mode to keep the power cable from protruding outward and getting in the way of things.
.jpg)
The internal power cable is pre-secured with cable ties to prevent it from rubbing against the chassis when rotated, which is a much appreciated feature for sure.
.jpg)
For cable routing in vertical mode, there's a bracket pictured above that helps to route your rear I/O and power cables cleanly through the bottom of the case. Do keep in mind that Lian Li recommends a total clearance of 52mm for your HDMI or DisplayPort cable for when the case is placed in he vertical configuration, so do check that your cables and any adapters you're using will fit accordingly.
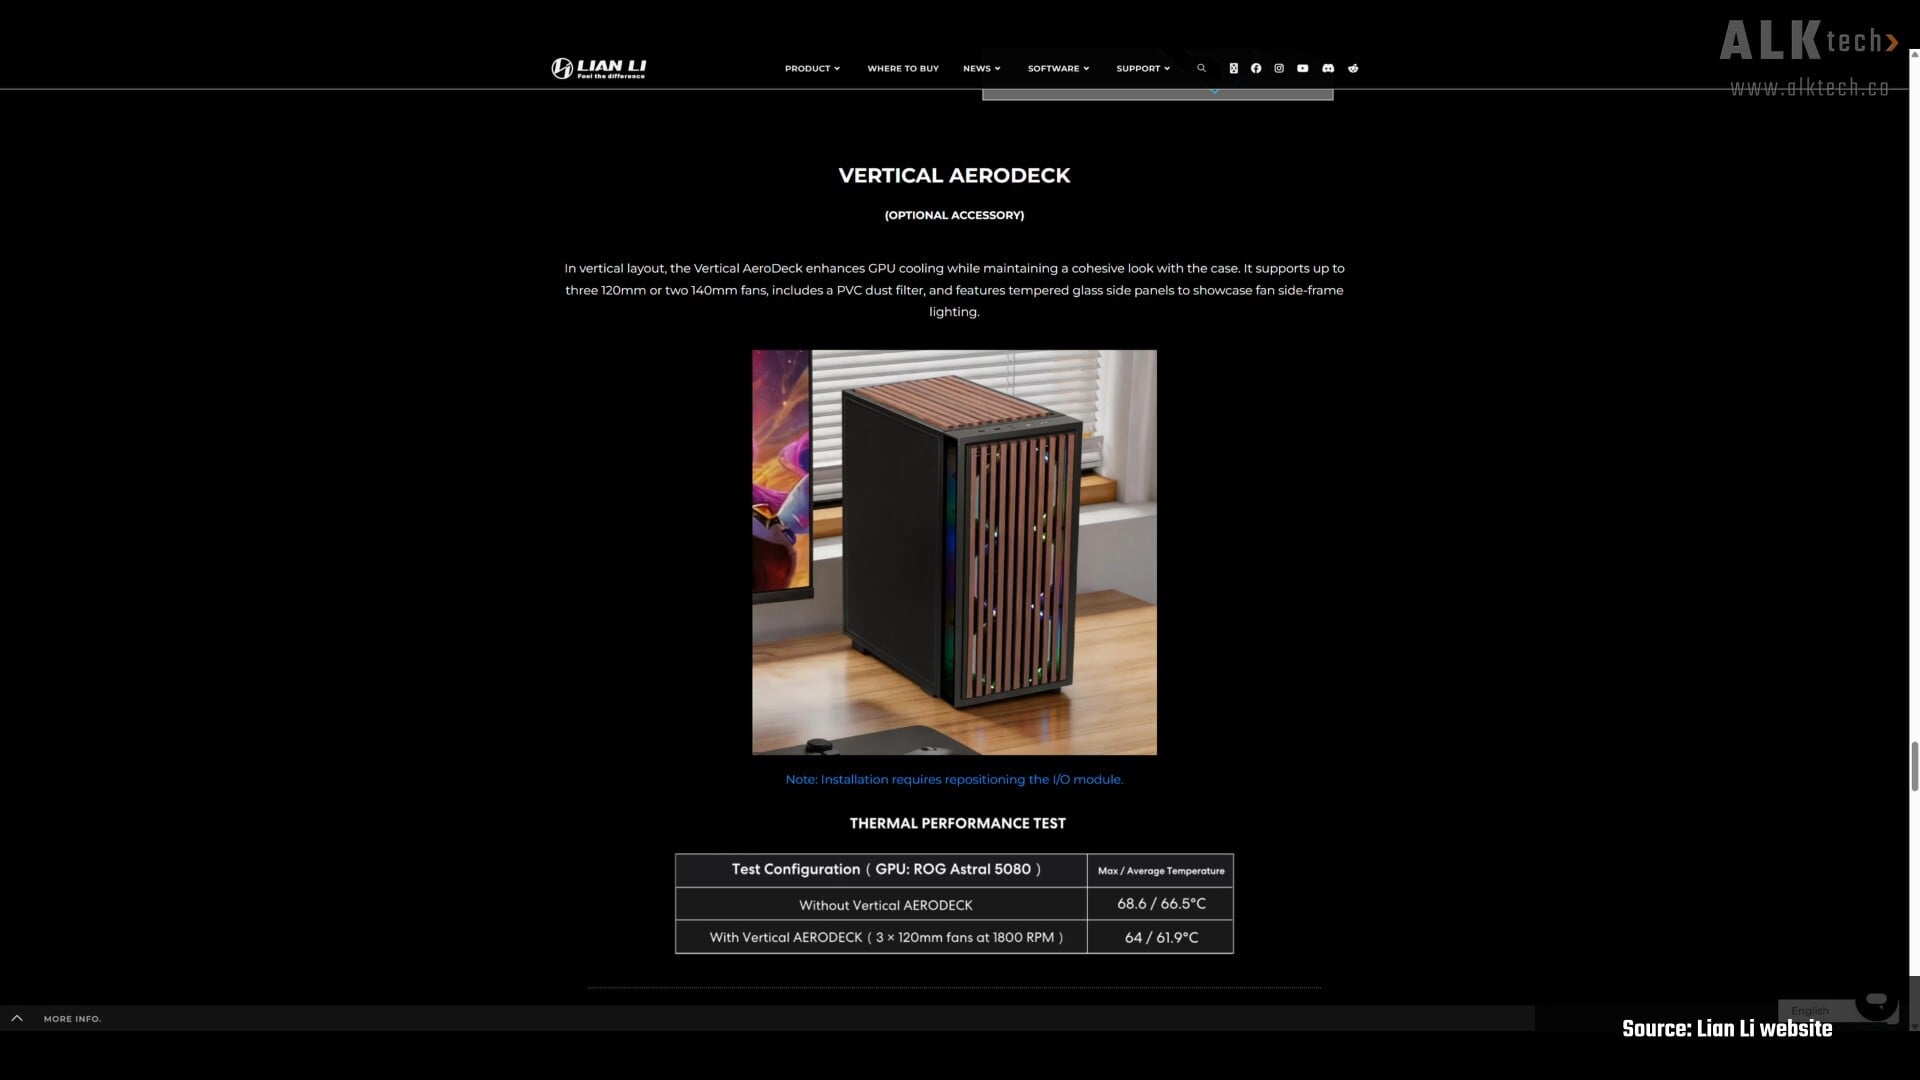
If you're going with the vertical layout, Lian Li's got an optional accessory that’s worth a quick mention: the Vertical AeroDeck. This is sold separately, and essentially functions as a bolt-on fan shroud that attaches to the bottom of the case, adding support for either three additional 120mm fans or two 140mm fans, specifically to help with GPU cooling when the case is in vertical mode.
Unfortunately, I don't have the Vertical AeroDeck on hand for this review, so I can't speak to the actual installation experience, or how it can improve the thermal performance of the B4-mATX. On paper though, it looks and sounds like a neat way of adding some extra cooling if you're going all-in on the vertical orientation with this case.
Physical Dimensions & Clearances
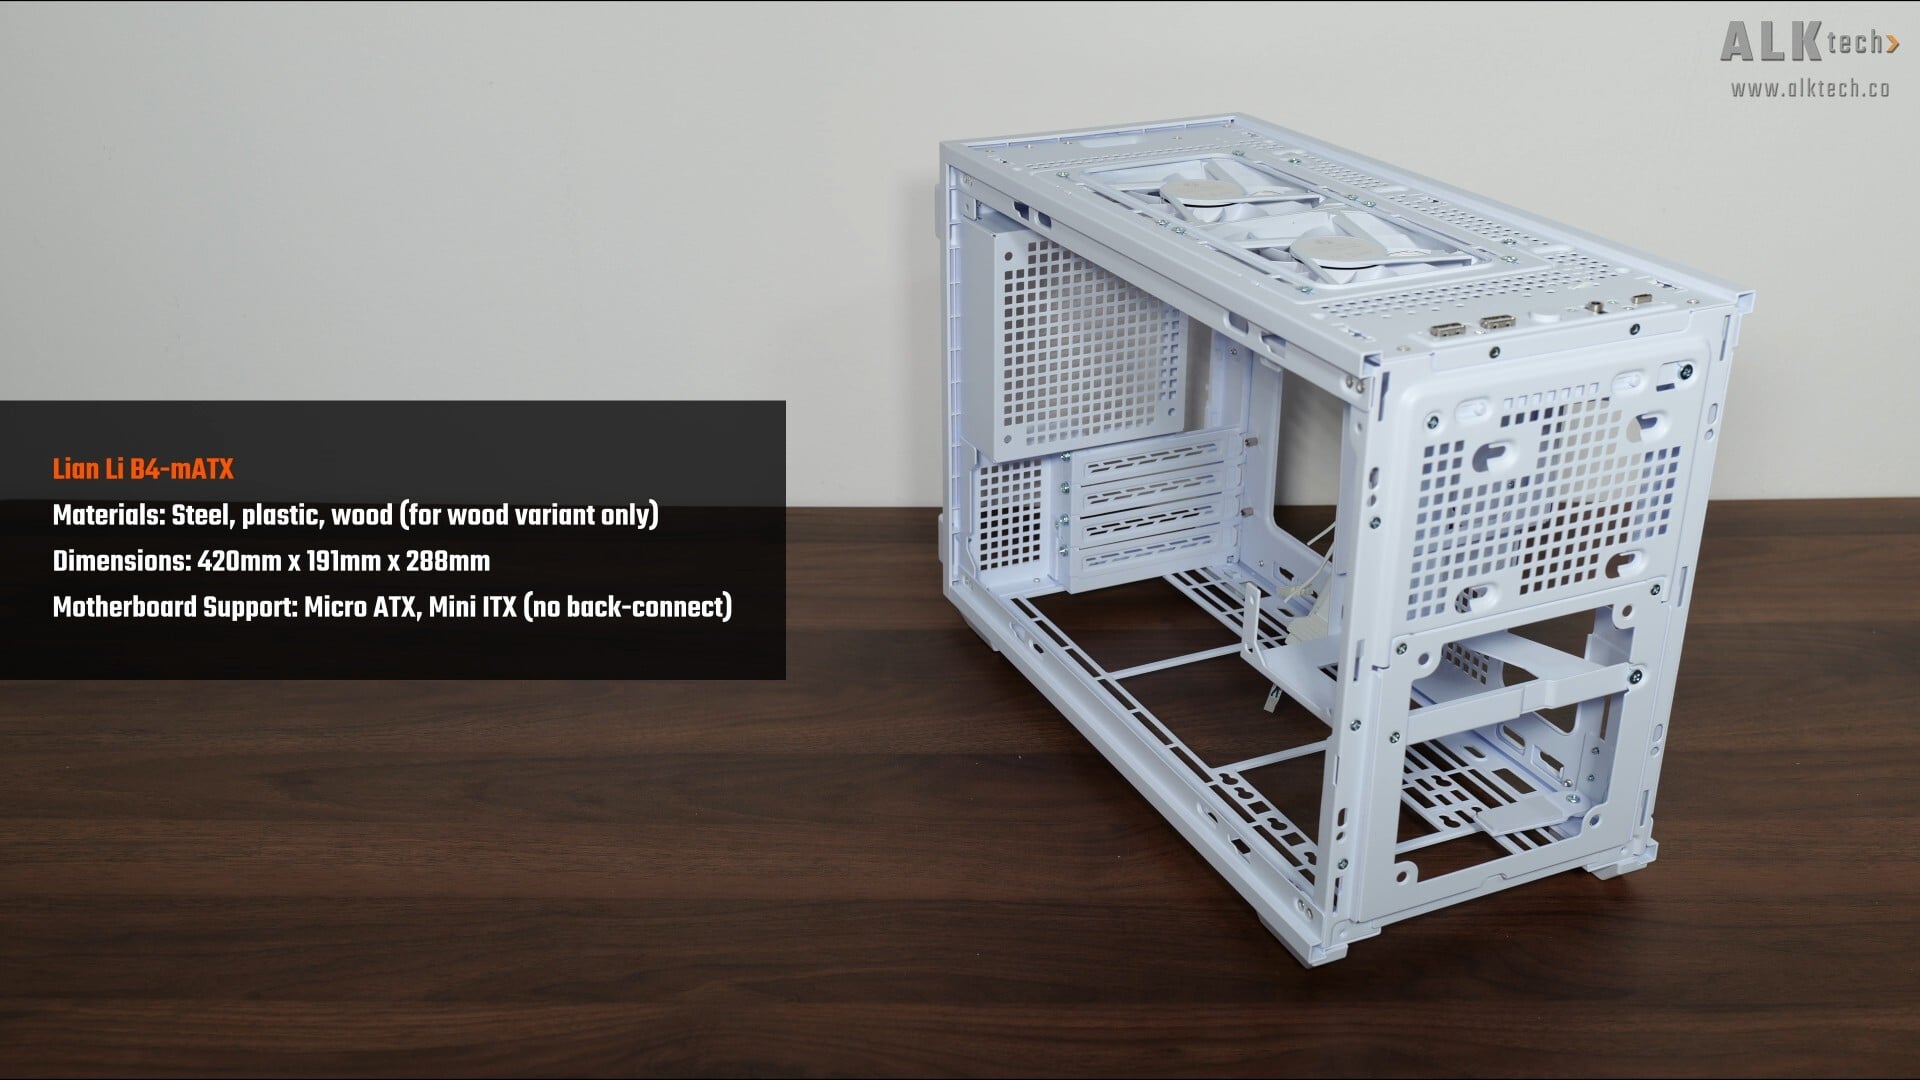
The B4-mATX has the dimensions as stated above...
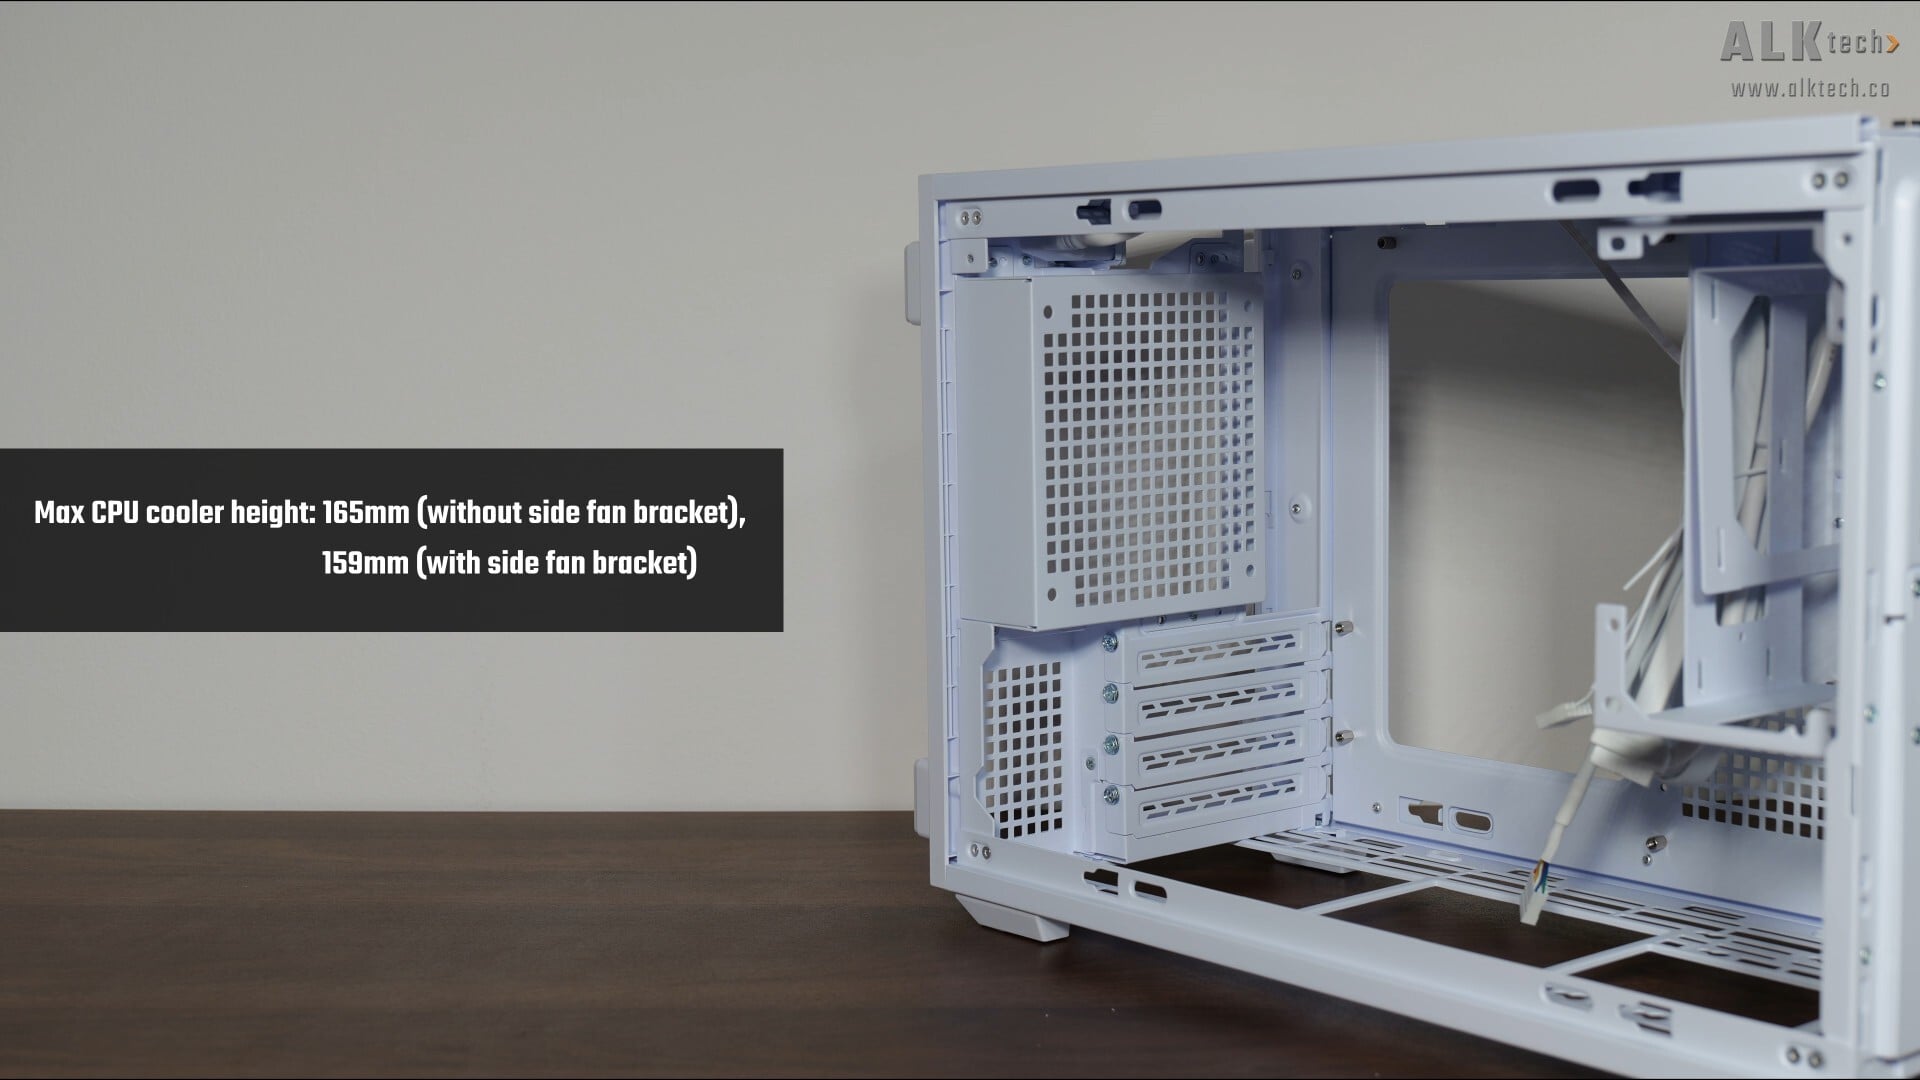
...and for folks intending to use an air cooler for their processor, do note that the case supports CPU air coolers of heights no more than 165mm without the side fan bracket installed. With the said bracket in place, we get up to 159mm of height clearance instead.
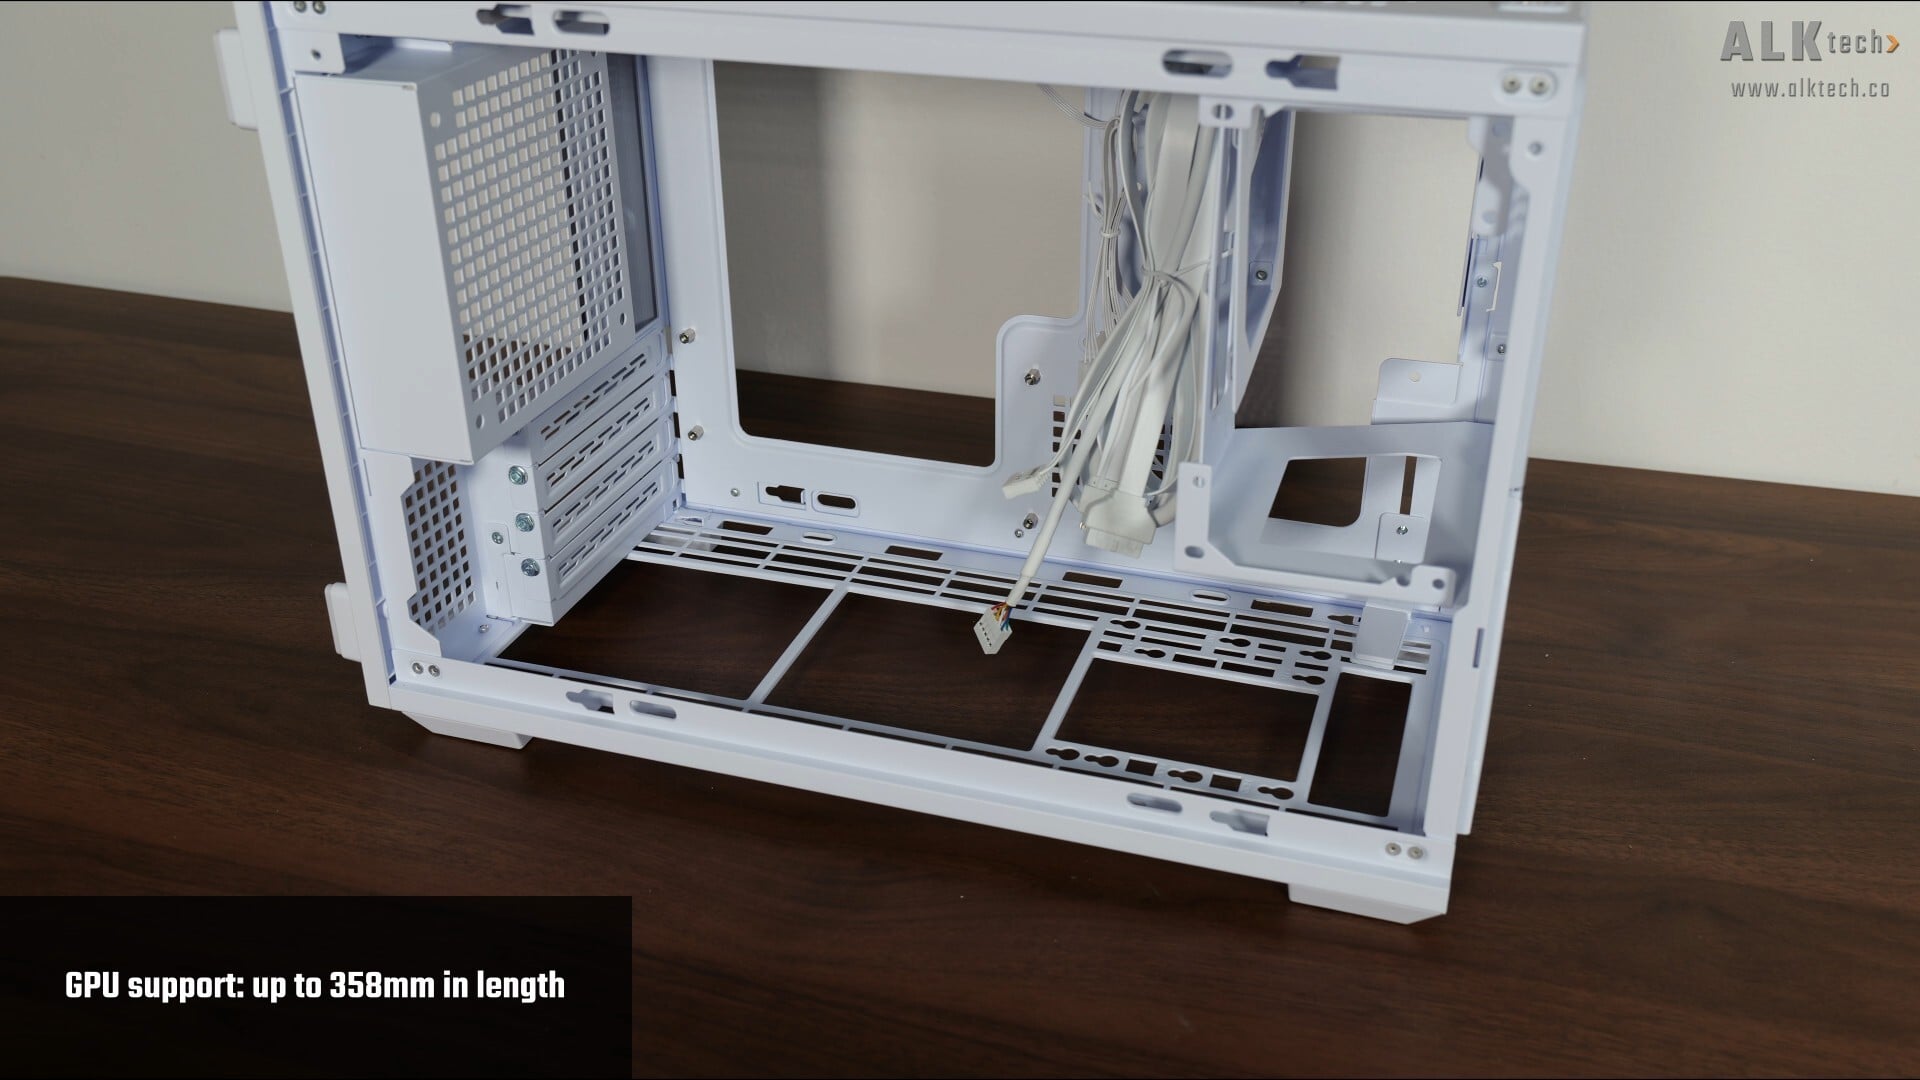
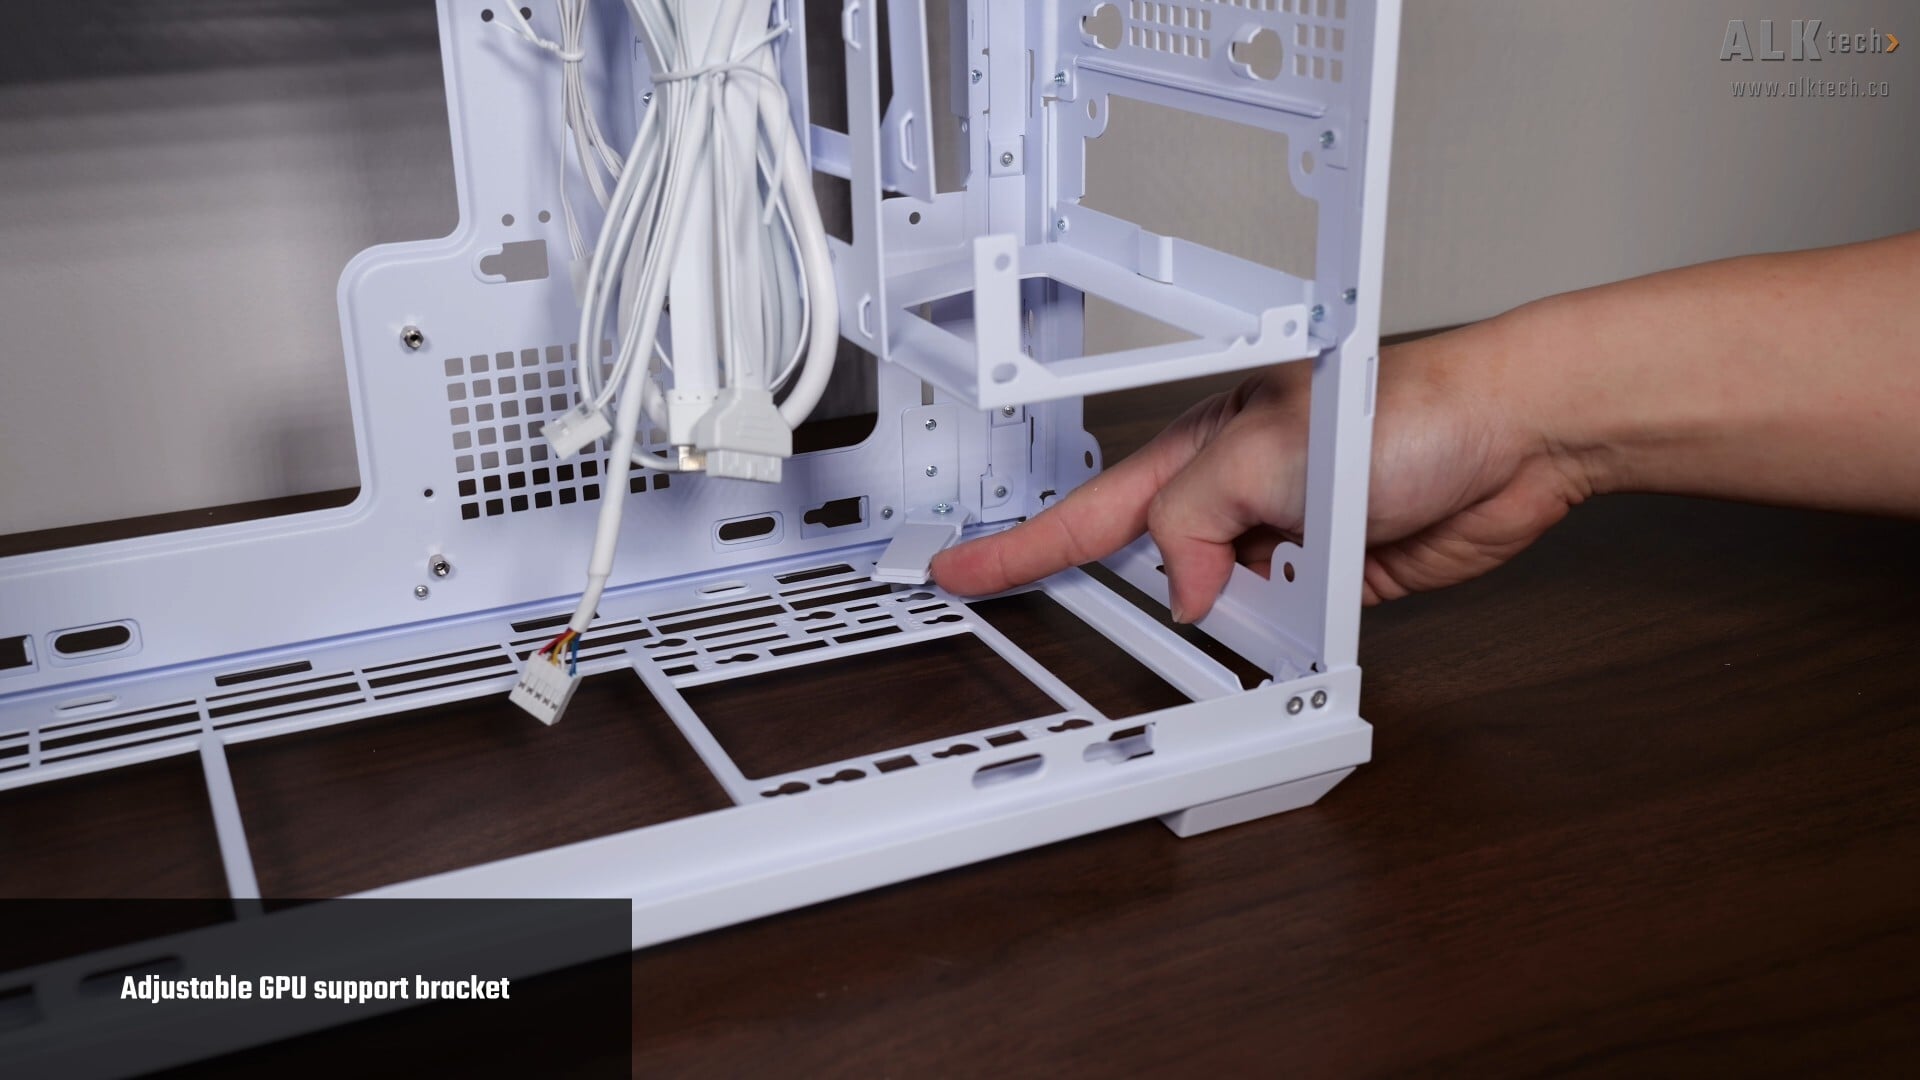
For your graphics card, the case comes with support for graphics cards with lengths of up to 358mm. We’ve also got an adjustable GPU support bracket that comes pre-installed on the motherboard tray of the case.
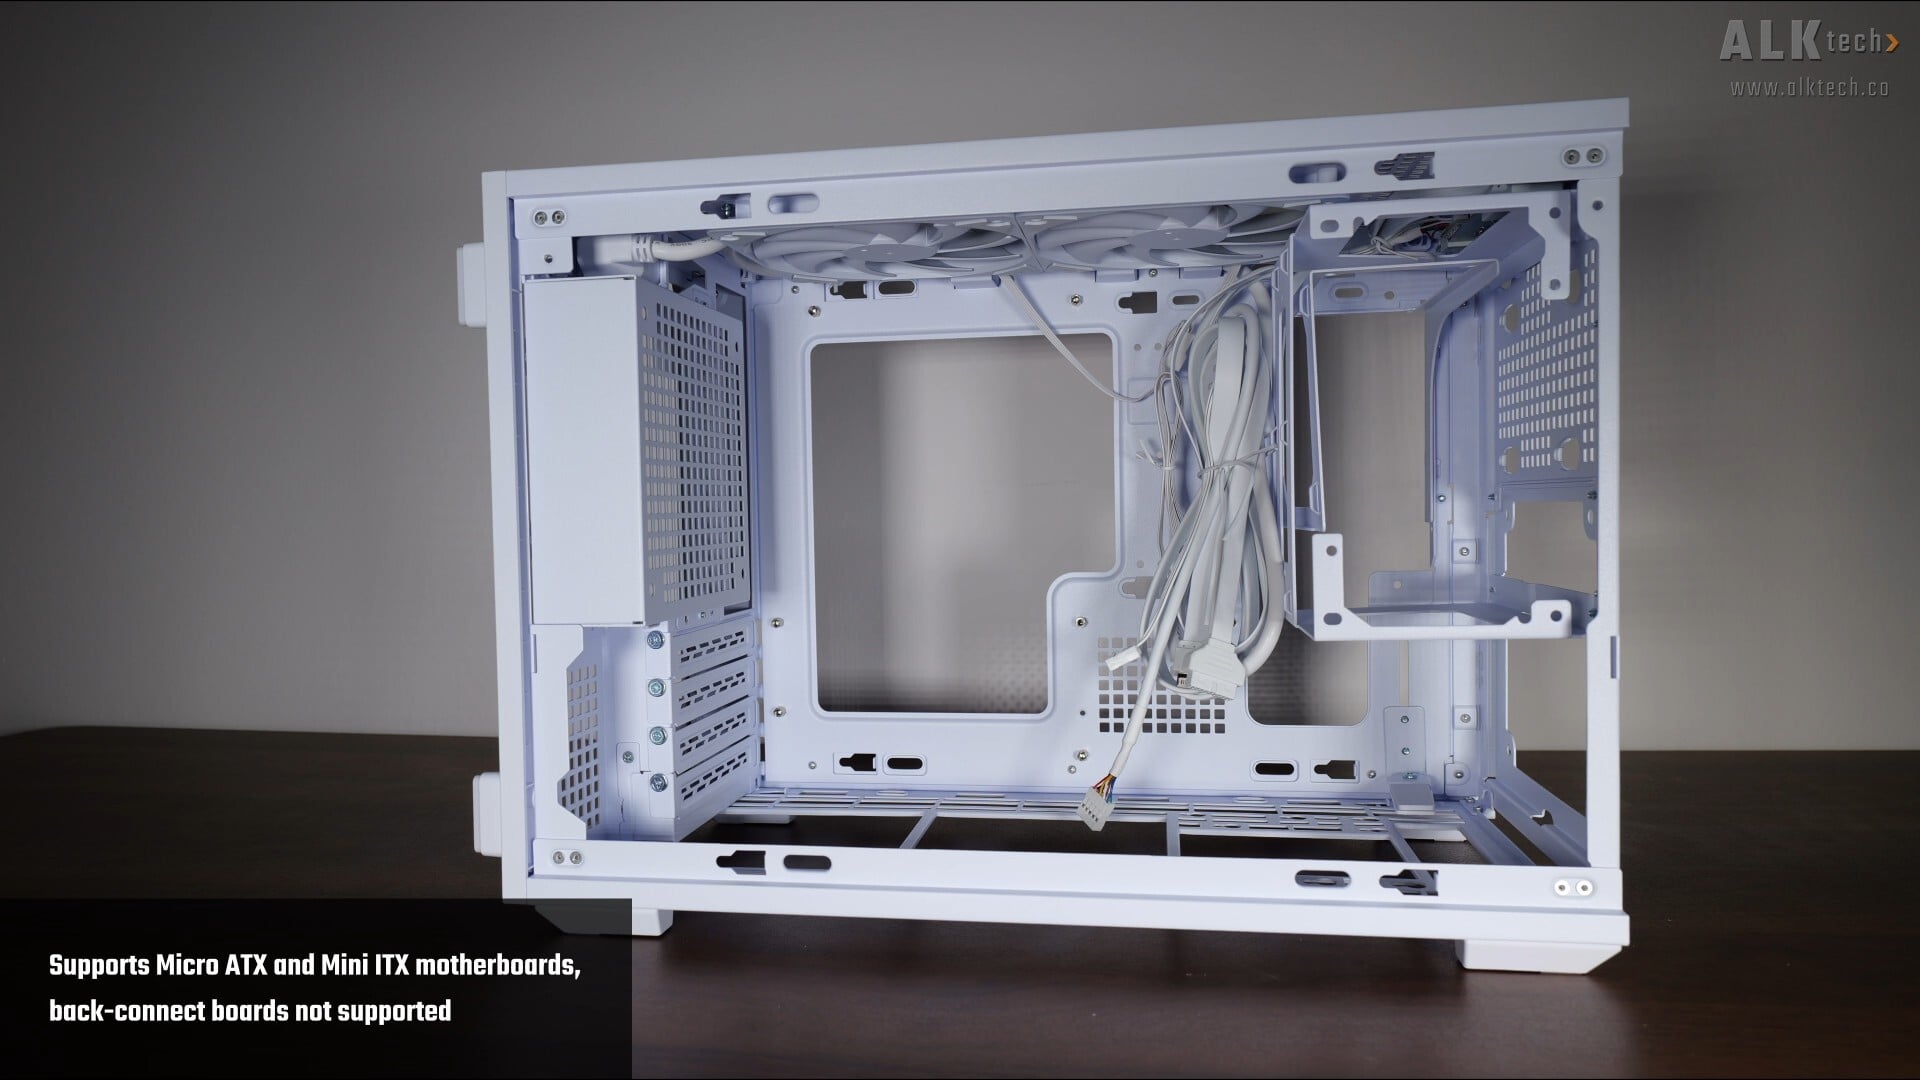
Moving on to the motherboard tray, the B4-mATX comes with support for microATX and Mini ITX motherboards, where back-connect motherboards are not supported.
.jpg)
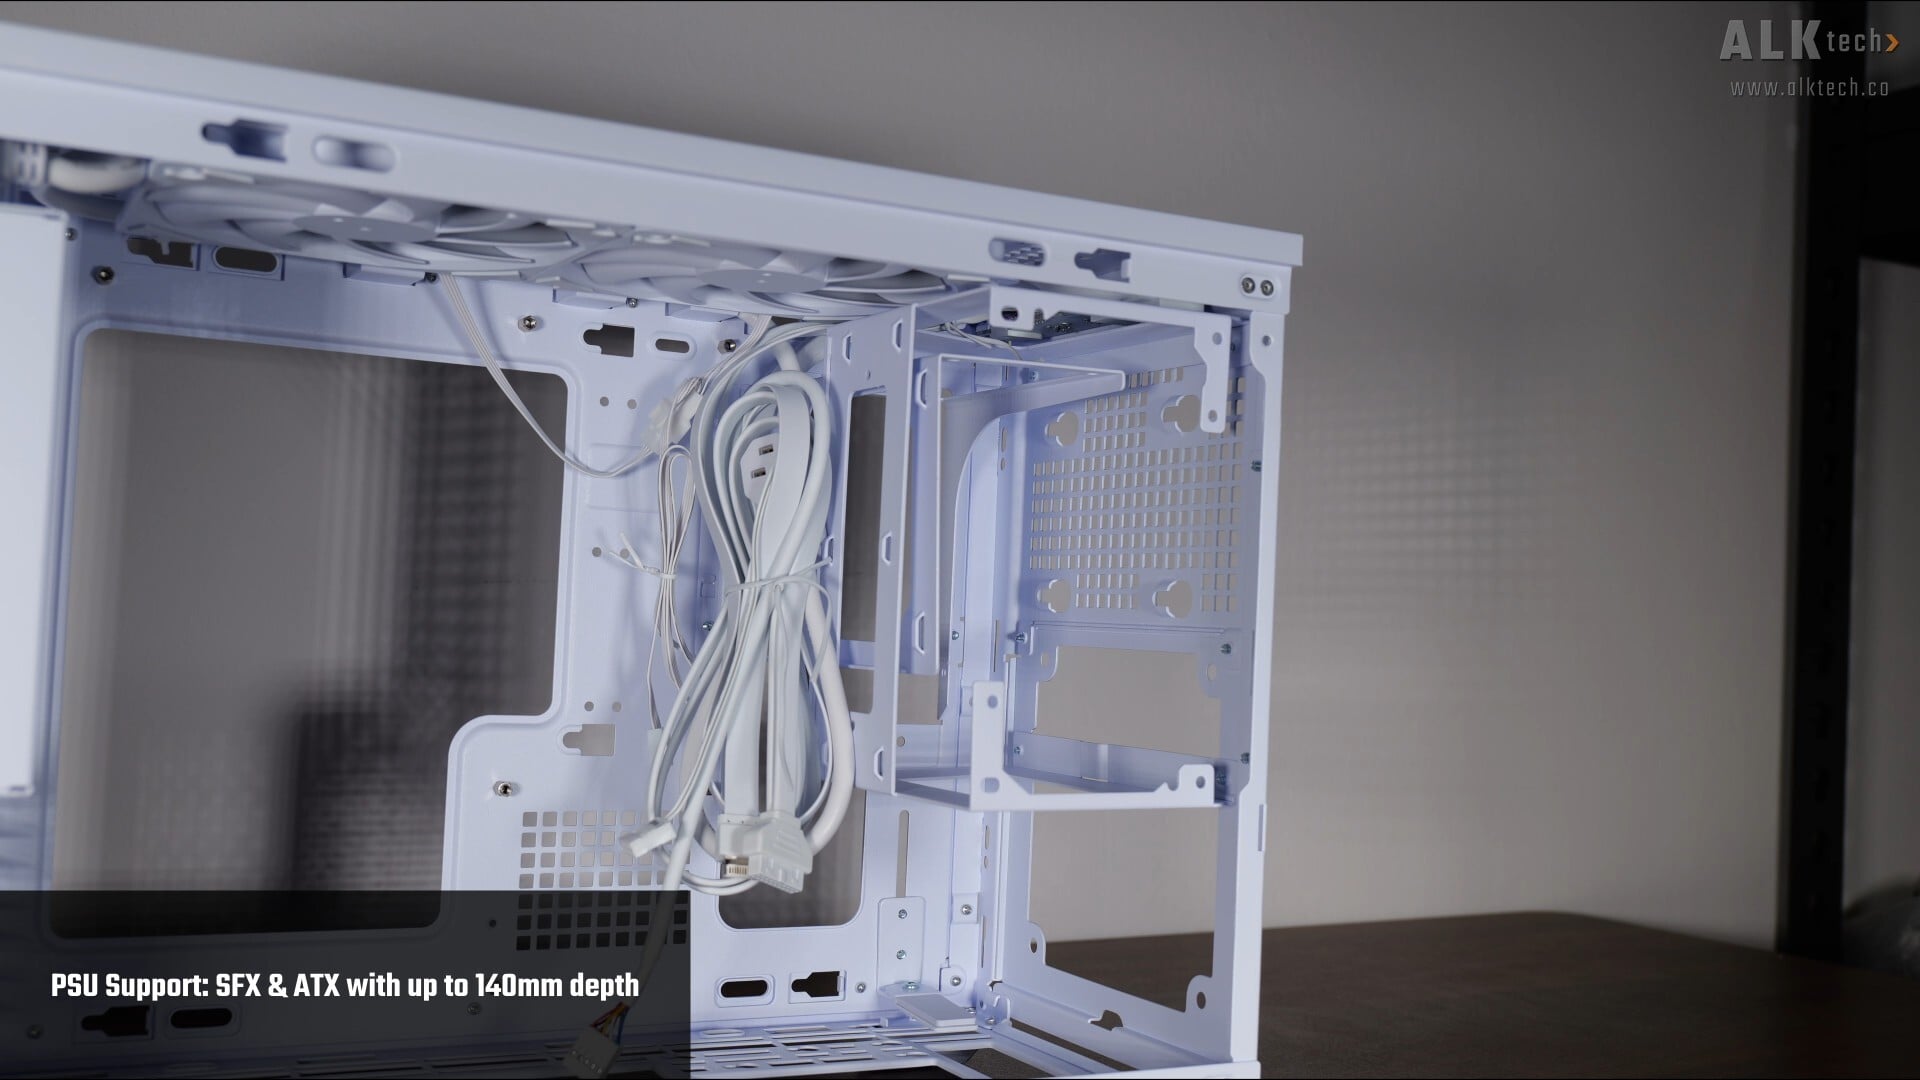
In terms of PSU support, we’ve got support for ATX PSUs with depths of no more than 140mm, and of course, SFX PSUs. Do note that your choice of PSU form factor will impact the amount of space you have for fans, graphics cards and all that, and shown above is a table that lists the various permutations of hardware that you could have with the B4-mATX. I’d suggest checking Lian Li’s product page first before committing to the purchase of your hardware components!
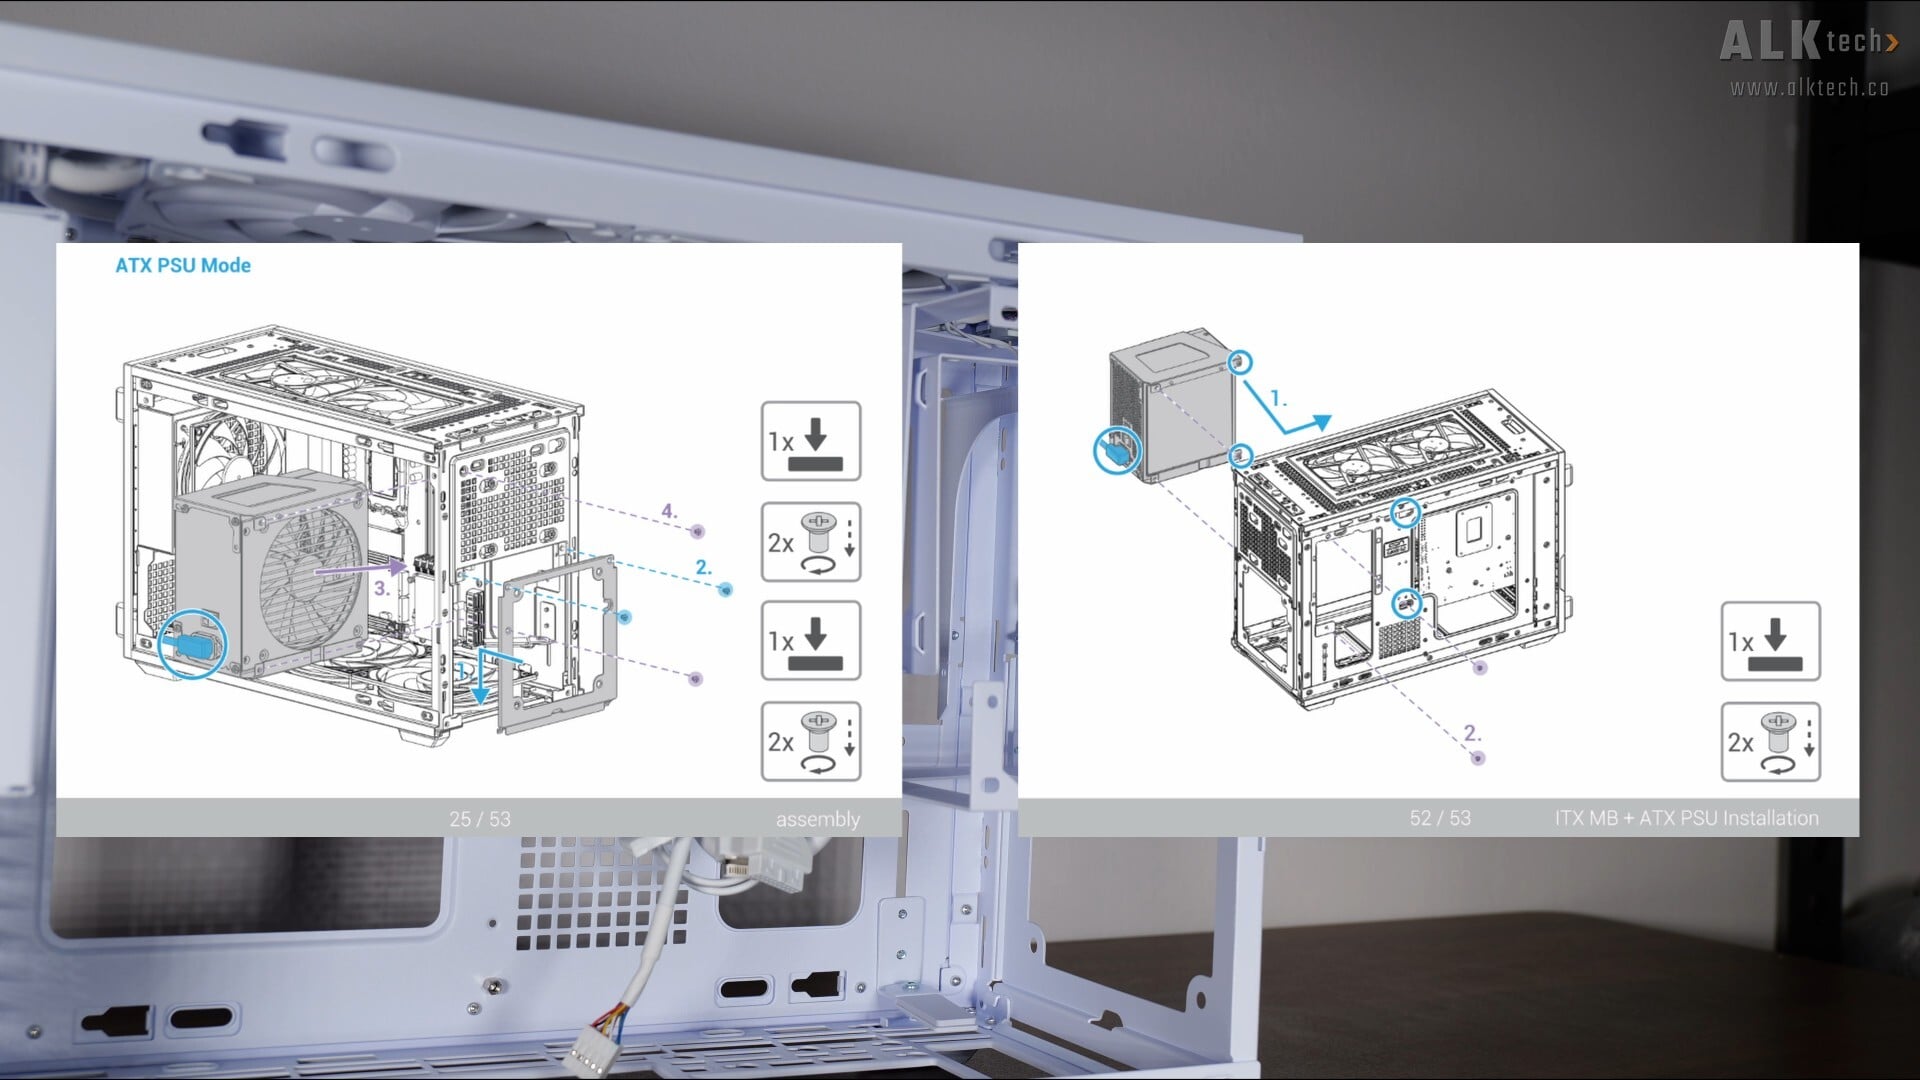
Worth mentioning too, that you can choose from two mounting orientations for an ATX PSU, as shown from the screengrab above that I’ve lifted from the case manual.
Storage Drive Support
.jpg)
.jpg)
Storage wise, the B4-mATX supports a single 2.5" SSD mounted behind the front panel of the case, along with an additional mounting location on the bottom panel of the case for either a 2.5" SSD or a 3.5" HDD. Do keep in mind though, that if you do mount a 3.5" HDD at the bottom, your GPU thickness is limited to just 65mm, and you'll only be able to fit a single 120mm bottom fan as a result. Going with a 2.5" SSD instead in that same location frees things up for two 120mm bottom fans.
Building a PC with the B4-mATX
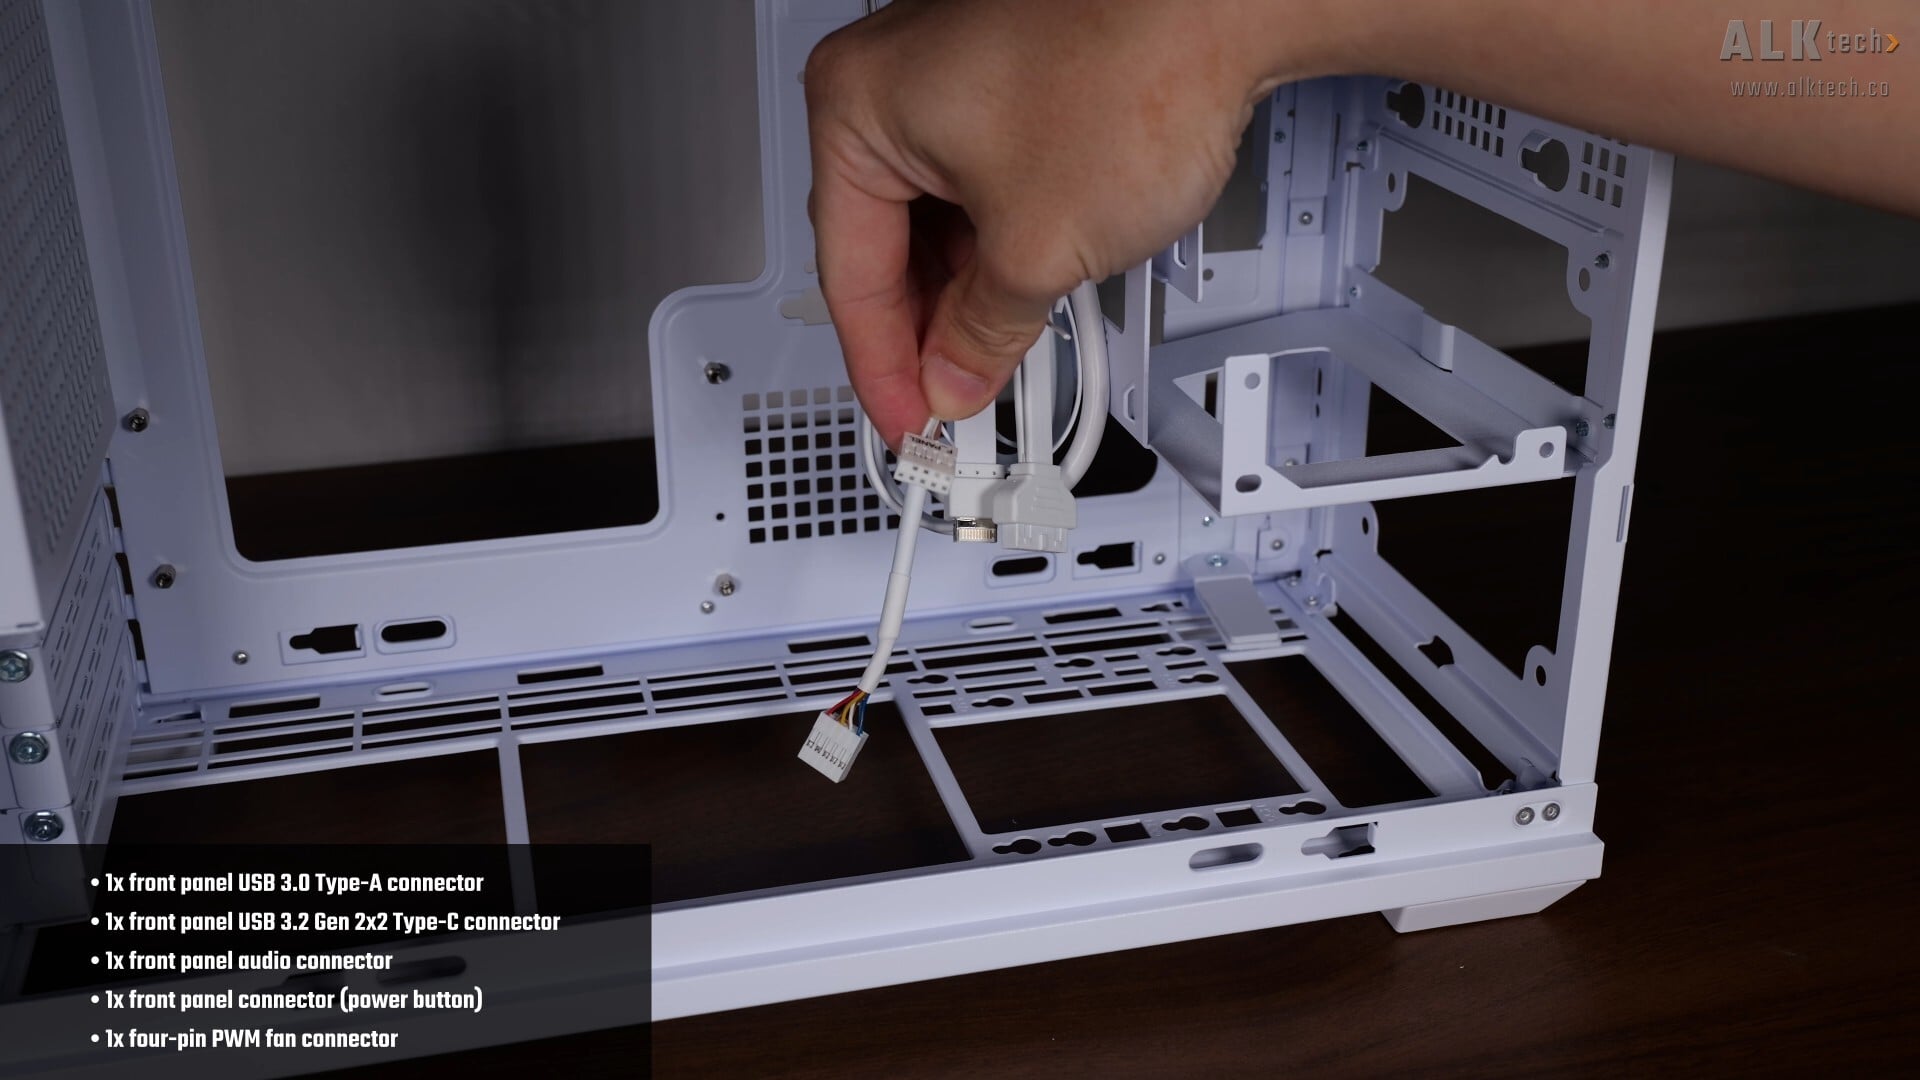
The front panel connectors of the case are pretty standard, and I appreciate the fact that Lian Li’s used a nine-pin connector rather than standalone connectors for the front panel header, which can be more fiddly to hook up to their respective header pins on the motherboard. That said, the included case fans are already pre-daisy chained together such that they terminate in one single four-pin PWM fan connector.
.jpg)
.jpg)
With that, let’s do a demo build with the B4-mATX. Before installing the motherboard into the case, you’ll first have to remove the preinstalled ATX PSU mounting bracket, as well as the preinstalled SFX PSU mounting bracket, so that you get space for manoeuvring a motherboard into place.
.jpg)
.jpg)
For this build, I’ve got a MSI MAG B850M MORTAR WIFI motherboard, as well as an air cooler, a Thermalright Phantom Spirit 120 SE ARGB, where to that end, I have the rear fan bracket oriented such that the rear exhaust fan is closer to the CPU cooler.
.jpg)
As per Lian Li’s recommendation for end-users intending to use an air cooler for their processor, I’ve also changed the orientation of the rightmost top mounted fan, so that it serves as an intake fan for the CPU air cooler.
.jpg)
.jpg)
Installing the power supply unit was straightforward enough, where you'll have to make sure that you’ve got a PSU that meets the size requirements. For this demo build, I’ll be using a Seasonic ATX PSU that measures in at a depth of just 140mm, where I’ll be mounting it in the standard orientation behind the front panel using the included ATX PSU bracket.
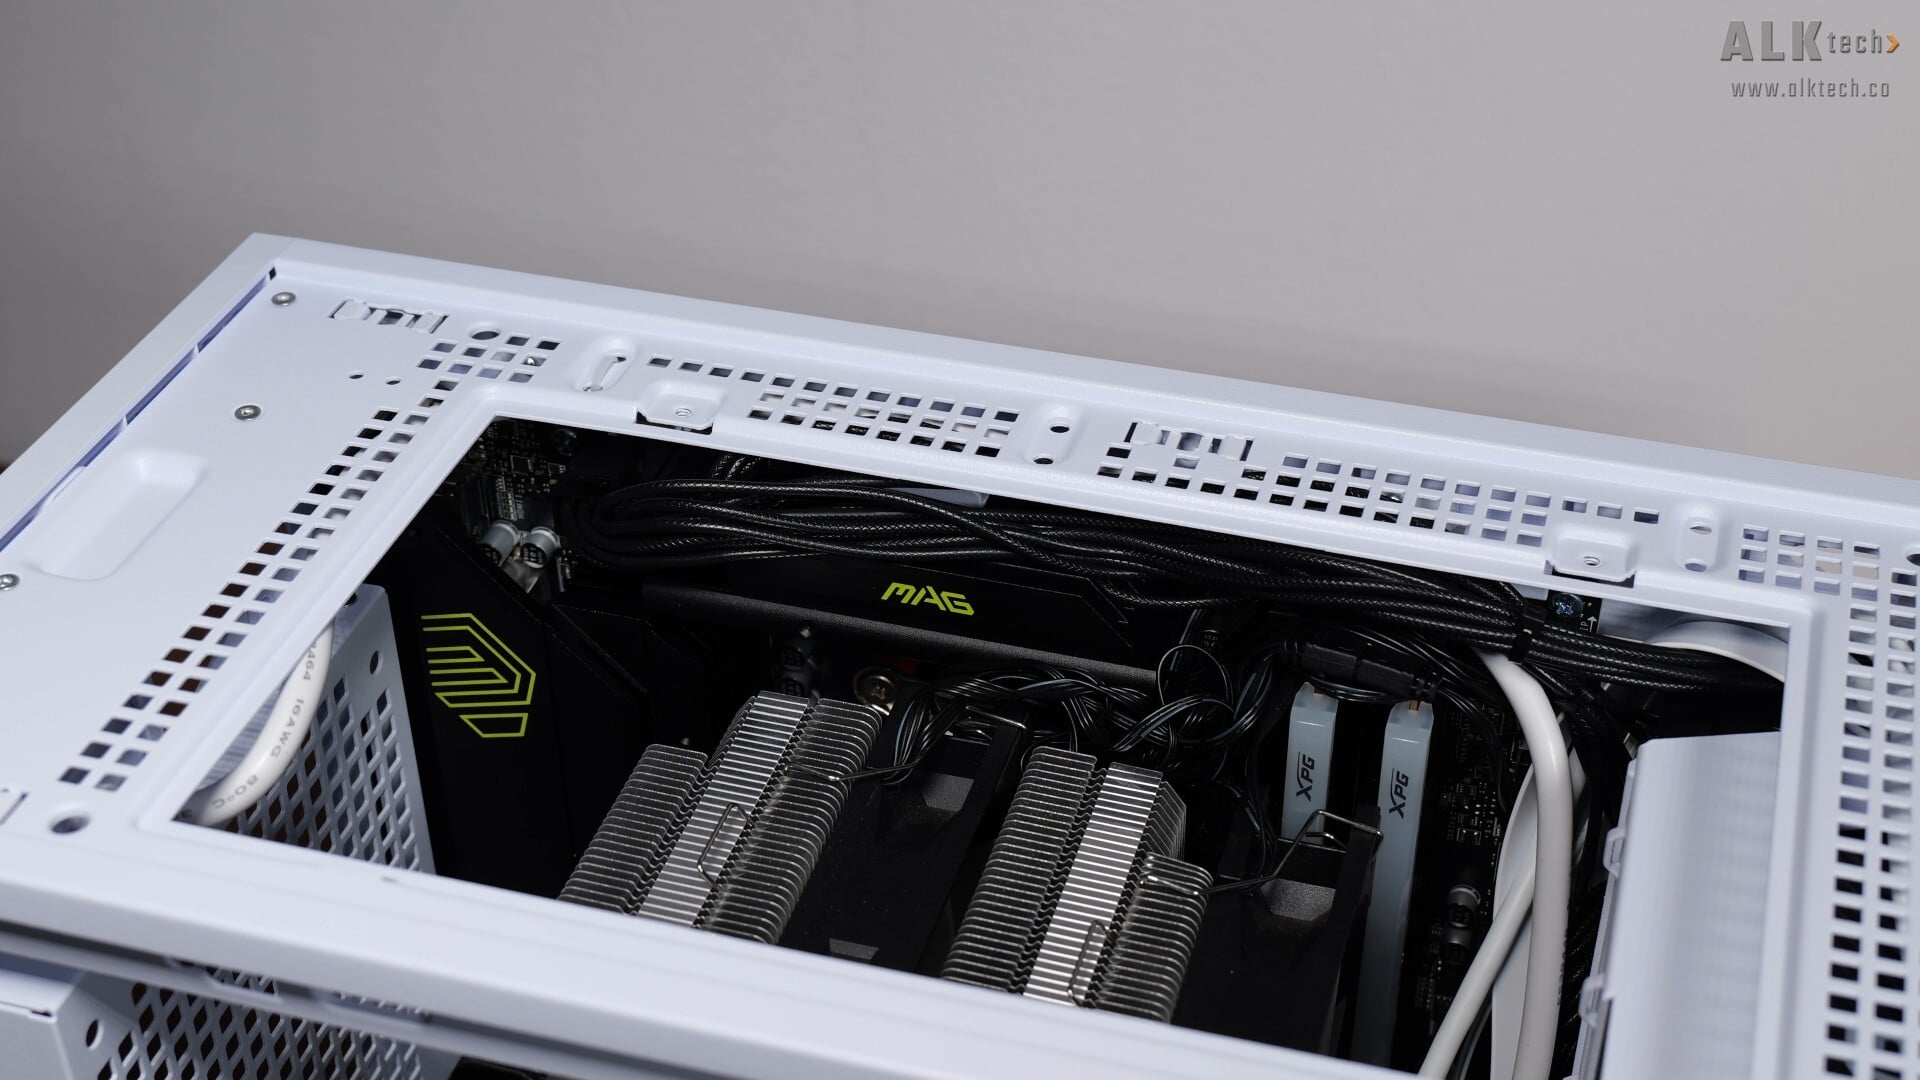
It’s great to have the removable top panel, which helps with routing the PSU’s EPS12V power cables to the motherboard, where as can be seen above, the amount of space to stash away the said EPS12V cables is pretty limited, and you may have to spend some time squeezing them in before mounting the top panel, and making sure that the EPS12V cables do not interfere with the fan blades of the top mounted case fans.
.jpg)
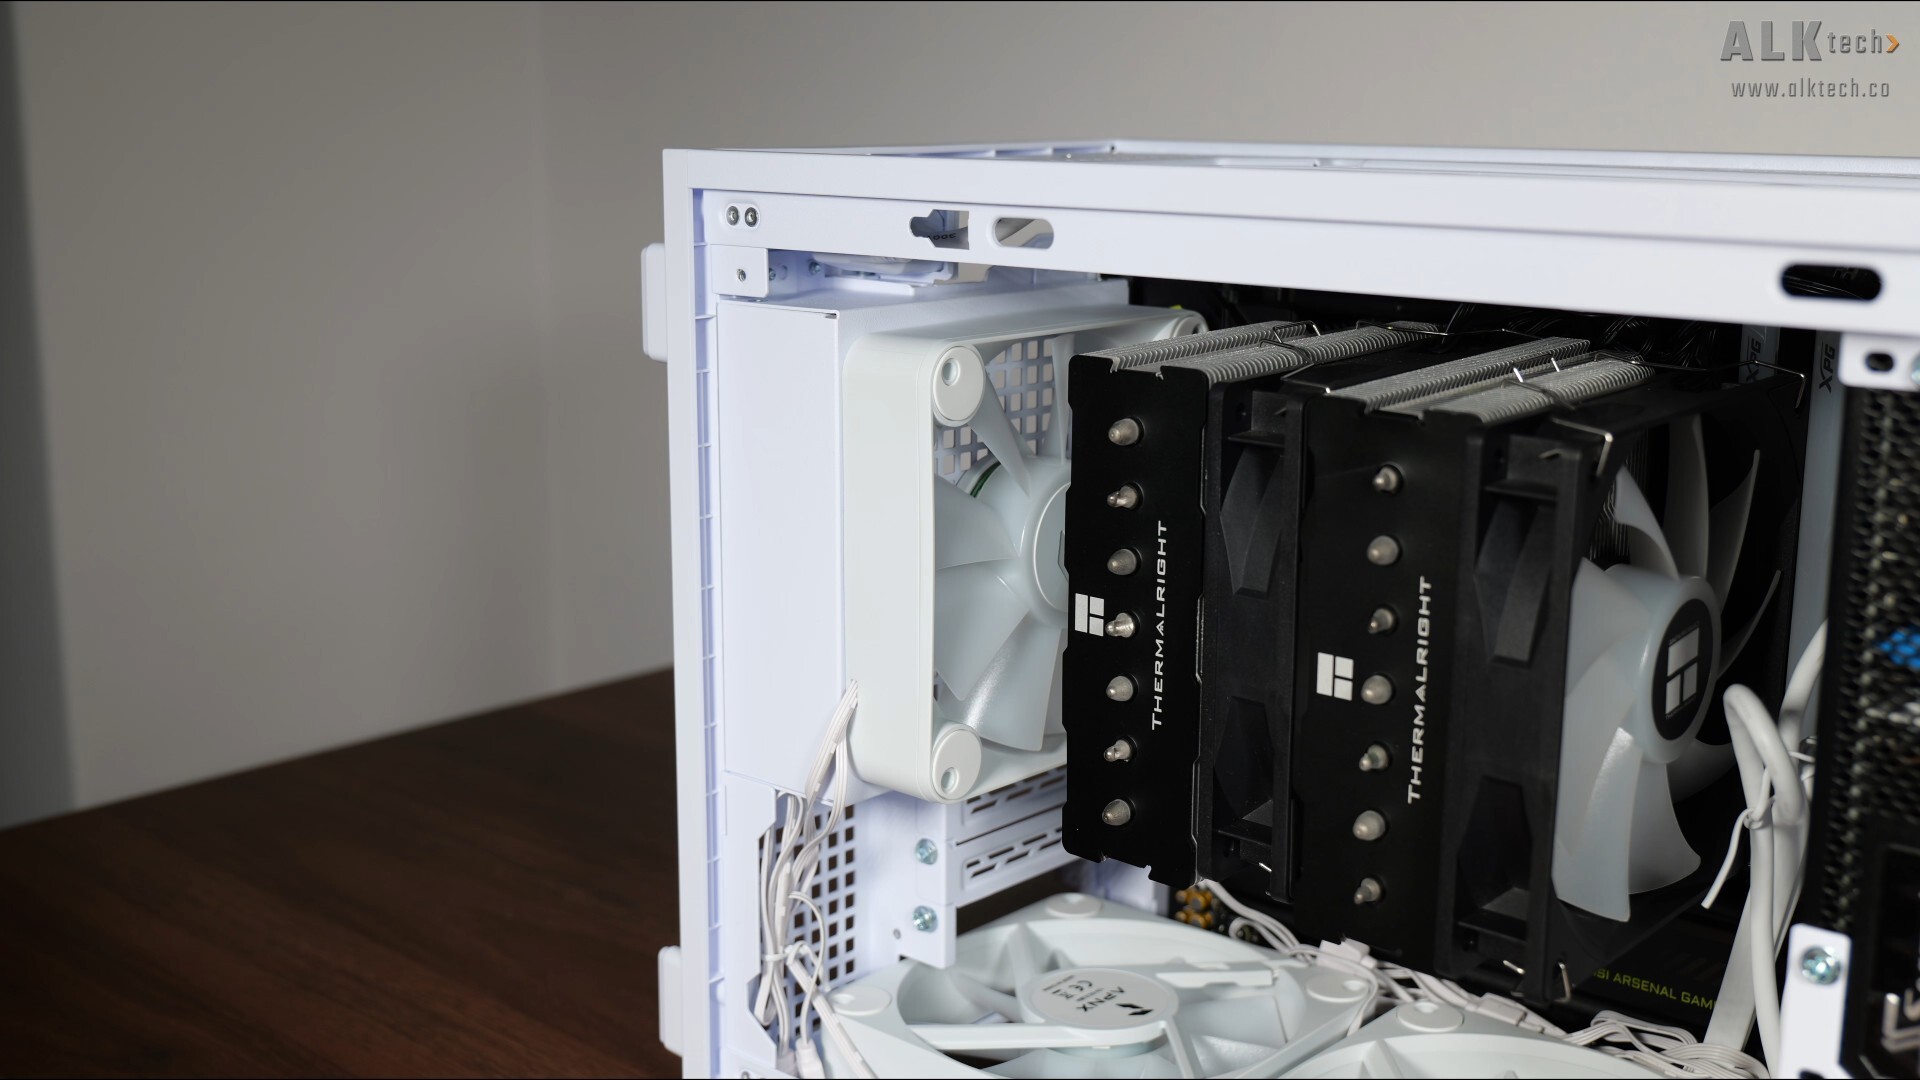
While we’re still on the topic of cooling, I’ve installed two intake fans on the bottom panel, and a rear exhaust fan as well. In case you’re wondering, these are APNX FP1-120 case fans with a thickness of 30mm.
.jpg)
.jpg)
Do note that you’ll have to remove the bottom expansion slot bracket as shown in the photos above, so as to make space for the leftmost bottom mounted case fan.
.jpg)
.jpg)
Another thing to mention, you might run into clearance issues with the bottom connectors of your motherboard, especially if you'll be using a microATX motherboard has its USB 3.0 Type-A front panel headers located along the bottom edge of the board, like with the MSI MAG B850M MORTAR WIFI that I have here. I did manage to get the fans in place with some effort, though this was at the expense of bending the USB 3.0 Type-A front panel cable, which, like all other front panel USB 3.0 Type-A cables from other brands, is chonky by design, by quite a fair bit.
.jpg)
Also, I had to remove one of the expansion slot covers so as to create more clearance for the leftmost bottom-mounted case fan. If anything, do try to get slim case fans for this PC case!
.jpg)
The graphics card for this demo build’s a MSI GeForce RTX 5060 Ti GAMING TRIO OC 16G, where it measures in at 300mm x 125mm x 44mm. Do note that if you’re intending to install a very thick graphics card, say one that occupies more than 3.5 slots, you won’t be able to install case fans on the bottom panel of the case!
.jpg)
Seeing as I didn’t do much cable management, I did face some difficulty getting the graphics card into the case due to the overhanging excess cables from the PSU and the front panel I/O cables which were all bundled up to the right of the motherboard, but with some elbow grease, I was able to push these cables away to create enough space for the graphics card to be properly inserted into the PCIe x16 slot.
.jpg)
.jpg)
With the demo build nearly completed, it’s a good time to talk about cable management. I think on the whole, for a compact microATX case, cable management with the B4-mATX was pretty okay, where inevitably, you’d have to deal with tight tolerances in order to make sure things can get to where they’d need to go – proper pre-build planning is essential! As can be seen, the demo build looks pretty tidy from the inside, despite the fact that I did not put in too much effort into cable management!
Completed Demo Build Aesthetics
.jpg)
.jpg)
Thermal & Acoustic Performance
To benchmark the thermal performance of the Lian Li B4-mATX PC case, I put together a demo build with the following specifications:
- CPU: AMD Ryzen 9 9900X
- CPU Cooler: Thermalright Phantom Spirit 120 SE ARGB
- CPU Thermal Paste: Arctic MX-4
- Motherboard: MSI B850M Mortar WIFI
- Memory: 32GB (2x16GB) XPG Lancer Blade RGB DDR5 6000 CL30
- Graphics Card: MSI GeForce RTX 5060 Ti 16G Gaming Trio OC
- PSU: Seasonic Focus GX ATX 3.1 850W
- Case: Lian Li B4-mATX
- Case Fans: 2x pre-installed slim 120mm case fans, 3x APNX FP1-120 120mm case fans
- OS: Microsoft Windows 11 Pro (25H2 with all latest updates installed)
- Fan Curve: Stock standard profiles
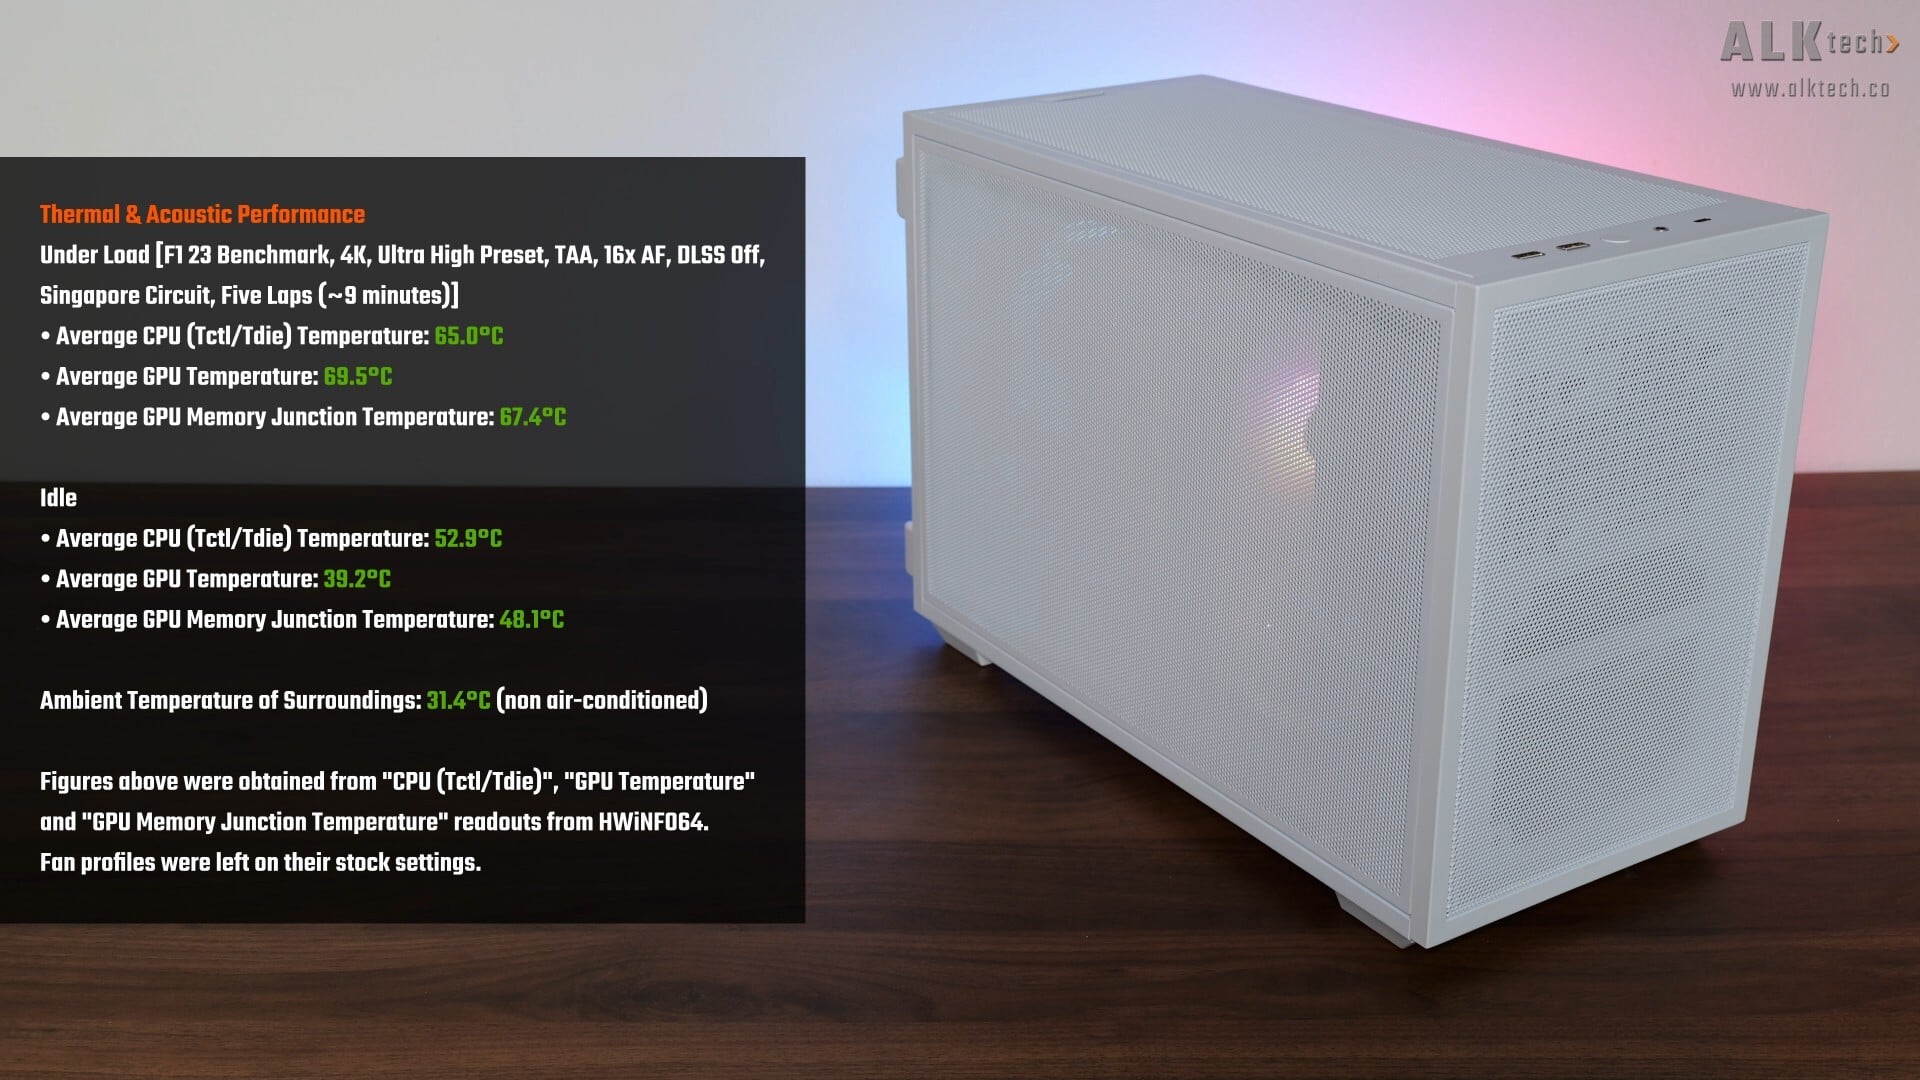
With F1 23’s in-game benchmark, where I ran a five-lap test for around 9 minutes in total, the Ryzen 9 9900X processor in the demo build achieved an average CPU temperature of 65.0°C, while the RTX 5060 Ti Gaming Trio OC 16G achieved an average GPU temperature of 69.5°C and an average GPU memory junction temperature of 67.4°C. These results were achieved in a non-air-conditioned room with an ambient temperature of around 31.4°C. A pretty decent set of results I must say, given that I had only installed three additional case fans.
Idle temperatures are as per what you see above, and for the thermal tests, I left the fan curves on their stock settings without any tweaks. Naturally, your thermal performance with this case will vary especially if you’re using different hardware from the demo build in this article.
Conclusion & Pricing
To sum up, the Lian Li B4-mATX is in my opinion, a pretty well-built compact microATX PC case that has lots of good stuff going for it. I like how it has support for lots of cooling options, the fact that it can be used in either the horizontal or vertical orientations pretty easily, and can support decently-sized graphics cards, CPU air coolers and even ATX PSUs (with reasonable size limitations of course), all in a pretty compact package. Thermal performance’s pretty decent too, at least with my demo build’s components.
Shortcomings wise, this being a compact microATX PC case after all, things can get really cramped inside the case especially as you’re doing up your PC build, where cable management is tricky, and tolerances for cables and such are really tight. If you’re intending to get this case, please do proper research on the components that you’re getting, such as your motherboard and where its respective headers are located, as the tight confines can make the installation of hardware tricky or even impossible if you’re unlucky. In addition, for those of you who are more inclined towards blinged out looks for your PC build, the B4-mATX's rather...pedestrian aesthetics may not appeal to such a demographic.
In terms of pricing, the mesh variant of this case in black or white can be bought for around $115 Singapore dollars, while the wood front panel variants can be had for around $125 Singapore dollars. For you international folks, the mesh white variant retails for US$74.99, the Mesh Black variant a bit less, at US$69.99, while the Wood panel variants command a premium at US$84.99 for the black variant and US$89.99 for the white variant. The optional Vertical AeroDeck accessory will set you back an additional US$29.99 – in Singapore, the AeroDeck can be had for around $46 Singapore dollars.
Get this PC case from Amazon: https://amzn.to/4ceWPiX (affiliate link)
Get this PC case from Lazada Singapore: https://s.lazada.sg/s.gFfhU?c=u&t=p-iF3a1O3-s2CDDVJV (affiliate link)
Get this PC case from Shopee Singapore: https://s.shopee.sg/1qbZEgNpqy (affiliate link)
ALKtech may earn commissions from qualifying purchases made using affiliate links, at no extra cost to you as a customer. These commissions go a long way in supporting the platform!
The PC case featured in this article was a media sample provided by Lian Li.